Skip to content

A PLAY EXPERIENCE MAKER'S WORK LOG FOR FUTURE SELF©2001 – 2023 Kyle Li 李肅綱 All Rights Reserved.

Category: 8-Bit

8bitworkshop Notes – Include binary files

Posted on October 5, 2026October 5, 2026 by admin

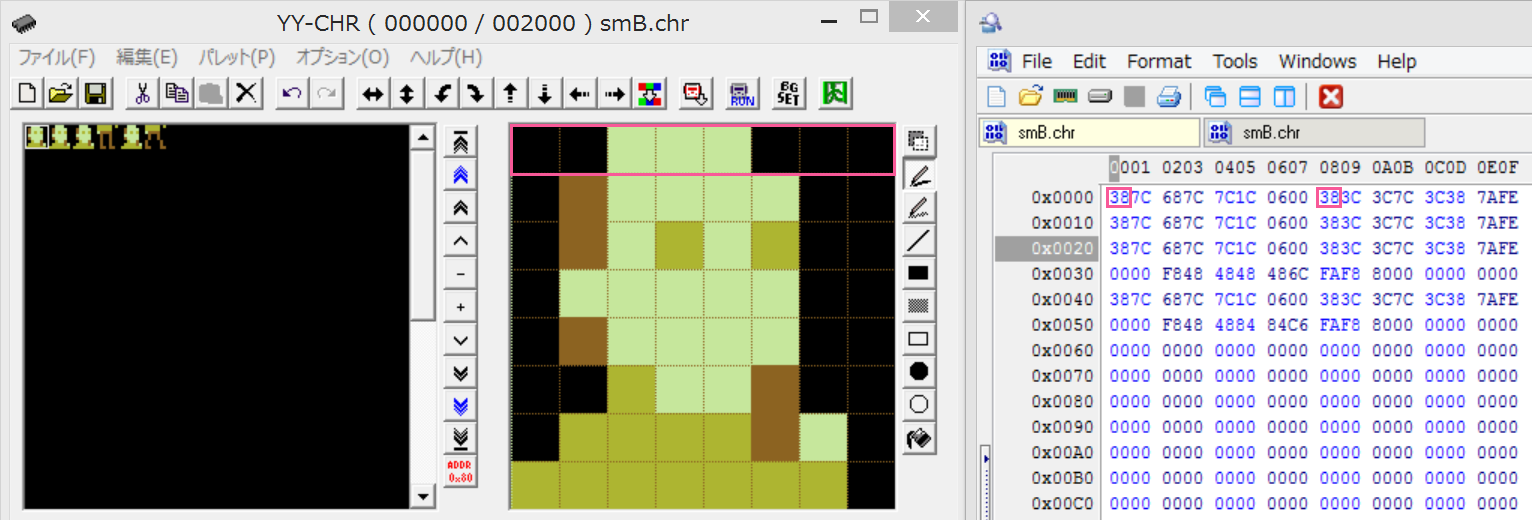
By default, 8bitworkshop uses chr_generic.s as the source of CHR data. The CHR pattern tables is embeds directly as byte arrays in the .s assembly file within the web editor. However, I can’t edit that file directly using YY-CHR or my custom Processing 4 tools. I have no intention of migrating to 8bitworkshop entirely, as I want to keep my established ROM hacking tools in my workflow.

  • Go to the top menu and select Upload… to upload your .chr file. Note that this step can be a bit unintuitive: you need to select [Open As New Project] so it gets saved as a standalone file in your workspace directory.
  • Once uploaded, add a resource directive at the very top of your main file to include the .chr asset.
// -----------------------------------------------------------------------------
// 8BITWORKSHOP ASSET LINK DIRECTIVES
// -----------------------------------------------------------------------------
//#resource "my.chr"
  • In my chr_include.s file (a new .s file I created based on chr_generic.s to avoid confusion), I replaced the original byte array with .incbin "my.chr".
  • My chr_include.s now looks like this, with all the original .byte lines removed:
;;{w:8,h:8,bpp:1,count:256,brev:1,np:2,pofs:8,remap:[0,1,2,4,5,6,7,8,9,10,11,12]};;
.segment "CHARS"
.incbin "my.chr"
  • After linking it in the main file, it was all set. Now I can edit the .chr file with my custom tools and update it whenever needed.”
// -----------------------------------------------------------------------------
// 8BITWORKSHOP ASSET LINK DIRECTIVES
// -----------------------------------------------------------------------------
//#resource "my.chr"
//#link "chr_include.s"

The great news is I can do the same for external Nametable files. Upload individual Nametable file and add a resource directive for each of them in the main file. In the “nametable.s”:

.export _nametable_0, _nametable_1, _nametable_2, _nametable_3
.export _nametable_4, _nametable_5, _nametable_6, _nametable_7

.segment "RODATA"

_nametable_0: .incbin "pic0.nam"
_nametable_1: .incbin "pic1.nam"
_nametable_2: .incbin "pic2.nam"
_nametable_3: .incbin "pic3.nam"
_nametable_4: .incbin "pic4.nam"
_nametable_5: .incbin "pic5.nam"
_nametable_6: .incbin "pic6.nam"
_nametable_7: .incbin "pic7.nam"

Compared to the .byte array format, this approach is much cleaner.
8bitworkshop Notes – Display an external Nametable V1

Posted on October 4, 2026October 10, 2026 by admin

Nametable file format:

The ultimate goal is to create an external file that stores all the nametable data.

.export _nametable_0, _nametable_1, _nametable_2, _nametable_3
.export _nametable_4, _nametable_5, _nametable_6, _nametable_7

.segment "RODATA"

_nametable_0: .repeat 30
                  .byte $00,$00,$00,$00,$00,$00,$00,$00,$00,$00,$00,$00,$00,$00,$00,$00,$00,$00,$00,$00,$00,$00,$00,$00,$00,$00,$40,$41,$41,$41,$41,$41
              .endrepeat

_nametable_1: .repeat 30
                  .byte $00,$00,$00,$00,$00,$00,$00,$00,$00,$00,$00,$00,$00,$00,$00,$00,$00,$00,$00,$00,$00,$00,$00,$00,$00,$00,$40,$41,$41,$41,$41,$41
              .endrepeat

_nametable_2: .repeat 30
                  .byte $00,$00,$00,$00,$00,$00,$00,$00,$00,$00,$00,$00,$00,$00,$00,$00,$00,$00,$00,$00,$00,$00,$00,$00,$00,$00,$40,$41,$41,$41,$41,$41
              .endrepeat

_nametable_3: .repeat 30
                  .byte $00,$00,$00,$00,$00,$00,$00,$00,$00,$00,$00,$00,$00,$00,$00,$00,$00,$00,$00,$00,$00,$00,$00,$00,$00,$00,$40,$41,$41,$41,$41,$41
              .endrepeat

_nametable_4: .repeat 30
                  .byte $00,$00,$00,$00,$00,$00,$00,$00,$00,$00,$00,$00,$00,$00,$00,$00,$00,$00,$00,$00,$00,$00,$00,$00,$00,$00,$40,$41,$41,$41,$41,$41
              .endrepeat

_nametable_5: .repeat 30
                  .byte $00,$00,$00,$00,$00,$00,$00,$00,$00,$00,$00,$00,$00,$00,$00,$00,$00,$00,$00,$00,$00,$00,$00,$00,$00,$00,$40,$41,$41,$41,$41,$41
              .endrepeat

_nametable_6: .repeat 30
                  .byte $00,$00,$00,$00,$00,$00,$00,$00,$00,$00,$00,$00,$00,$00,$00,$00,$00,$00,$00,$00,$00,$00,$00,$00,$00,$00,$40,$41,$41,$41,$41,$41
              .endrepeat

_nametable_7: .repeat 30
                  .byte $00,$00,$00,$00,$00,$00,$00,$00,$00,$00,$00,$00,$00,$00,$00,$00,$00,$00,$00,$00,$00,$00,$00,$00,$00,$00,$40,$41,$41,$41,$41,$41
              .endrepeat

Nametables are stored as raw byte arrays in PRG ROM and copied or decompressed into PPU VRAM when loaded.

  • Uncompressed Nametables ($1,024$ bytes each): I can store roughly 15 to 20 uncompressed Nametables before filling up your 32 KB PRG ROM (leaving ~12 KB for game engine code, physics, music, and logic).
  • RLE-Compressed Nametables (~150 to 300 bytes each): I can easily link 60 to 100+ compressed Nametables in 32 KB PRG ROM using vram_unrle().

Suggested Memory Budget Breakdown in 32 KB PRG ROM:

  • C Engine & Game Logic ~10 KB
  • neslib Library & Runtime ~2 KB
  • Audio Engine & SFX (FamiTone2) ~3 KB
  • Available Space for Backgrounds ~17 KB
  • Max Nametable Capacity:
    • Uncompressed ~17 Full Screens
    • *RLE Compressed Allocation ~60 to 100+ Screens

*An RLE-Compressed Nametable is a background screen layout that has been processed using Run-Length Encoding (RLE) to significantly reduce its size in PRG ROM.Instead of storing all 1,024 individual tile bytes for a full $32 \times 30$ grid, RLE compresses repeated identical tiles (like blank sky, floor blocks, or solid walls) into compact sequence commands.

Uncompressed (16 bytes):
$00, $00, $00, $00, $00, $00, $00, $00, $00, $00, $4A, $4B, $00, $00, $00, $00

RLE Compressed (6 bytes):
[10x $00], [1x $4A], [1x $4B], [4x $00]

Display 1 nametable as the background:

//#link "chr_generic.s"
//#link "nametable.s"

#include <nes.h>
#include "neslib.h"


// Declare external assembly symbol exported in nametable.s
extern const unsigned char nametable_0[];

// Sample palette (Background palette 0)
const unsigned char palette[16] = {
    0x0f, 0x00, 0x10, 0x30, // Black background, Dark Gray, Light Gray, White
    0x0f, 0x00, 0x10, 0x30,
    0x0f, 0x00, 0x10, 0x30,
    0x0f, 0x00, 0x10, 0x30
};

void load_attributes_separately(const unsigned char *tiles, const unsigned char *attributes) {
    // 1. Write tile bytes
    vram_adr(0x2000);
    vram_write(tiles, 960);

    // 2. Write attribute bytes to $23C0 (Nametable 0 attribute offset)
    vram_adr(0x23C0);
    vram_write(attributes, 64);
}

void main(void) {
    bank_bg(0);  // Backgrounds from $0000 (Font/Tiles)
    bank_spr(1); // Sprites from $1000 (Player)
    // Disable rendering while writing to PPU memory
    ppu_off();

    // Load background color palette
    pal_bg(palette);

    // Set PPU address to Nametable 0 start ($2000)
    vram_adr(0x2000);

    // Write the full 960-byte nametable array from nametable.s
    // (32 rows x 30 columns = 960 bytes)
    vram_write(nametable_0, 960);

    // Reset scroll position
    scroll(0, 0);

    // Enable rendering
    ppu_on_all();

    // Infinite loop to keep rendering active
    while (1) {
        ppu_wait_frame();
    }
}

8bitworkshop Notes – Player Running and Jumping

Posted on October 4, 2026October 4, 2026 by admin
// -----------------------------------------------------------------------------
// 8BITWORKSHOP ASSET LINK DIRECTIVES
// -----------------------------------------------------------------------------
//#link "chr_generic.s"

#include "neslib.h"

// Physics Constants
#define FLOOR_Y     192
#define PLAYER_X    32
#define GRAVITY     1
#define JUMP_FORCE -10

// -----------------------------------------------------------------------------
// PALETTE SETUP
// -----------------------------------------------------------------------------
const unsigned char sprite_palette[16] = {
    0x0F, 0x16, 0x27, 0x30, // Palette 0: Black, Red, Orange, White
    0x0F, 0x0F, 0x0F, 0x0F,
    0x0F, 0x0F, 0x0F, 0x0F,
    0x0F, 0x0F, 0x0F, 0x0F
};

// -----------------------------------------------------------------------------
// 2x2 METASPRITES (16x16 pixels)
// Structure per tile: x_offset, y_offset, tile_id, attributes
// Terminated with 128 (0x80)
// -----------------------------------------------------------------------------
const unsigned char metasprite_run1[] = {
    0,  0, 0xDC, 0, // Top-Left tile
    8,  0, 0xDE, 0, // Top-Right tile
    0,  8, 0xDD, 0, // Bottom-Left tile
    8,  8, 0xDF, 0, // Bottom-Right tile
    128
};

const unsigned char metasprite_run2[] = {
    0,  0, 0xE0, 0,
    8,  0, 0xE2, 0,
    0,  8, 0xE1, 0,
    8,  8, 0xE3, 0,
    128
};

const unsigned char metasprite_jump[] = {
    0,  0, 0xE8, 0,
    8,  0, 0xEA, 0,
    0,  8, 0xE9, 0,
    8,  8, 0xEB, 0,
    128
};

// Running animation frame table
const unsigned char* const run_animation[] = {
    metasprite_run1,
    metasprite_run2
};

// -----------------------------------------------------------------------------
// PLAYER STATE VARIABLES
// -----------------------------------------------------------------------------
unsigned char player_y = FLOOR_Y;
signed char player_vy = 0;
unsigned char is_grounded = 1;

unsigned char anim_timer = 0;
unsigned char anim_frame = 0;

// -----------------------------------------------------------------------------
// FUNCTIONS
// -----------------------------------------------------------------------------

void update_player(unsigned char pad) {
    // Jump trigger on A button
    if ((pad & PAD_A) && is_grounded) {
        player_vy = JUMP_FORCE;
        is_grounded = 0;
    }

    // Apply Velocity & Gravity
    player_y += player_vy;
    player_vy += GRAVITY;

    // Floor Boundary
    if (player_y >= FLOOR_Y) {
        player_y = FLOOR_Y;
        player_vy = 0;
        is_grounded = 1;
    }
}

void update_animation(void) {
    if (is_grounded) {
        anim_timer++;
        if (anim_timer >= 6) { // Advance frame every 6 ticks (~10 FPS)
            anim_timer = 0;
            anim_frame = (anim_frame + 1) % 2; // Toggle between frame 0 and 1
        }
    }
}

void draw_player(void) {
    const unsigned char* current_metasprite;

    // Select airborne or grounded MetaSprite
    if (!is_grounded) {
        current_metasprite = metasprite_jump;
    } else {
        current_metasprite = run_animation[anim_frame];
    }

    // Render 2x2 MetaSprite to OAM
    oam_meta_spr(PLAYER_X, player_y, 0, current_metasprite);
}

// -----------------------------------------------------------------------------
// MAIN PROGRAM LOOP
// -----------------------------------------------------------------------------
void main(void) {
    // Write sprite palettes to PPU
    pal_spr(sprite_palette);

    // Turn on graphics rendering
    ppu_on_all();

    while (1) {
        // Read Controller 1 Input
        unsigned char pad = pad_trigger(0);

        update_player(pad);
        update_animation();

        // Clear sprite hardware memory and re-draw
        oam_clear();
        draw_player();

        // Synchronize with NES TV refresh rate (60 FPS)
        ppu_wait_nmi();
    }
}

Using C with the neslib library in 8bitworkshop lets you prototype game loops, player gravity, and scrolling background mechanics cleanly without writing raw 6502 assembly right away.

Core Technical Concept

To simulate an endless runner on NES:

  1. Player Position: The player stays fixed horizontally on the X-axis (e.g., $X = 32$) and only moves vertically on the Y-axis when jumping or falling under gravity.
  2. Scrolling: The NES background hardware fine-scrolls horizontally (scroll_x++). As background tiles move off-screen to the left, new tiles and obstacles spawn on the right seam.
  3. Collision Detection: Check bounding box collisions between the fixed player character sprite and incoming obstacle coordinates.

[Breakpoint] The code runs, but nothing shows up on the screen.

To handle a character made of 4 hardware tiles ($16 \times 16$ pixels in a $2 \times 2$ grid), you can use MetaSprites or standard relative coordinate drawing functions. neslib provides built-in functions like oam_meta_spr() specifically designed for multi-tile objects.

[Breakpoint] I added logic for character animation and collision, and while the code checked out, the screen just flashed between black and red with nothing rendering. I soon realized I hadn’t linked the default CHR file to the game likely because my original prompt didn’t include details about the CHR data and color palette.

// -----------------------------------------------------------------------------
// METASPRITES
// -----------------------------------------------------------------------------
const unsigned char metasprite_run1[] = {
    0,  0, 0x01, 0, // Top-Left
    8,  0, 0x02, 0, // Top-Right
    0,  8, 0x11, 0, // Bottom-Left
    8,  8, 0x12, 0, // Bottom-Right
    128
};

const unsigned char metasprite_run2[] = {
    0,  0, 0x03, 0,
    8,  0, 0x04, 0,
    0,  8, 0x13, 0,
    8,  8, 0x14, 0,
    128
};

const unsigned char metasprite_jump[] = {
    0,  0, 0x05, 0,
    8,  0, 0x06, 0,
    0,  8, 0x15, 0,
    8,  8, 0x16, 0,
    128
};

const unsigned char* const run_animation[] = {
    metasprite_run1,
    metasprite_run2
};

The flickering occurs because check_collision() is evaluating to 1 (true) constantly on every frame, causing the game loop to alternate palette color 0 between red (0x16) and black (0x0F).

The Cause: Initial Y-Coordinate Overlap

  1. FLOOR_Y is set to 192.
  2. player_y starts at 192.
  3. player_y + 16 equals 208.
  4. obstacle_y is set to FLOOR_Y + 8 = 200.

Because (player_y + 16) ($208$) is greater than or equal to obstacle_y ($200$), the vertical collision condition (player_y + 16) >= obstacle_y evaluates to TRUE continuously, even when the obstacle is on the far right of the screen ($X = 240$).

Adjust obstacle_y to sit at FLOOR_Y and refine the bounding box collision logic to require both top and bottom $Y$-axis overlaps:

[Breakpoint] Screen was still back, I finally realized I need to set up color palettes.

The color palette setup is incomplete. At boot, the NES PPU contains random or zeroed palette RAM. Calling pal_col(0, ...) only modifies index 0 (the background fill color), leaving all sprite colors uninitialized or black.

What Is Happening

  1. Undefined Sprite Palettes: Without initializing sprite palettes using pal_spr() or pal_bg(), the PPU reads color 0x0F (black) for every sprite pixel. The sprites are actually rendering, but they are invisible against the black background.
  2. False Collision Flashing: Because the sprite tiles are invisible, it felt like a random flashing bug. Modifying obstacle_x -= 2 altered how often the invisible obstacle bounding box collided with the player.
In NES hardware, palettes are defined in 16-byte arrays (4 palette groups of 4 colors each). Index 0 of each group is the shared background color.
Add palette initialization inside the main() setup before entering the while(1) loop:

// Define background and sprite palette arrays (16 bytes each)
const unsigned char bg_palette[16] = {
    0x0F, 0x00, 0x10, 0x30, // Palette 0 (Black, Gray, Light Gray, White)
    0x0F, 0x01, 0x11, 0x21, // Palette 1
    0x0F, 0x06, 0x16, 0x26, // Palette 2
    0x0F, 0x09, 0x19, 0x29  // Palette 3
};

const unsigned char sprite_palette[16] = {
    0x0F, 0x16, 0x27, 0x30, // Palette 0: Red, Orange, White (Player)
    0x0F, 0x11, 0x21, 0x30, // Palette 1: Blue, Light Blue, White (Obstacle)
    0x0F, 0x09, 0x19, 0x29, // Palette 2
    0x0F, 0x0F, 0x0F, 0x0F  // Palette 3
};

In 8bitworkshop, comment directives like //link "chr_generic.s" tell the build system to assemble and link the CHR graphics asset bank into the final ROM cartridge. Without it, the NES PPU renders completely blank or garbage graphics banks. This was the final missing link. Here is the working code for character running.
Gameboy Modding

Posted on May 22, 2019May 22, 2019 by admin

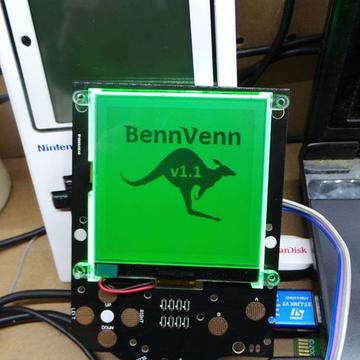
This is nostalgic and fun! I modded my first Gameboy DMG01 about 10 years ago when I started to teach 8-bit Development. There was a trend in New York City at the time, many people in my nerd circle were making custom 8-bit games and producing chiptunes – it was the thing to do! I was fortunate to meet and worked with two chiptune masters during that time. One mentored me on 8-bit game development, and the other one opened my eyes to the possibilities of 8-bit music.

Discovered old and new mods online:
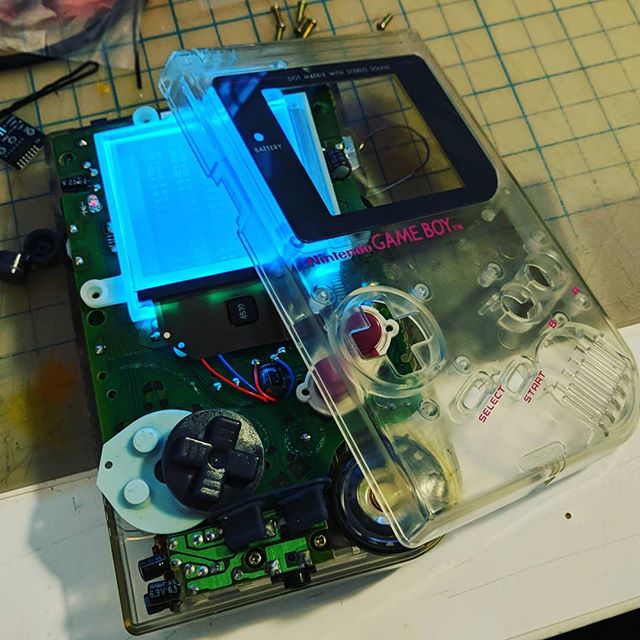
[backlit mod with the Bivert module]

[DMG 3″ BACKLIT LCD KIT!!!]
https://bennvenn.myshopify.com/products/dmg-3-backlit-lcd-kit?variant=34512590602

Image by BennVenn

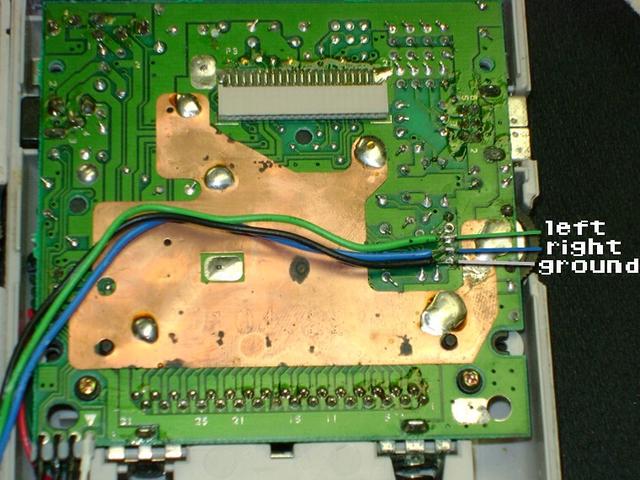
[prosound mod]
https://snapguide.com/guides/mod-your-dmg-gameboy-with-prosound-stereo-jack/

Image by Rob M

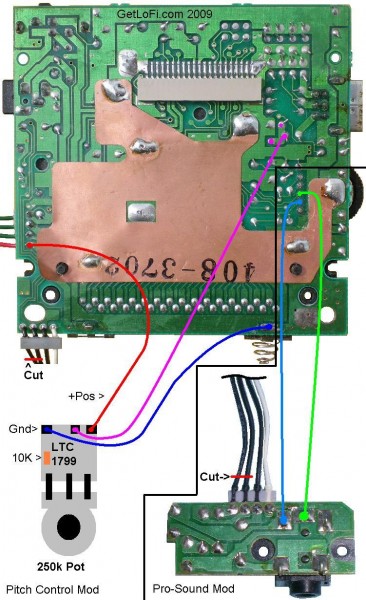
[pitch mod]
http://getlofi.com/gameboy-pitch-modification-and-pro-sound-kit/

Image by getlofi

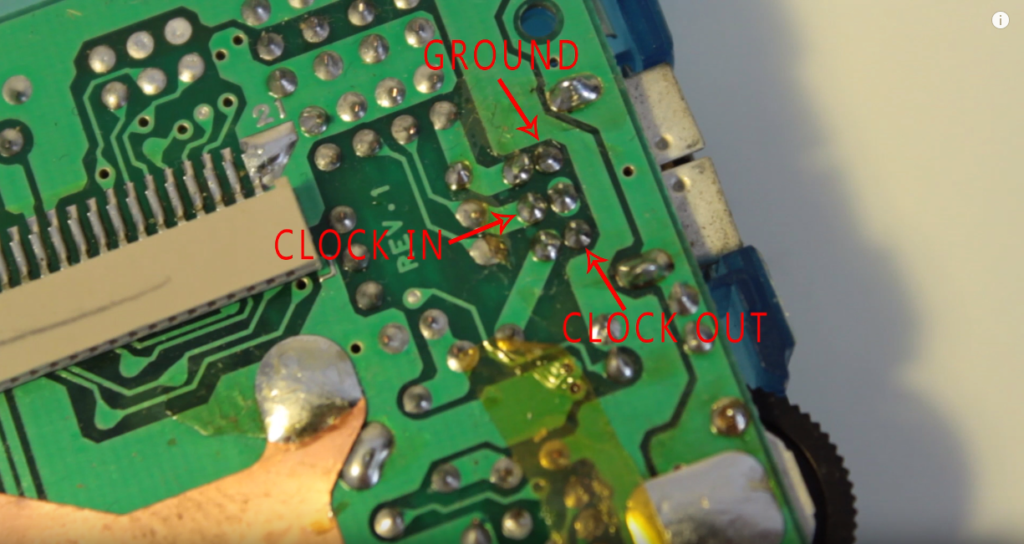
[sync in/out]

Image by Microbrixia

This time I started with the backlit mod and the Bivert module. I ordered the parts from TheGodOfGaming on eBay. Overall the modding was smooth. The only terrifying part was to remove the film sticker from the back of the glassy dot matrix screen. When I tried to flip the corner of the sticker, the screen chipped a little and splintered my finger.

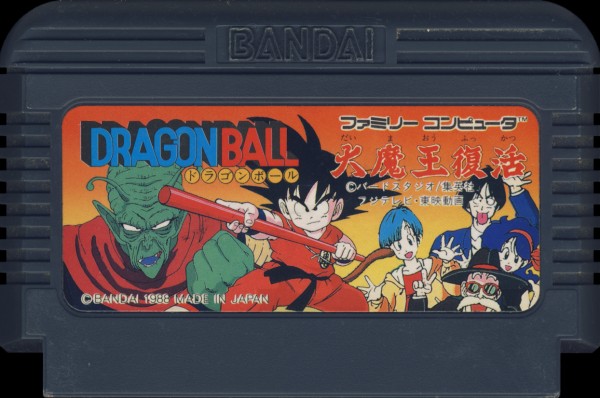
MR Mechanic Study: FC ドラゴンボール Card Game Mechanic

Posted on March 26, 2019June 26, 2019 by admin

I played ドラゴンボール 大魔王復活 when I was a kid and I was impressed by the card battle mechanic in the game. It was a brilliant idea to bring some strategic thinkings into dice rolling which is usually just pure randomness. I didn’t fully understand how it works because it felt like there were more than just comparing numbers on cards. The mechanic evolved over 6 Dragonball games on Famicom and then was carried over to Super Famicom. I missed old animes that were made into RPG games back in the days such as Saint Seiya, Jo Jo’s Bizzard Journey, and Dragonball. All of them had become fighting games in their recent video game adaptations. Looking back to those old RPG games, I really appreciated all the efforts went into telling a complex story with so few pixels.

ドラゴンボール 大魔王復活
wikipedia

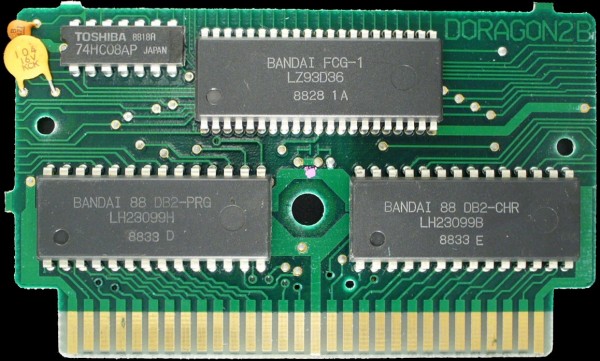
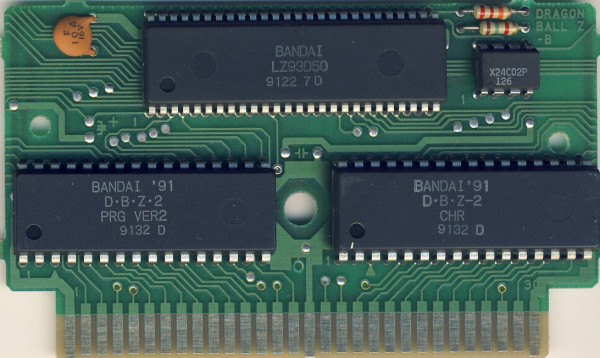
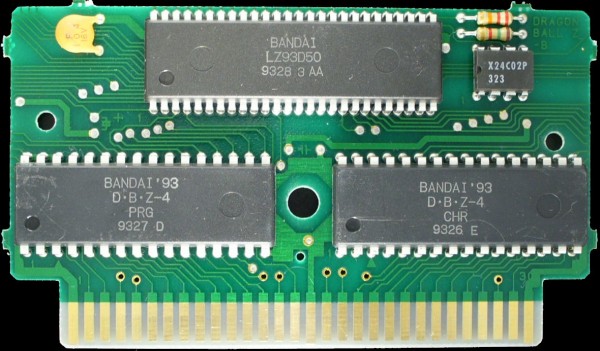
128KB PRG + 128KB CHR
Card Design

カード

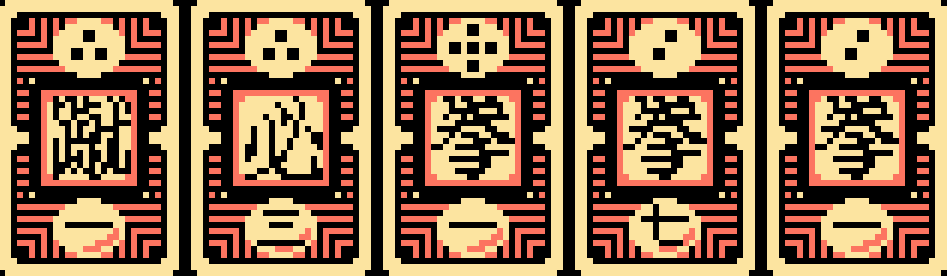
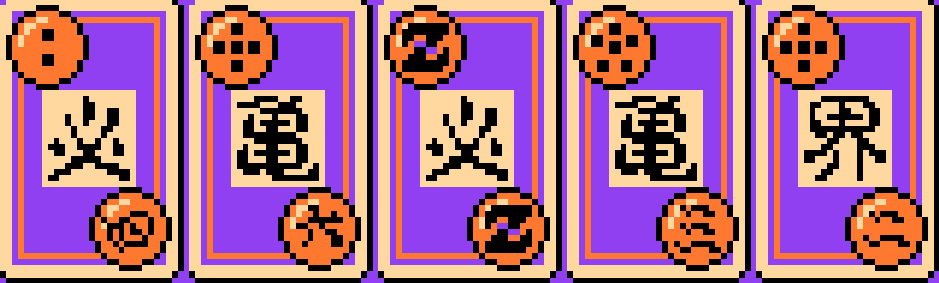
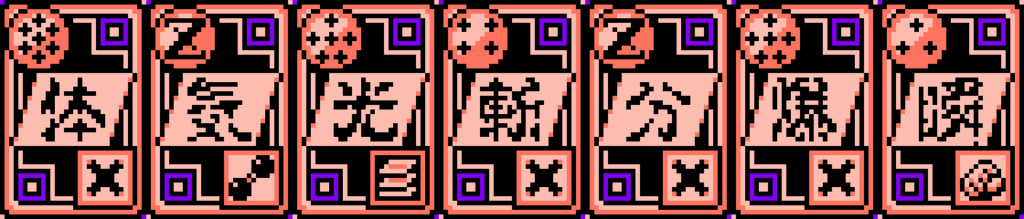
普段プレイヤーは5枚カードを持っており、このカードを使ってゲームを進めることとなる。各カードの上にはドラゴンボールをモチーフにした星、中央には戦闘時の攻撃手段、下には漢数字が書かれている。

  • 星(1〜7)- フィールド上では移動力で、この星の数だけ悟空が移動できる。バトル時は攻撃権兼攻撃力を意味する。詳しくは後述のバトルを参照。
  • 攻撃手段 – 後述のバトルを参照。
  • 漢数字(一〜九)- 防御力。もし敵に攻撃されても、この数値が高ければ回避できたり傷が少なくてすむ。

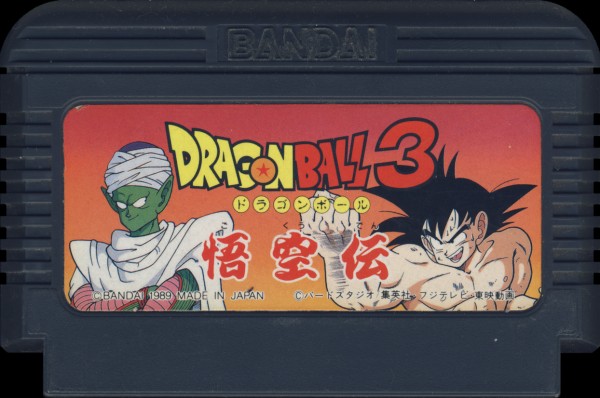
ドラゴンボール3 悟空伝
wikipedia

128KB PRG + 256KB CHR
Card Design

戦闘(カードバトル)

戦闘はカードで行われる。星の数(1〜7)で攻撃力、漢数字(一〜七)で防御力が決まる。星の数が高い方が攻撃権を取るが、こちらが1で相手が7の場合はこちらが攻撃権を取る。中心の漢字「拳」「蹴」「体」「武」「連」「必」によって攻撃パターンが決まる。「必」と書かれたカードを使うと必殺技ポイントを消費し必殺技を繰り出せる。敵に勝利すると修行値が貰え、一定の値になるとレベルアップし体力や必殺技ポイントが増えたりスピード、パワー、テクニック、タフネスを高めるレベルポイントが得られたり、新たな必殺技が覚えられる。レベルの上限はストーリーの進行具合によって決められている。敵を倒すと、その敵が持っていたアイテムを獲得できるときがある。

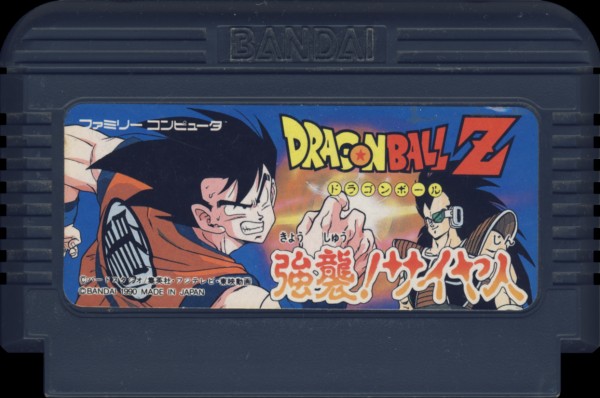
ドラゴンボールZ 強襲サイヤ人
wikipedia

256KB PRG + 256KB CHR
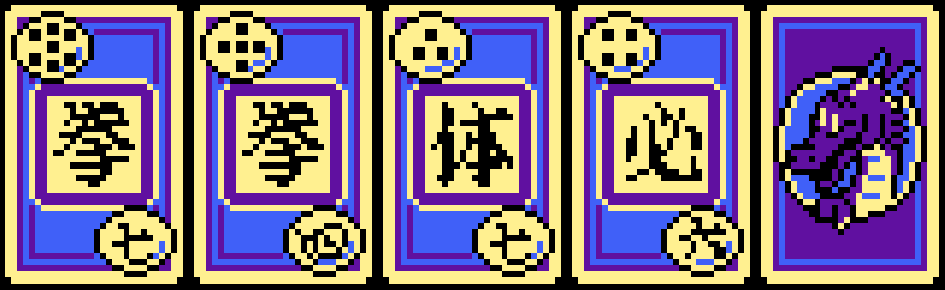
Card Design

戦闘(カードバトル)

戦闘はカードを使って行われる。星の数で(1 – Z)が攻撃力、漢数字(一 – Z)で防御力が決まる。またカードに書かれている流派と各キャラクターに設定された流派が一致すると攻撃力がアップする。「必」と書かれたカードを使うと、BEを消費して必殺技を繰り出せる。2体以上の敵キャラクターへの攻撃はキャラクターごとに設定するが、複数のキャラクターが1体の敵キャラクターを倒してしまうと。他のキャラクターはそのターンの間行動しない。敵に勝利すると経験値としてBPが貰え、一定の値になるとレベルアップ。キャラクターはHPが4分の1になると苦痛の顔に変わり、0になると死亡する(名前の横に十字架のようなマークがつく)。死亡した仲間を復活させるチャンスは、ゲーム内の特定のイベント一回きりである(ガーリックJr.編終了時の悟空復活イベント時に合わせて復活するため、終盤のベジータ・ナッパ編では復活不可能)。

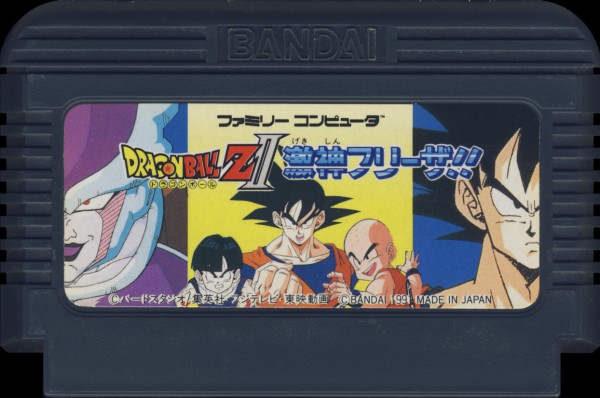
ドラゴンボールZII 激神フリーザ!!
wikipedia

256KB PRG + 256KB CHR
Card Design

戦闘(カードバトル)

戦闘はカードで行われる星の数で(1 – Z)が攻撃力、漢数字(一 – Z)で防御力が決まり、攻撃は漢数字の多い順に行われる。カードの流派と各キャラクターの流派が一致すると、強力な「複合攻撃」や敵全員を攻撃する「複数攻撃」ができる。「必」と書かれたカードを使うと、BE(バトルエネルギー)を消費して必殺技を繰り出せる。必殺技には敵全体を攻撃するものもある。キャラクターはHPが29[3]以下になると、顔の上に「ピンチ!」の文字が点滅し[4]、0になると回復効果のあるおたすけカードを使って全快しない限り戦闘に参加できなくなる。前作とは違い死亡扱いではなく一時離脱扱いとなるため、回復さえできればいつでも復活可能。敵に勝利すると経験値としてBP(バトルポイント=戦闘力)が貰え、一定の値になるとレベルアップ。サイヤ人である悟空、悟飯、ベジータは、瀕死の状態から一気に全快するとレベルアップする。前作にあった「神」流派カードは本作には登場しない。

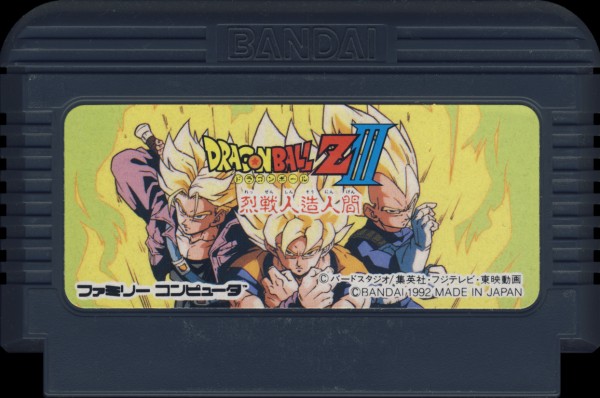
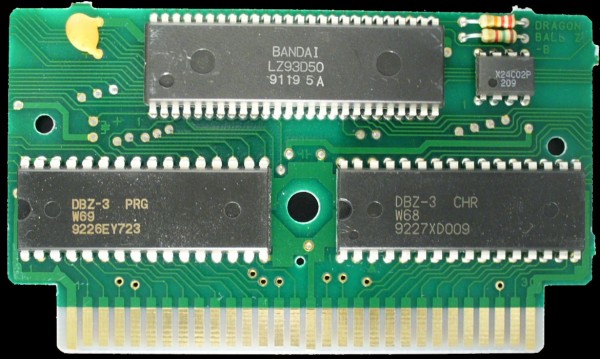
ドラゴンボールZIII 烈戦人造人間
wikipedia

256KB PRG + 256KB CHR
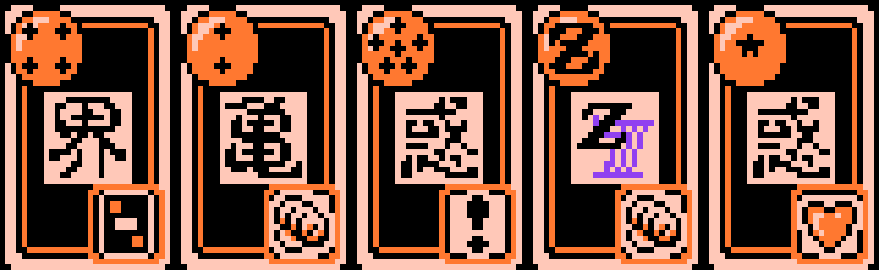
Card Design

戦闘(カードバトル)

今作では3Dと2Dバトルの2種類に別れる。基本的に戦闘はカードで行われる星の数で(1 – Z)が攻撃力が決まる。敵に勝利すると経験値が貰え、一定の値になるとレベルアップ。またサイヤ人(悟空、悟飯、ベジータ、トランクス)は、戦闘中HPが1桁や戦闘不能になったときに仙豆などで一気に全回復すると、レベルアップする特性を持つ。

3Dバトル戦闘に参加するメンバー3人と、控えているメンバーとで、敵との戦闘が展開される。引いたカードの右下のマークにより様々な効果が起こる。戦闘中に敵が放つ必殺技は、画面上のキャラクターに「!」マークが出ると同時に十字キーの上を押すことによって2分の1の確率で回避できるというテクニックがある(技の命中が確定のときは、双方のキャラクターのカットインが入る)が、ボス戦ではこれが不可。ランダムではね返したりはね返されることはある。またオートバトル時やサブメンバーは、ステータス画面でのオート設定によって「わざをつかうな」「よわいテキから」「とにかくオート」「おおわざでいけ」の4つの戦い方を選択できる。マップでの移動画面でスタートボタンとセレクトボタンを同時に押すと、常に2D戦闘にするか、あるいは3D戦闘にするか、といった選択も可能(ボスキャラクターとの戦闘は必ず3D戦闘になる)。

必殺技カードに書かれている流派と、そのキャラクターの流派が一致したカードを選ぶと、KI(気)を消費して必殺技を出すことができる。KIを練ることで1ターン無防備状態となるが、次のターンでより強力な技を出すことができるようになる。

2Dバトル戦闘に参加するメンバーのみで戦う簡略化されるバトル。主に(CPUが)弱いと判断した敵に対して展開される。※フィールド移動中にスタートとセレクトボタンを押すことによって設定が可能。

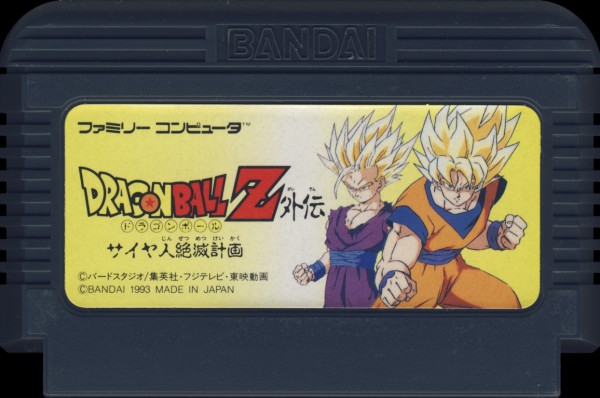
ドラゴンボールZ外伝 サイヤ人絶滅計画
wikipedia

256KB PRG + 256KB CHR
Card Design

戦闘

カードを数枚選んで行う。使用可能な枚数はストーリーの進行に従い増加する。前作までの流派ではなく、「拳」「蹴」など。「Z」は好きなものに変化させることが可能。 星の数と文字により、攻撃力および攻撃方法が決まる。アレンジメントを完成させることで必殺技が発動し、初めて使った技には各キャラクターのコメントが入る。敵の必殺技は、当たる寸前にAボタンまたはBボタンを押すことで、弾くまたはかわすことができる(巨大な光線技はかわすのみ)。ただし味方の必殺技も同様に敵に無効化されることがあり、ザコ敵は一部の技を吸収することも可能。前作では裏技的扱いだった光弾を弾くコマンドを説明書に載せたのはプレイヤーに戦闘を見せるだけでなく、参加させるためである[。

[SFC]ドラゴンボールZ 超サイヤ伝説
wikipedia

バトルカード

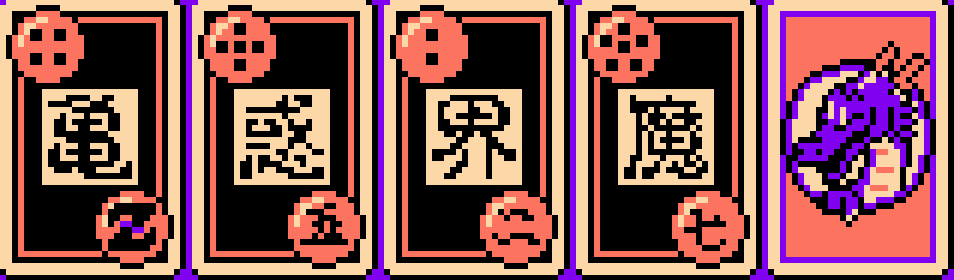
キャラクターが戦闘を行うときに使用するカードで、「星(1 – Z)」「漢数字(一 – Z)」「流派」の3つの要素から構成される。「星」は攻撃力、「漢数字」は防御力に対応しており、数が多いほど効果が高くなる。本作における「流派」は「神」「魔」「界」「惑」「特戦隊」「超」と、特別な効果を持つ「気」「必」と全7種があり、カードに書かれた流派とキャラクターの流派が一致するとそのターンの攻撃が強化される(敵が複数いる場合は全体攻撃、1体しかいない場合は攻撃力を上昇させる)。また、流派「必」のカードを選ぶとKI(気)を消費して各種の必殺技を繰り出せる(KIが不足している場合は必殺技を選ぶことができず、打撃攻撃を行う。なお必殺技のほとんどは「エネルギー波」など、気功波系による通常打撃攻撃よりも威力が高い強化攻撃であるが、例外もあり「太陽拳」のように対象相手の行動を1ターン封じる(お助けカード「じいちゃん」と同等)補助技もある。

ドラゴンボール 大魔王復活
ドラゴンボール3 悟空伝
ドラゴンボールZ・強襲サイヤ人
ドラゴンボールZII 激神フリーザ!!
ドラゴンボールZIII 烈戦人造人間
ドラゴンボールZ外伝 サイヤ人絶滅計画

ドラゴンボールのファミコンゲーム 7本
DBゲーム攻略本
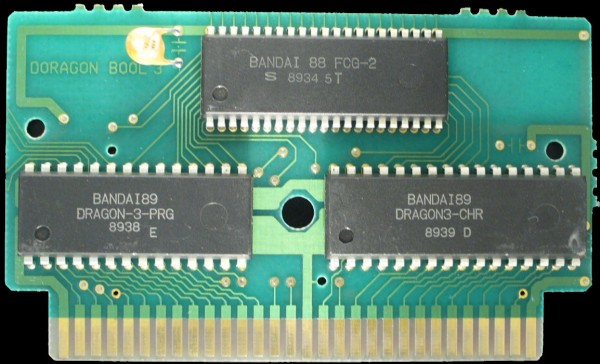
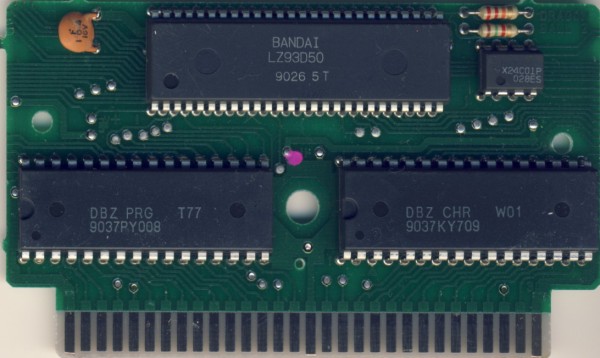
Bootgod

Playsentation

Posted on May 29, 2015February 16, 2026 by Kyle Li

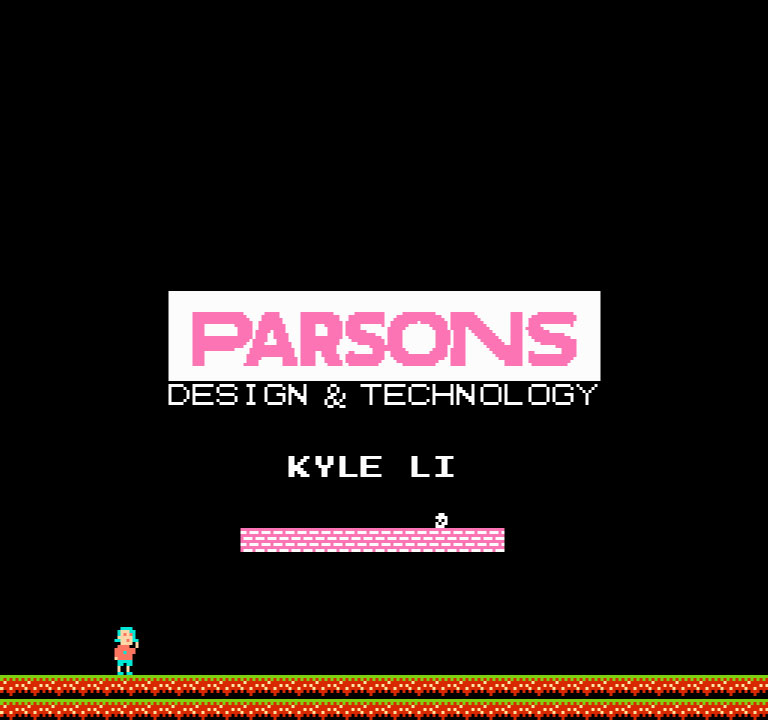
I was invited to be a part of the design panel in LEVEL UP 2015 TAIWAN GAME DESIGN FESTIVAL (http://levelup-twgs.com/) at TECO New York. The curatorial team made a great effort to gather all the talented hard-working Taiwanese Indie game developers in New York. I really wanted to participate but was caught up with other projects and commitments. In order to contribute to this great event, I decided to give my presentation a playful kick by hacking together an 8-bit presentation on a NES cartridge!

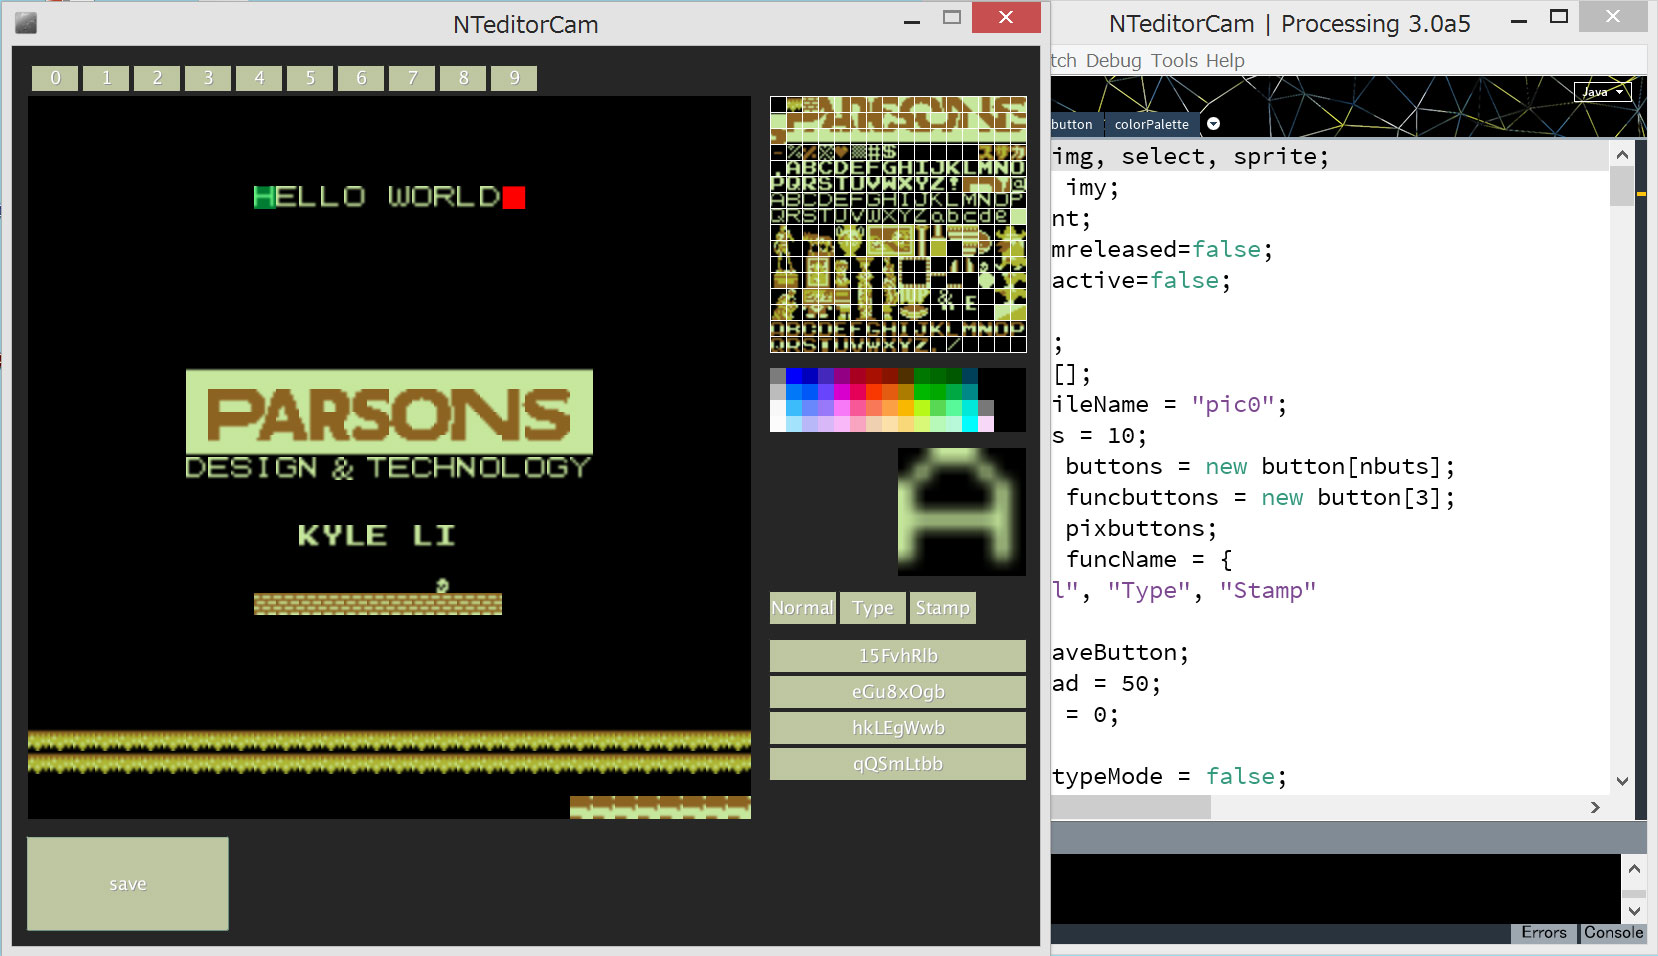
I dug out my tool bag and all the sample codes I used to teach in class. With a little bit of CHR mashup, I was able to put the overall look-and-feel plus the basic platform mechanic together quickly. I soon ran into a problem on placing all the text in the presentation. Letters and symbols are treated as graphic tiles in NES, so if I want to write stuff on the screen I have to arrange and place them on the screen letter by letter. It is a PIA to do so. I decided to write a tool to do this for me – a typing tool for editing nametable.

The only challenge in building this tool is to decode CHR file with limited/raw binary support in Processing in comparison to C++. This could be fixed by writing my own shifting functions which turned out to be a breeze. I am started to see the potential of this tool and want to develop it further with extra functions like color picking, stamp, and creating nametables from an image file or from camera.

parsons

trickyCHR

Playsentation

Every row (8 pixels across) in the 8×8 tile is 2 bytes of information. In order to get the wanted bits, I left shifted both bytes, masked the first byte for the least significant bit, right shifted the second byte by 1, added the two byte together, and lastly masked the sum for 2 least significant bits. This will give me either 0, 1, 2, or 3, which matches the 4  palette colors.

(((byte01 >> 7) & 0x01)+(((byte02 >> 7)) << 1)) & 0x03

sys12: polaris

Posted on June 8, 2014December 27, 2020 by Kyle Li

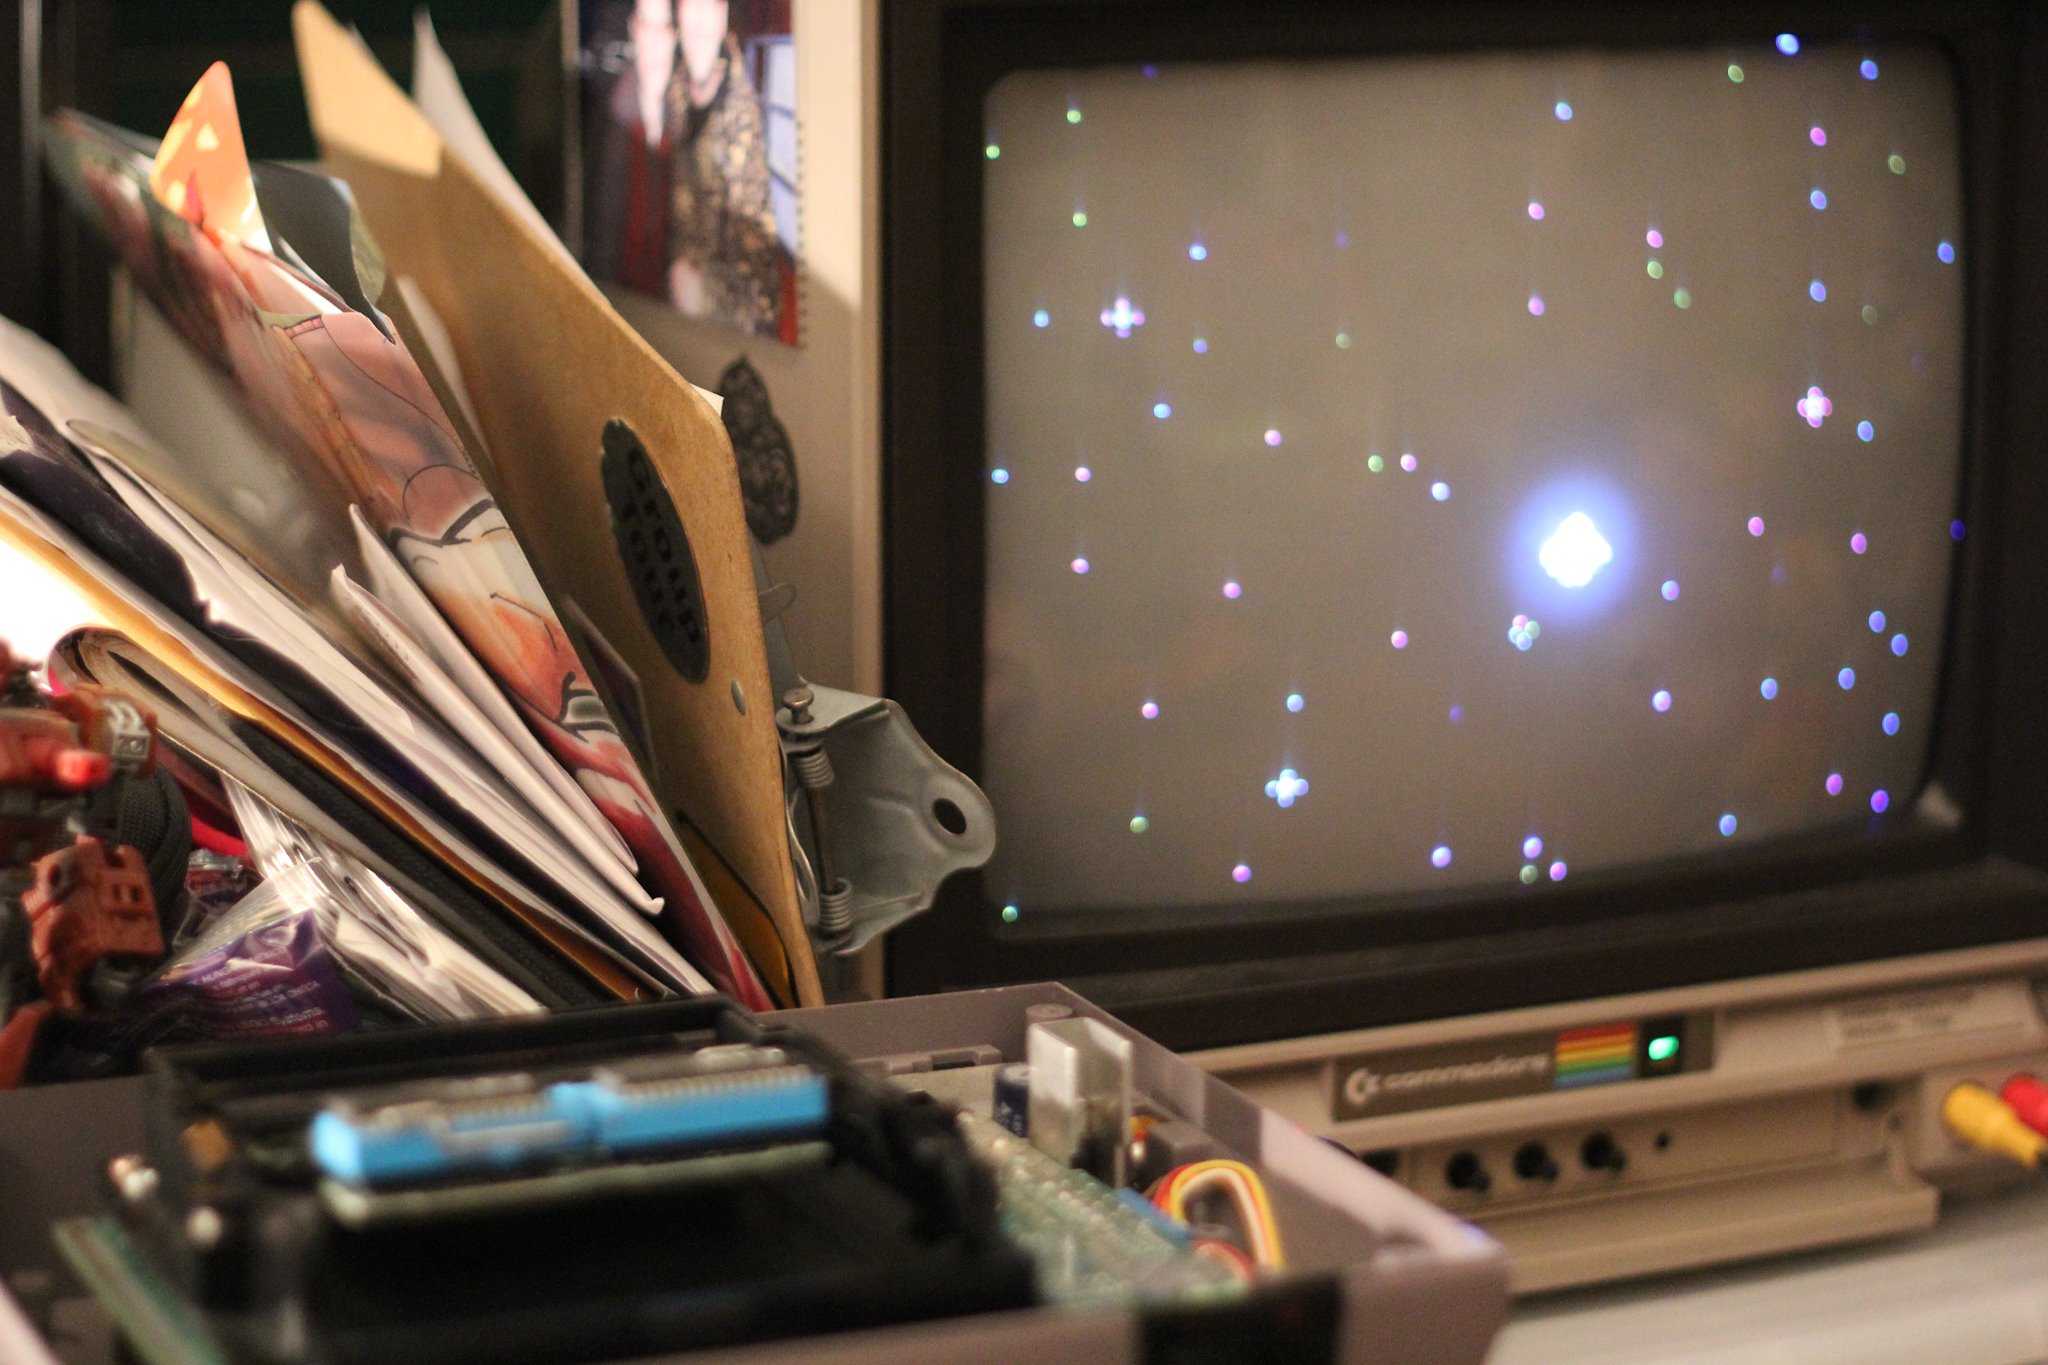
我喜歡利用古董遊戲機來作為媒介,她們的種種硬軟體限制還有快要絕跡的製作程序為我提供了一個充滿挑戰的創作平台。System 12: polaris 是利用80年代的美式任天堂來作為平台,呈現一個孩子飛向北極星的片段。

8.P.M

Posted on December 13, 2013March 30, 2019 by Kyle Li

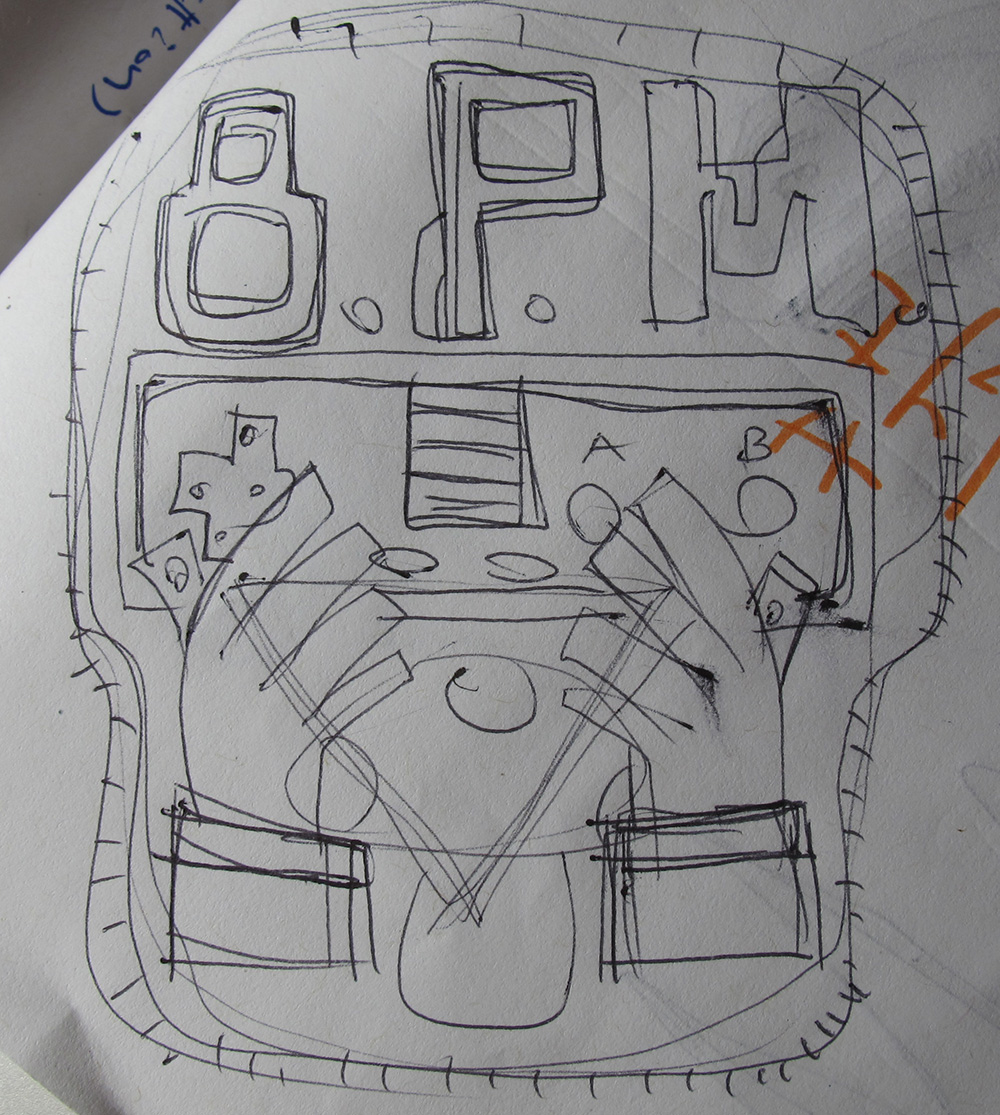
8.P.M (8-bit as Poetic Medium) group embroidered patch design in progress.

I started to wear coverall recently. It is something I wanted to do for a long time. A good coverall needs good patches so my first patch, here I come! I decided to make 8PM(8-bit as Poetic Medium) my first patch.

IMG_5632
8PM

8PM

Final Two Weeks of 8-bit Production 2012

Posted on December 12, 2012February 16, 2026 by Kyle Li

In 8-bit production, students design and make their very own game cartridges for Nintendo Entertainment System (NES). It is a fun and efficient way to look at digital game production while building up their perspectives in video game history. We make characters, hack roms, redesign existing game levels, make 8-bit music, program assembly, and build the game cartridge all in one semester. It was a blast.


8-Bit Production: Rom Hacking

Posted on February 19, 2011February 16, 2026 by Kyle Li

We have been hacking roms using YY-CHR and hex editor in the past few weeks. We alternated the pattern tables, color palettes, and nametables of existing NES games. The goal of these exercises is to help students feel comfortable working in a lower programming environment.

Week 1 was easy. I started out with a brief introduction of Nintendo’s history, and then went into how software design and hardware engineering compliments each other in the early days. For hands-on, I brought in a Famicom, a Famicom Disk system, a NES, and a few NES cartridges with different kinds of PCBs inside. It is important to throw in a few slides of how early computer was designed, especially the design of a MPU computer, because the idea of using CHR and PRG chips was derived from a static MPU system (ROM, RAM, and I/Os). At the end of the class, I showed them the YY-CHR editor and we hacked a few games. The link is a collection of hacked rom by students using the YY-CHR editor.

Week 1 hacked roms page

Recent Posts

  • 8bitworkshop Notes – Include binary files
  • 8bitworkshop Notes – Display an external Nametable V1
  • 8bitworkshop Notes – Player Running and Jumping
  • Native Web Speech API
  • AI: You are _____ correct.

Archives

Proudly powered by WordPress | Theme: MiniZen by Martin Stehle.