Skip to content

A PLAY EXPERIENCE MAKER'S WORK LOG FOR FUTURE SELF©2001 – 2023 Kyle Li 李肅綱 All Rights Reserved.

Category: games

8bitworkshop Notes – Include binary files

Posted on October 5, 2026October 5, 2026 by admin

By default, 8bitworkshop uses chr_generic.s as the source of CHR data. The CHR pattern tables is embeds directly as byte arrays in the .s assembly file within the web editor. However, I can’t edit that file directly using YY-CHR or my custom Processing 4 tools. I have no intention of migrating to 8bitworkshop entirely, as I want to keep my established ROM hacking tools in my workflow.

  • Go to the top menu and select Upload… to upload your .chr file. Note that this step can be a bit unintuitive: you need to select [Open As New Project] so it gets saved as a standalone file in your workspace directory.
  • Once uploaded, add a resource directive at the very top of your main file to include the .chr asset.
// -----------------------------------------------------------------------------
// 8BITWORKSHOP ASSET LINK DIRECTIVES
// -----------------------------------------------------------------------------
//#resource "my.chr"
  • In my chr_include.s file (a new .s file I created based on chr_generic.s to avoid confusion), I replaced the original byte array with .incbin "my.chr".
  • My chr_include.s now looks like this, with all the original .byte lines removed:
;;{w:8,h:8,bpp:1,count:256,brev:1,np:2,pofs:8,remap:[0,1,2,4,5,6,7,8,9,10,11,12]};;
.segment "CHARS"
.incbin "my.chr"
  • After linking it in the main file, it was all set. Now I can edit the .chr file with my custom tools and update it whenever needed.”
// -----------------------------------------------------------------------------
// 8BITWORKSHOP ASSET LINK DIRECTIVES
// -----------------------------------------------------------------------------
//#resource "my.chr"
//#link "chr_include.s"

The great news is I can do the same for external Nametable files. Upload individual Nametable file and add a resource directive for each of them in the main file. In the “nametable.s”:

.export _nametable_0, _nametable_1, _nametable_2, _nametable_3
.export _nametable_4, _nametable_5, _nametable_6, _nametable_7

.segment "RODATA"

_nametable_0: .incbin "pic0.nam"
_nametable_1: .incbin "pic1.nam"
_nametable_2: .incbin "pic2.nam"
_nametable_3: .incbin "pic3.nam"
_nametable_4: .incbin "pic4.nam"
_nametable_5: .incbin "pic5.nam"
_nametable_6: .incbin "pic6.nam"
_nametable_7: .incbin "pic7.nam"

Compared to the .byte array format, this approach is much cleaner.
8bitworkshop Notes – Display an external Nametable V1

Posted on October 4, 2026October 10, 2026 by admin

Nametable file format:

The ultimate goal is to create an external file that stores all the nametable data.

.export _nametable_0, _nametable_1, _nametable_2, _nametable_3
.export _nametable_4, _nametable_5, _nametable_6, _nametable_7

.segment "RODATA"

_nametable_0: .repeat 30
                  .byte $00,$00,$00,$00,$00,$00,$00,$00,$00,$00,$00,$00,$00,$00,$00,$00,$00,$00,$00,$00,$00,$00,$00,$00,$00,$00,$40,$41,$41,$41,$41,$41
              .endrepeat

_nametable_1: .repeat 30
                  .byte $00,$00,$00,$00,$00,$00,$00,$00,$00,$00,$00,$00,$00,$00,$00,$00,$00,$00,$00,$00,$00,$00,$00,$00,$00,$00,$40,$41,$41,$41,$41,$41
              .endrepeat

_nametable_2: .repeat 30
                  .byte $00,$00,$00,$00,$00,$00,$00,$00,$00,$00,$00,$00,$00,$00,$00,$00,$00,$00,$00,$00,$00,$00,$00,$00,$00,$00,$40,$41,$41,$41,$41,$41
              .endrepeat

_nametable_3: .repeat 30
                  .byte $00,$00,$00,$00,$00,$00,$00,$00,$00,$00,$00,$00,$00,$00,$00,$00,$00,$00,$00,$00,$00,$00,$00,$00,$00,$00,$40,$41,$41,$41,$41,$41
              .endrepeat

_nametable_4: .repeat 30
                  .byte $00,$00,$00,$00,$00,$00,$00,$00,$00,$00,$00,$00,$00,$00,$00,$00,$00,$00,$00,$00,$00,$00,$00,$00,$00,$00,$40,$41,$41,$41,$41,$41
              .endrepeat

_nametable_5: .repeat 30
                  .byte $00,$00,$00,$00,$00,$00,$00,$00,$00,$00,$00,$00,$00,$00,$00,$00,$00,$00,$00,$00,$00,$00,$00,$00,$00,$00,$40,$41,$41,$41,$41,$41
              .endrepeat

_nametable_6: .repeat 30
                  .byte $00,$00,$00,$00,$00,$00,$00,$00,$00,$00,$00,$00,$00,$00,$00,$00,$00,$00,$00,$00,$00,$00,$00,$00,$00,$00,$40,$41,$41,$41,$41,$41
              .endrepeat

_nametable_7: .repeat 30
                  .byte $00,$00,$00,$00,$00,$00,$00,$00,$00,$00,$00,$00,$00,$00,$00,$00,$00,$00,$00,$00,$00,$00,$00,$00,$00,$00,$40,$41,$41,$41,$41,$41
              .endrepeat

Nametables are stored as raw byte arrays in PRG ROM and copied or decompressed into PPU VRAM when loaded.

  • Uncompressed Nametables ($1,024$ bytes each): I can store roughly 15 to 20 uncompressed Nametables before filling up your 32 KB PRG ROM (leaving ~12 KB for game engine code, physics, music, and logic).
  • RLE-Compressed Nametables (~150 to 300 bytes each): I can easily link 60 to 100+ compressed Nametables in 32 KB PRG ROM using vram_unrle().

Suggested Memory Budget Breakdown in 32 KB PRG ROM:

  • C Engine & Game Logic ~10 KB
  • neslib Library & Runtime ~2 KB
  • Audio Engine & SFX (FamiTone2) ~3 KB
  • Available Space for Backgrounds ~17 KB
  • Max Nametable Capacity:
    • Uncompressed ~17 Full Screens
    • *RLE Compressed Allocation ~60 to 100+ Screens

*An RLE-Compressed Nametable is a background screen layout that has been processed using Run-Length Encoding (RLE) to significantly reduce its size in PRG ROM.Instead of storing all 1,024 individual tile bytes for a full $32 \times 30$ grid, RLE compresses repeated identical tiles (like blank sky, floor blocks, or solid walls) into compact sequence commands.

Uncompressed (16 bytes):
$00, $00, $00, $00, $00, $00, $00, $00, $00, $00, $4A, $4B, $00, $00, $00, $00

RLE Compressed (6 bytes):
[10x $00], [1x $4A], [1x $4B], [4x $00]

Display 1 nametable as the background:

//#link "chr_generic.s"
//#link "nametable.s"

#include <nes.h>
#include "neslib.h"


// Declare external assembly symbol exported in nametable.s
extern const unsigned char nametable_0[];

// Sample palette (Background palette 0)
const unsigned char palette[16] = {
    0x0f, 0x00, 0x10, 0x30, // Black background, Dark Gray, Light Gray, White
    0x0f, 0x00, 0x10, 0x30,
    0x0f, 0x00, 0x10, 0x30,
    0x0f, 0x00, 0x10, 0x30
};

void load_attributes_separately(const unsigned char *tiles, const unsigned char *attributes) {
    // 1. Write tile bytes
    vram_adr(0x2000);
    vram_write(tiles, 960);

    // 2. Write attribute bytes to $23C0 (Nametable 0 attribute offset)
    vram_adr(0x23C0);
    vram_write(attributes, 64);
}

void main(void) {
    bank_bg(0);  // Backgrounds from $0000 (Font/Tiles)
    bank_spr(1); // Sprites from $1000 (Player)
    // Disable rendering while writing to PPU memory
    ppu_off();

    // Load background color palette
    pal_bg(palette);

    // Set PPU address to Nametable 0 start ($2000)
    vram_adr(0x2000);

    // Write the full 960-byte nametable array from nametable.s
    // (32 rows x 30 columns = 960 bytes)
    vram_write(nametable_0, 960);

    // Reset scroll position
    scroll(0, 0);

    // Enable rendering
    ppu_on_all();

    // Infinite loop to keep rendering active
    while (1) {
        ppu_wait_frame();
    }
}

8bitworkshop Notes – Player Running and Jumping

Posted on October 4, 2026October 4, 2026 by admin
// -----------------------------------------------------------------------------
// 8BITWORKSHOP ASSET LINK DIRECTIVES
// -----------------------------------------------------------------------------
//#link "chr_generic.s"

#include "neslib.h"

// Physics Constants
#define FLOOR_Y     192
#define PLAYER_X    32
#define GRAVITY     1
#define JUMP_FORCE -10

// -----------------------------------------------------------------------------
// PALETTE SETUP
// -----------------------------------------------------------------------------
const unsigned char sprite_palette[16] = {
    0x0F, 0x16, 0x27, 0x30, // Palette 0: Black, Red, Orange, White
    0x0F, 0x0F, 0x0F, 0x0F,
    0x0F, 0x0F, 0x0F, 0x0F,
    0x0F, 0x0F, 0x0F, 0x0F
};

// -----------------------------------------------------------------------------
// 2x2 METASPRITES (16x16 pixels)
// Structure per tile: x_offset, y_offset, tile_id, attributes
// Terminated with 128 (0x80)
// -----------------------------------------------------------------------------
const unsigned char metasprite_run1[] = {
    0,  0, 0xDC, 0, // Top-Left tile
    8,  0, 0xDE, 0, // Top-Right tile
    0,  8, 0xDD, 0, // Bottom-Left tile
    8,  8, 0xDF, 0, // Bottom-Right tile
    128
};

const unsigned char metasprite_run2[] = {
    0,  0, 0xE0, 0,
    8,  0, 0xE2, 0,
    0,  8, 0xE1, 0,
    8,  8, 0xE3, 0,
    128
};

const unsigned char metasprite_jump[] = {
    0,  0, 0xE8, 0,
    8,  0, 0xEA, 0,
    0,  8, 0xE9, 0,
    8,  8, 0xEB, 0,
    128
};

// Running animation frame table
const unsigned char* const run_animation[] = {
    metasprite_run1,
    metasprite_run2
};

// -----------------------------------------------------------------------------
// PLAYER STATE VARIABLES
// -----------------------------------------------------------------------------
unsigned char player_y = FLOOR_Y;
signed char player_vy = 0;
unsigned char is_grounded = 1;

unsigned char anim_timer = 0;
unsigned char anim_frame = 0;

// -----------------------------------------------------------------------------
// FUNCTIONS
// -----------------------------------------------------------------------------

void update_player(unsigned char pad) {
    // Jump trigger on A button
    if ((pad & PAD_A) && is_grounded) {
        player_vy = JUMP_FORCE;
        is_grounded = 0;
    }

    // Apply Velocity & Gravity
    player_y += player_vy;
    player_vy += GRAVITY;

    // Floor Boundary
    if (player_y >= FLOOR_Y) {
        player_y = FLOOR_Y;
        player_vy = 0;
        is_grounded = 1;
    }
}

void update_animation(void) {
    if (is_grounded) {
        anim_timer++;
        if (anim_timer >= 6) { // Advance frame every 6 ticks (~10 FPS)
            anim_timer = 0;
            anim_frame = (anim_frame + 1) % 2; // Toggle between frame 0 and 1
        }
    }
}

void draw_player(void) {
    const unsigned char* current_metasprite;

    // Select airborne or grounded MetaSprite
    if (!is_grounded) {
        current_metasprite = metasprite_jump;
    } else {
        current_metasprite = run_animation[anim_frame];
    }

    // Render 2x2 MetaSprite to OAM
    oam_meta_spr(PLAYER_X, player_y, 0, current_metasprite);
}

// -----------------------------------------------------------------------------
// MAIN PROGRAM LOOP
// -----------------------------------------------------------------------------
void main(void) {
    // Write sprite palettes to PPU
    pal_spr(sprite_palette);

    // Turn on graphics rendering
    ppu_on_all();

    while (1) {
        // Read Controller 1 Input
        unsigned char pad = pad_trigger(0);

        update_player(pad);
        update_animation();

        // Clear sprite hardware memory and re-draw
        oam_clear();
        draw_player();

        // Synchronize with NES TV refresh rate (60 FPS)
        ppu_wait_nmi();
    }
}

Using C with the neslib library in 8bitworkshop lets you prototype game loops, player gravity, and scrolling background mechanics cleanly without writing raw 6502 assembly right away.

Core Technical Concept

To simulate an endless runner on NES:

  1. Player Position: The player stays fixed horizontally on the X-axis (e.g., $X = 32$) and only moves vertically on the Y-axis when jumping or falling under gravity.
  2. Scrolling: The NES background hardware fine-scrolls horizontally (scroll_x++). As background tiles move off-screen to the left, new tiles and obstacles spawn on the right seam.
  3. Collision Detection: Check bounding box collisions between the fixed player character sprite and incoming obstacle coordinates.

[Breakpoint] The code runs, but nothing shows up on the screen.

To handle a character made of 4 hardware tiles ($16 \times 16$ pixels in a $2 \times 2$ grid), you can use MetaSprites or standard relative coordinate drawing functions. neslib provides built-in functions like oam_meta_spr() specifically designed for multi-tile objects.

[Breakpoint] I added logic for character animation and collision, and while the code checked out, the screen just flashed between black and red with nothing rendering. I soon realized I hadn’t linked the default CHR file to the game likely because my original prompt didn’t include details about the CHR data and color palette.

// -----------------------------------------------------------------------------
// METASPRITES
// -----------------------------------------------------------------------------
const unsigned char metasprite_run1[] = {
    0,  0, 0x01, 0, // Top-Left
    8,  0, 0x02, 0, // Top-Right
    0,  8, 0x11, 0, // Bottom-Left
    8,  8, 0x12, 0, // Bottom-Right
    128
};

const unsigned char metasprite_run2[] = {
    0,  0, 0x03, 0,
    8,  0, 0x04, 0,
    0,  8, 0x13, 0,
    8,  8, 0x14, 0,
    128
};

const unsigned char metasprite_jump[] = {
    0,  0, 0x05, 0,
    8,  0, 0x06, 0,
    0,  8, 0x15, 0,
    8,  8, 0x16, 0,
    128
};

const unsigned char* const run_animation[] = {
    metasprite_run1,
    metasprite_run2
};

The flickering occurs because check_collision() is evaluating to 1 (true) constantly on every frame, causing the game loop to alternate palette color 0 between red (0x16) and black (0x0F).

The Cause: Initial Y-Coordinate Overlap

  1. FLOOR_Y is set to 192.
  2. player_y starts at 192.
  3. player_y + 16 equals 208.
  4. obstacle_y is set to FLOOR_Y + 8 = 200.

Because (player_y + 16) ($208$) is greater than or equal to obstacle_y ($200$), the vertical collision condition (player_y + 16) >= obstacle_y evaluates to TRUE continuously, even when the obstacle is on the far right of the screen ($X = 240$).

Adjust obstacle_y to sit at FLOOR_Y and refine the bounding box collision logic to require both top and bottom $Y$-axis overlaps:

[Breakpoint] Screen was still back, I finally realized I need to set up color palettes.

The color palette setup is incomplete. At boot, the NES PPU contains random or zeroed palette RAM. Calling pal_col(0, ...) only modifies index 0 (the background fill color), leaving all sprite colors uninitialized or black.

What Is Happening

  1. Undefined Sprite Palettes: Without initializing sprite palettes using pal_spr() or pal_bg(), the PPU reads color 0x0F (black) for every sprite pixel. The sprites are actually rendering, but they are invisible against the black background.
  2. False Collision Flashing: Because the sprite tiles are invisible, it felt like a random flashing bug. Modifying obstacle_x -= 2 altered how often the invisible obstacle bounding box collided with the player.

In NES hardware, palettes are defined in 16-byte arrays (4 palette groups of 4 colors each). Index 0 of each group is the shared background color.

Add palette initialization inside the main() setup before entering the while(1) loop:

// Define background and sprite palette arrays (16 bytes each)
const unsigned char bg_palette[16] = {
    0x0F, 0x00, 0x10, 0x30, // Palette 0 (Black, Gray, Light Gray, White)
    0x0F, 0x01, 0x11, 0x21, // Palette 1
    0x0F, 0x06, 0x16, 0x26, // Palette 2
    0x0F, 0x09, 0x19, 0x29  // Palette 3
};

const unsigned char sprite_palette[16] = {
    0x0F, 0x16, 0x27, 0x30, // Palette 0: Red, Orange, White (Player)
    0x0F, 0x11, 0x21, 0x30, // Palette 1: Blue, Light Blue, White (Obstacle)
    0x0F, 0x09, 0x19, 0x29, // Palette 2
    0x0F, 0x0F, 0x0F, 0x0F  // Palette 3
};

In 8bitworkshop, comment directives like //link "chr_generic.s" tell the build system to assemble and link the CHR graphics asset bank into the final ROM cartridge. Without it, the NES PPU renders completely blank or garbage graphics banks. This was the final missing link. Here is the working code for character running.

コンピュータ・ウォーゲーム

Posted on July 19, 2025July 19, 2025 by admin

コンピュータ・ウォーゲーム 01 銀河漂流バイファムⅡ

コンピュータ・ウォーゲーム 02 重戦機エルガイム

コンピュータ・ウォーゲーム 03 ゴジラ

コンピュータ・ウォーゲーム 04 パーフェクトサッカー

コンピュータ・ウォーゲーム 05 北斗の拳 対決牙一族

コンピュータ・ウォーゲーム 06 機動戦士Zガンダムゲーム カミングマークⅡ

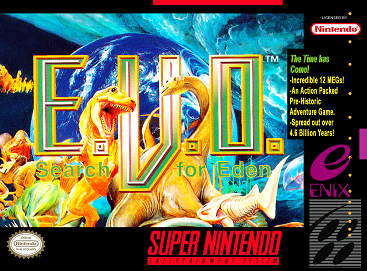
E.V.O.: Search for Eden

Posted on January 29, 2025January 29, 2025 by admin

Blast from the past!!

46億年物語 はるかなるエデンへ

Archived and Modified from:
https://gmerago.com/forum.php?mod=viewthread&tid=1826

第一章:魚類時代

可以先熟悉一下簡本操作,魚類只有咬和撞擊兩種攻擊方式,操作很簡單。進化方面可先強化顎與鰭,軀幹最後再考慮。另外鮟鱇魚的燈籠是不錯的東西,進化後在海底火山版面打軟體魚可以快速獲得大量EVO.P。其他種類的角就不要使用了,價格高且很容易損壞,以後章節的角都是沒有特殊效果的,所以除了用作裝飾就不用進化這個部位了,使用身體撞擊效果要好的多。路線只有一條,最後要消滅BOSS才能上岸,BOSS智力很低,等它自己撞牆後近身連續咬攻擊就可以消滅它了。

第二章:兩栖類時代

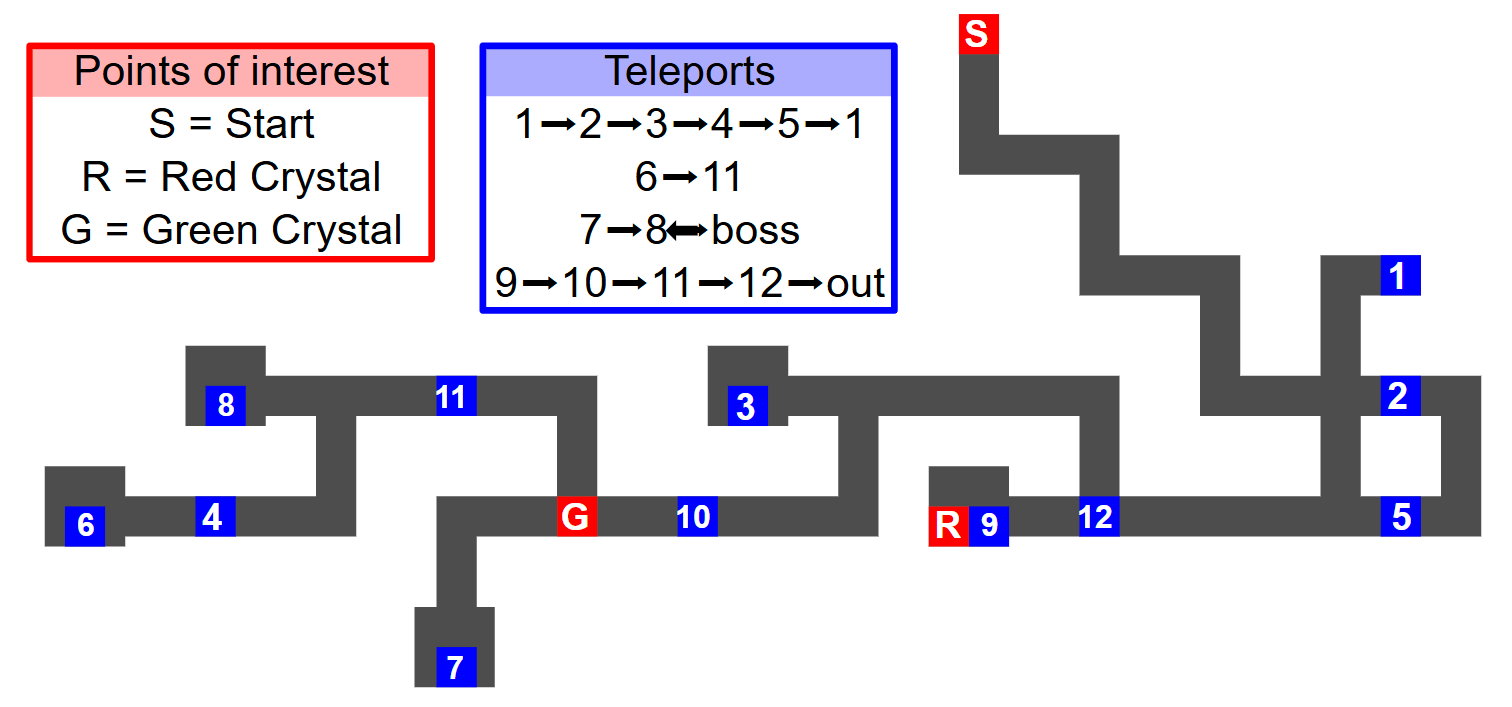
終於來到了陸地上,攻擊方式多了踩踏攻擊,玩過馬里奧都知道這招,可控性比較強,不過是威力和體重成正比的,還好體重不影響跳躍力,走的慢可以跳著前進。地圖右邊的道路暫時不通,可以向上先取得第一個綠水晶,以後就可以變成以前記錄過的形態了,不過每個綠水晶只能使用一次。而後向左前進,在盡頭的會發現一隻巨型蠑螈,引到右邊的平地上很容易對付。消滅後會看到他的家人,然後就可以去地圖右邊的道路了,當然也可以做好事讓他們一家團聚。

向右前進會發現兩栖類被工蜂襲擊,山洞口遇見被兵蜂打敗打兩栖類,死後給我們留下了一塊超級肉。進入山洞有很多蟲卵,消滅所有蟲卵和幼蟲後兵蜂會出現,趁他俯衝的破綻可以連續攻擊好幾次。消滅兵蜂出山洞進入沙漠,注意沙漠中的沙蟲是無法消滅,要躲避前進。沙漠最深處會發現雄峰,能力和兵蜂差不多,勝利後進入恐龍時代。

第三章:恐龍時代

本章的進化稍微複雜一些,首先多了二足與四足的選擇,初始狀態是四足,選擇軀幹進化的二足化會進化為中間形態,第二次會變成二足行走的爬行類,反之可以變回四足爬行類。二足善於奔跑跳躍,四足有專用軀幹所以防禦力很高,不過速度實在太慢,還是二足優勢明顯。另外爬行類多出了頸部進化,影響咬攻擊判定,不過頭部太高會吃不到地面上的食物也攻擊不到矮小的敵人。本章有劇情可以進化為鳥類,鳥類有自由飛行的能力,可以看作二足爬行類的強化版,而且有相關劇情,所以建議本章進化為鳥類。

開始後有兩條路線,隨便選一條前進到匯合點會遇到丟失孩子的戟龍,不要以為她好欺負,根本打不贏的。繼續前進會遇到大批雷龍,只會傻站著吃樹葉,需要EVO.P就找他們吧。一直向下可以找到迷路的小戟龍,正在欺負兩隻青蛙,幫助青蛙消滅他吧!

如果放跑了小戟龍回去可以看到戟龍母子團聚的劇情,這時再下手也不遲~~。再次進入剛才遇到小戟龍的場景,會出現一隻大蟾蜍,本身沒什麼能耐,但放出的小蟾蜍比較麻煩,最好不要管小蟾蜍直接攻擊他。戰勝他後先不要向右前進,可以去地圖上被雲籠罩的高峰,一直爬到最高處會發現一個平臺,鼓起勇氣跳下去吧,注意要儘量向左邊跳,向右邊或走下去都是無效的。神奇的事情發生了,神被這種缺心眼的行為感動了,賜予了我們一雙翅膀,遺憾的是神也學聰明了,以後誰用這招他都不管了。

鳥類進化選項基本與二足爬行相同,不過以前的EVO.P被清零了。也不用著急去賺EVO.P。先從山上下來,回到大地圖上,會看到一片來回移動的雲,來到雲停留的地方就可以進入雲內,雲內部可以取得超強的飛龍形態,最好記錄下來以後絕對有用,雲內地圖如下。

穿過雲層就來到太空了,上方有四個入口,右邊是一個綠水晶,中間兩個入口相通,可以取得蝙蝠怪形態,有飛龍就用不到他了。進入左邊的入口會看到一個外星人正在研究恐龍,剛想過去打招呼他就跑掉了。把藍水晶吃了吧,EVO.P 9999入手

這回可以隨便進化了。去地圖右邊吧,最後是大批的霸王龍,攻擊力很高,要小心對付,躲著等時間到也可以。

第四章:冰河時代

先進入右邊的山洞,登上檯子會出現選項,選一是進化為哺乳類,二是保持目前的形態。這算是遊戲中最重要的選擇,以後再沒有轉變形態的機會了。

進化為哺乳類新多出了踢攻擊,食草類哺乳類的踢攻擊力還是不錯的,不過因為是用後腿踢,所以使前要先轉身。開始時猿類軀幹是不能選擇的,必須要進化為貓型顎和兔軀幹才能進化,猿類再進化三次就可以變成人類。不過直立哺乳類再第五章就不能進化成人魚了,想看人魚就先趴著吧。

一直前進到分支點,上面的分支暫時被冰壁擋著,繼續向下會返回地圖上方。要連戰猛獁象三兄弟,然後就可以去空中的鳥人城了。BOSS鳥人法師的攻擊範圍比較大,近身強攻就可以了。勝利後冰壁消失了,裡面遇到雪人一家,打敗大雪人後小雪人哭著跑了。

https://strategywiki.org/wiki/File:EVO_Birdfort_map.svg

第五章:哺乳類時代

進化在上一章已經決定了,開始是單路線,也什麼需要注意的。一直來到地圖右下的高山,爬到山頂,有一個EVO.P 5000的藍水晶。此時提取以前記錄的飛龍形態或者是還保持著鳥類形態,一直向上飛穿過雲層可以發現外星人的UFO,UFO不會攻擊,擊墜UFO可以看到外星人的劇情。

進入山洞,裡面的猴子很煩人,攻擊方式多且很靈活。最裡面會見到上一章的小雪人,已經長大了,還是挺厲害的,不過最後也敵不過我們,一家團聚去了。到地圖最下方進入水下,如果還保持四足哺乳類形態的話,則可以選擇四肢的進化,然後再進化三次,就可以變成人魚了。人魚的咬攻擊範圍很小,還是利用本身的高速度多用身體撞擊為好。回到傳送巨石陣,在石陣中央按B就可以到達另一個石陣

最後的山洞外有一個看門的原始人,如果體重輕一擊就會被他打出版面,最好先引他出招露出破綻再攻擊。山洞深處就是最終BOSS,BOSS本身沒什麼能力,但受到攻擊會放出體內的內核,一共有八個內核,所以這是一場持久戰,慢慢打吧。

THE END

Bubble Up and Go!

Posted on January 27, 2025January 28, 2025 by admin

Bubble Up and Go, aka B.U.G., is a single-player Start-of-2025-Empowering game. It has been a rocky start this year, negativities are around us! In this simulation, players have to navigate through negativities, learn to keep a safe distance to toxic influences, and purify them with positive energy! Hope all of us have a great rest of 2025. Bubble up and let’s go already!

This year’s them is bubble.

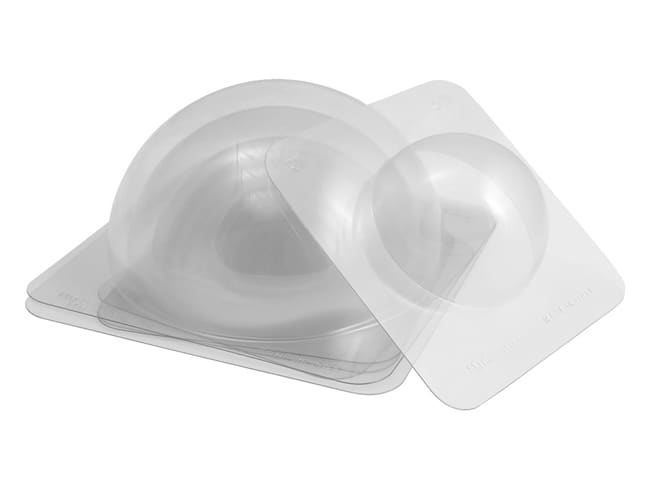
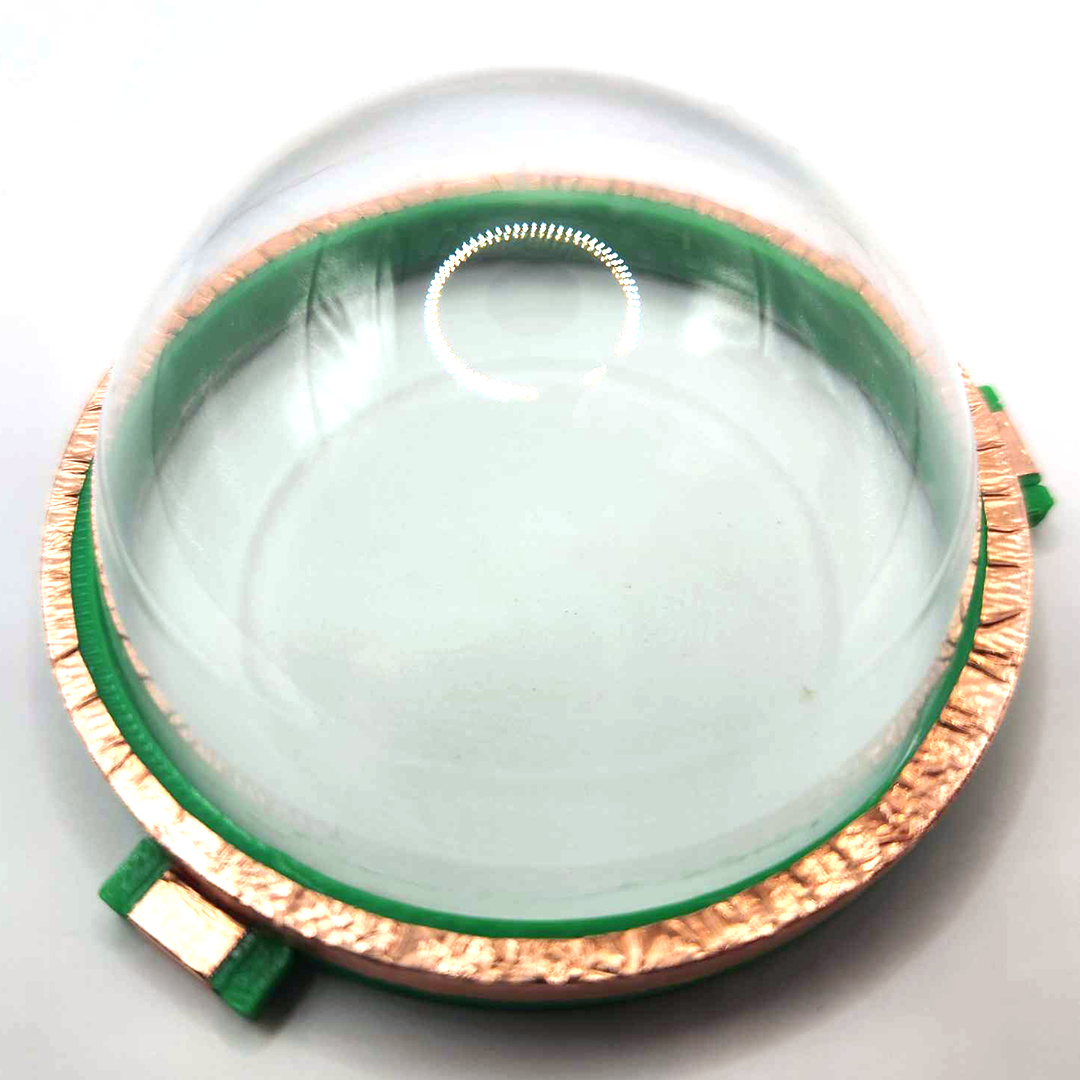
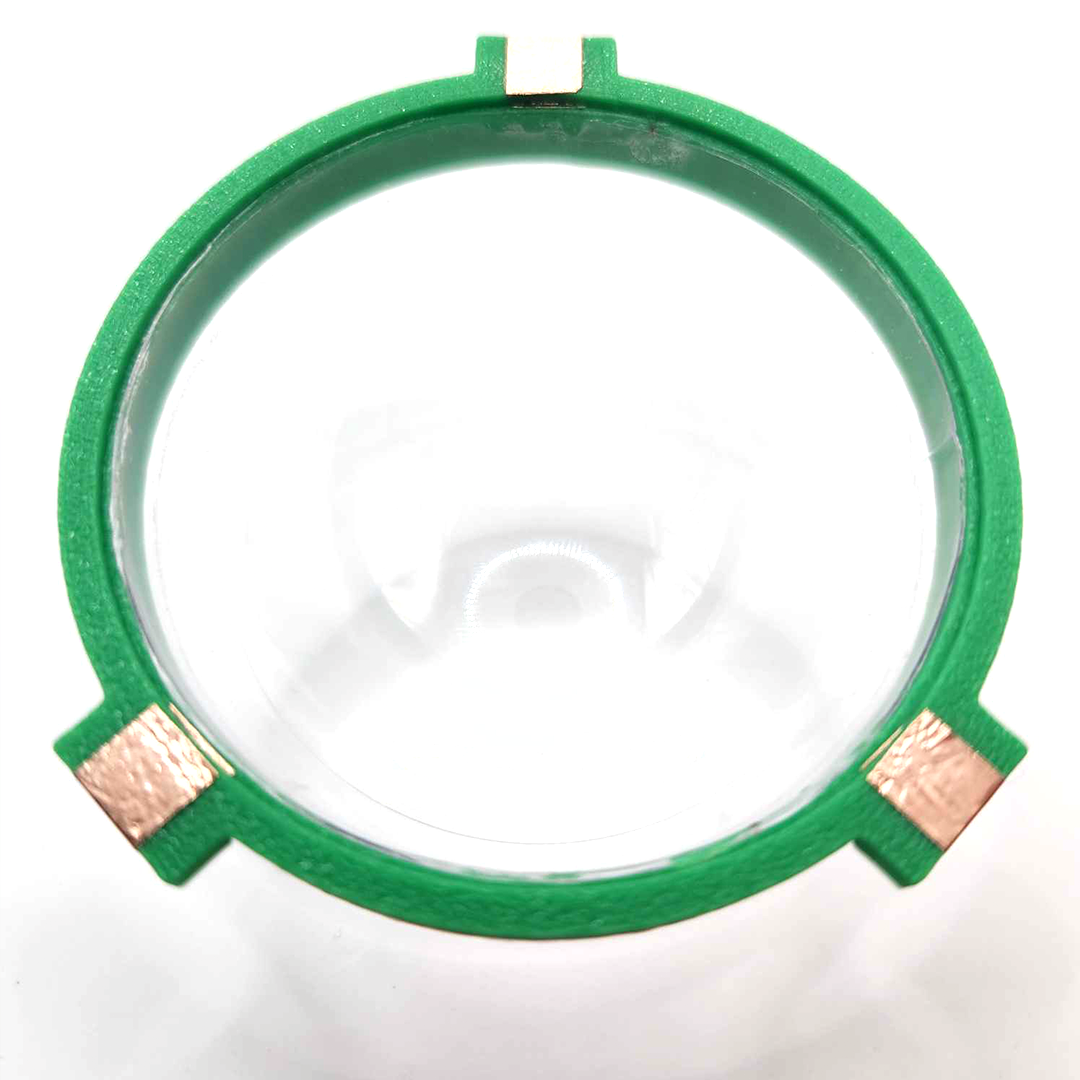
How convenient! Before attending the global game jam today at our site, I stopped by Michael’s. I went there to see if I could find a cheap snow globe kit for a summer project that I was working on. There were a few interesting things I found there but they were either two big or too fragile for the project. I eventually decided to go with a clear plastic 3-Part Mold that was on sale. It has the right size and super cheap. The universe was aligned that afternoon because when I arrived, I found out the theme for this year’s Global Game Jam was, guess what!?, bubble!

Okay, I have to make something to answer the calling!

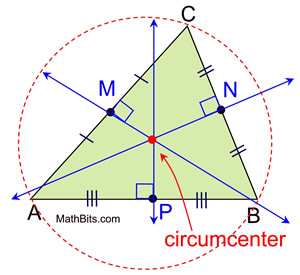
I also relearned math in the process (in English!), for example, in a triangle, the line that goes from one angle to the middle of the line between two other angles is called a median. The other one I relearned was the circumcenter of a triangle which is the point where the triangle’s three perpendicular bisectors meet. It’s also the center of the circle that passes through all three vertices of the triangle, called the circumcircle.

Translating them into Visual Scripting was also very fun. I had done a similar experiment with C# in 2013 when those tablet toys were popular. The relation between the 3 angles is different for different triangles and, therefore in theory, can be used as identifier. The debugging is a little tricky because the multitouch feature can’t be tested directly inside of Unity editor.

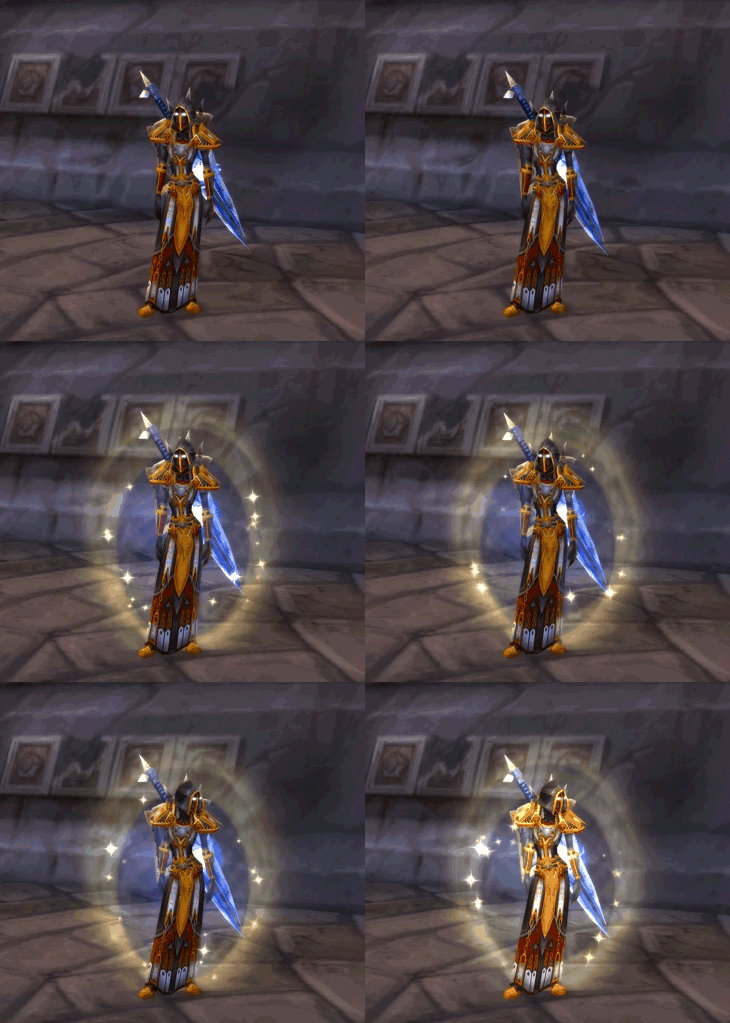
With the bubbly controller in mind, the first few things that came to me was protection, activation, attraction and repeal. This probably came from my memory of playing WoW. Bubble up = 0 harm.

Here are an initial set of rules to situate the gameplay and most of them are based on the felt.

  • the player (soul unit) can attract good energies and repeal negative ones
  • negative energies (disaster clusters) will randomly pop up in proximity to the player
  • bullets with positive energy will shoot out of the front of the soul unit to repeal any disaster cluster they hit.
  • a successful hit with a bullet will generate points and enlarge the soul unity over time
  • when points reach a threshold, the player can release a map attack that whips out all the disaster clusters nearby.

Global Game Jam 2025: https://globalgamejam.org/group/11573/games

Over the course this weekend, 21 students, 1 faculty, and 1 alum (my one and only Bryce!) made 7 games in total, super awesome!

We played each other’s games at the end, all of my overthinking and tech-savvy game mechanics were immediately humbled by other players. For example, the bubble controller can also control the rotation of the soul unit. I wanted to use the rotation for something so I added a mechanic which shoots out a energy bullet from the front to repeal disaster clusters. It was not very intuitive, and players had a hard figure out what’s going on there including where the front is. I should of just let the soul unit do what bubble do the best which is to bounce with other disaster clusters directly. I missed frequent playtesting so much!

I am planning to add a few more things:

  • Soul unit can be hurt by nearby clusters – decrease points?
  • Bounce instead of shooting energy?
  • a better theme

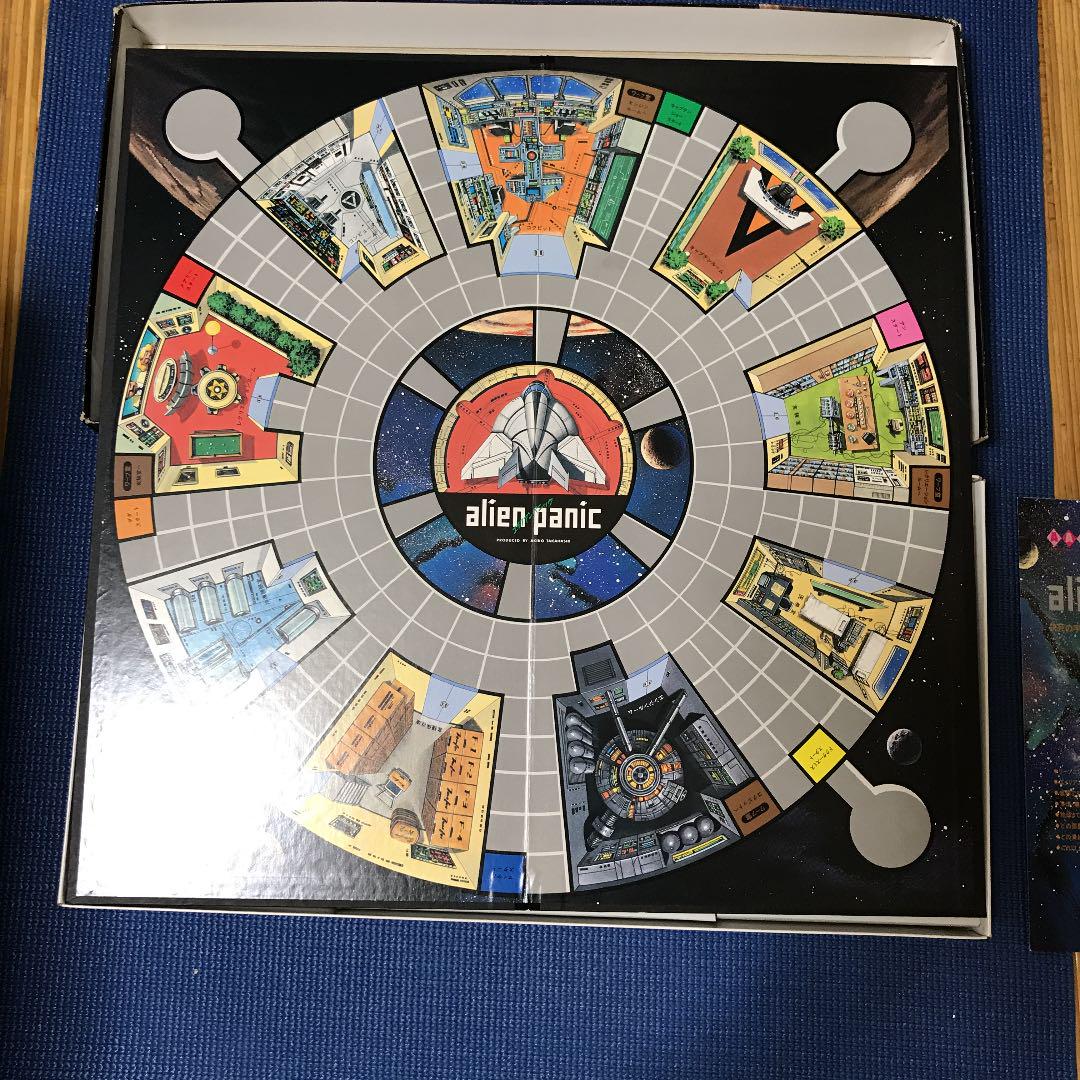
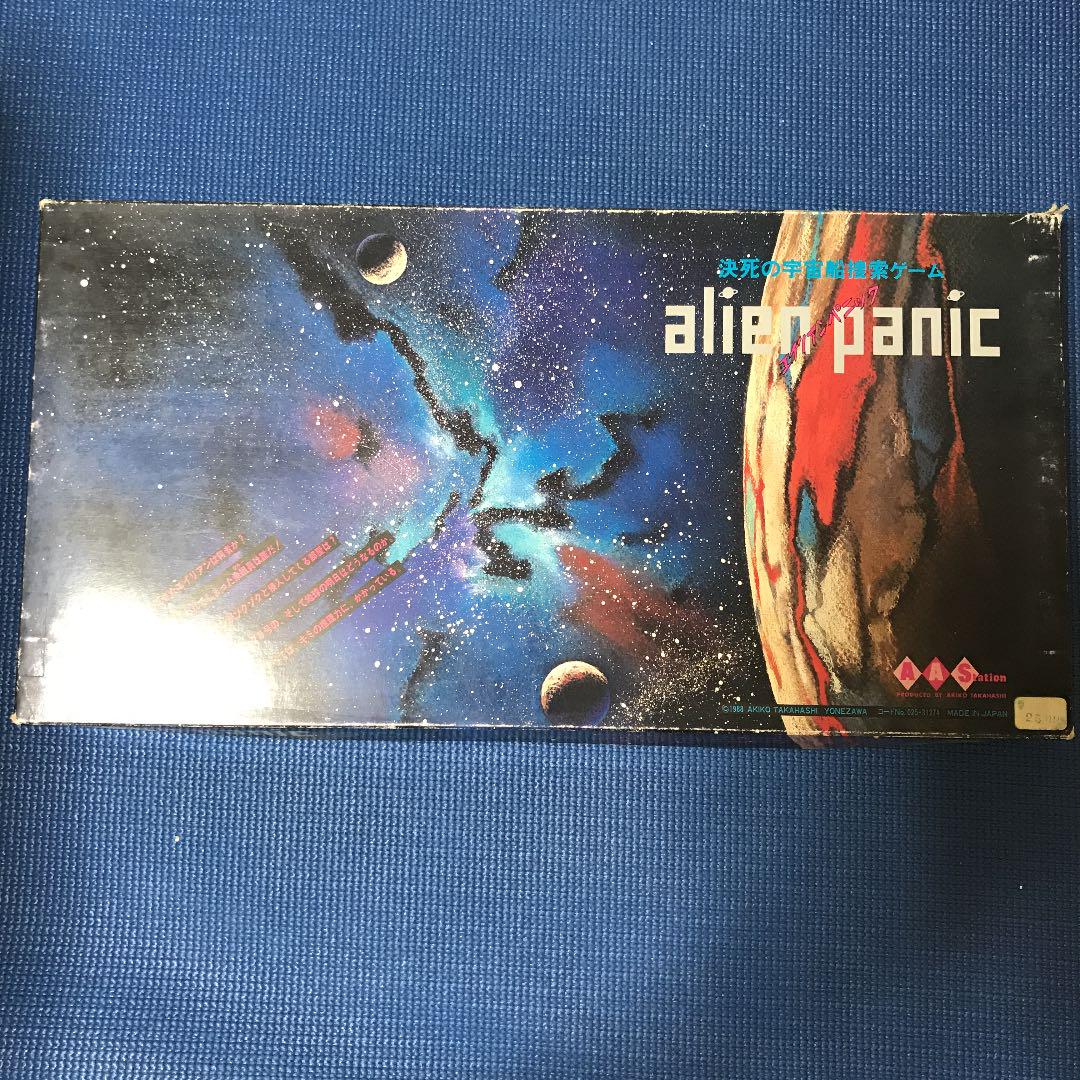
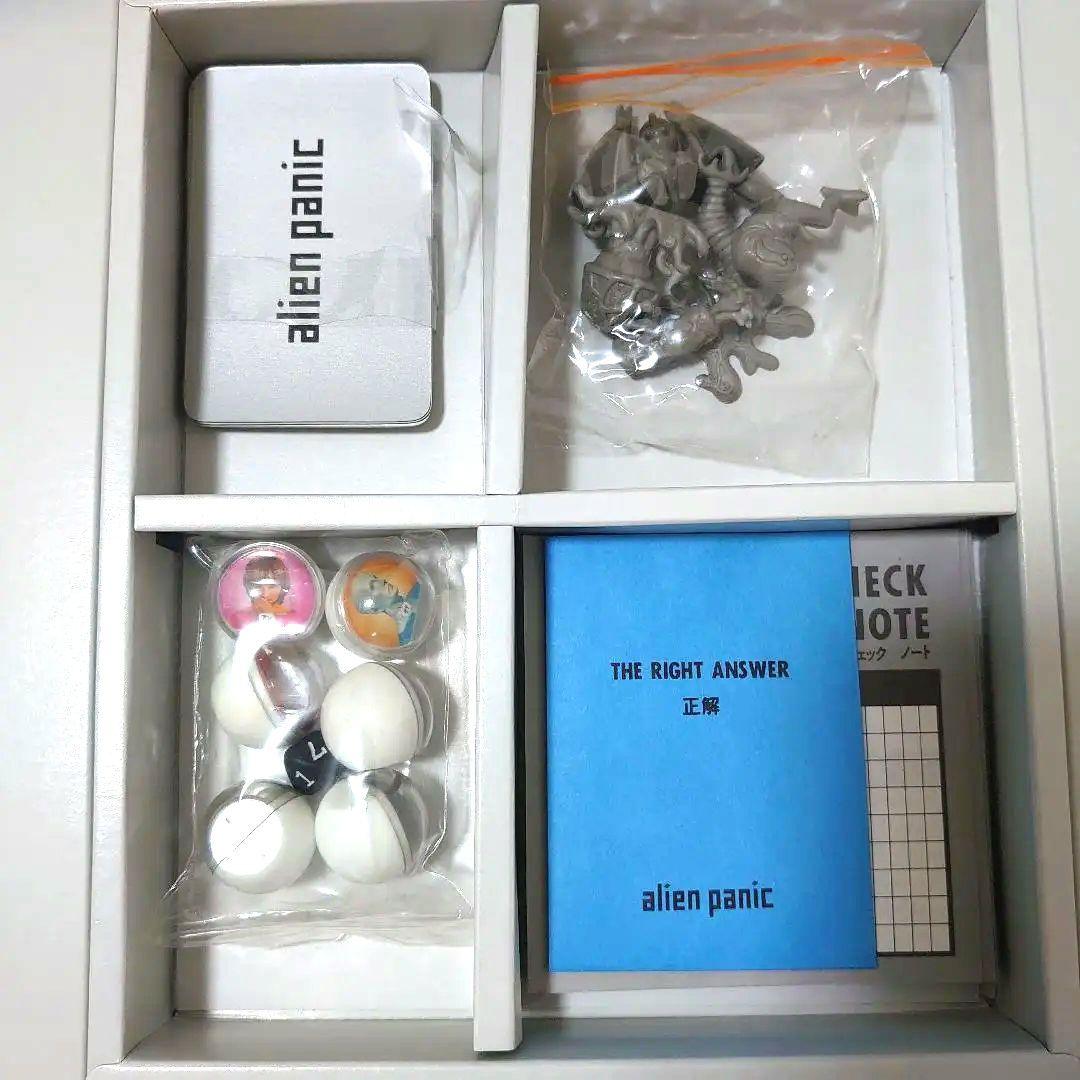
エイリアンパニック alien panic

Posted on January 3, 2025January 3, 2025 by admin

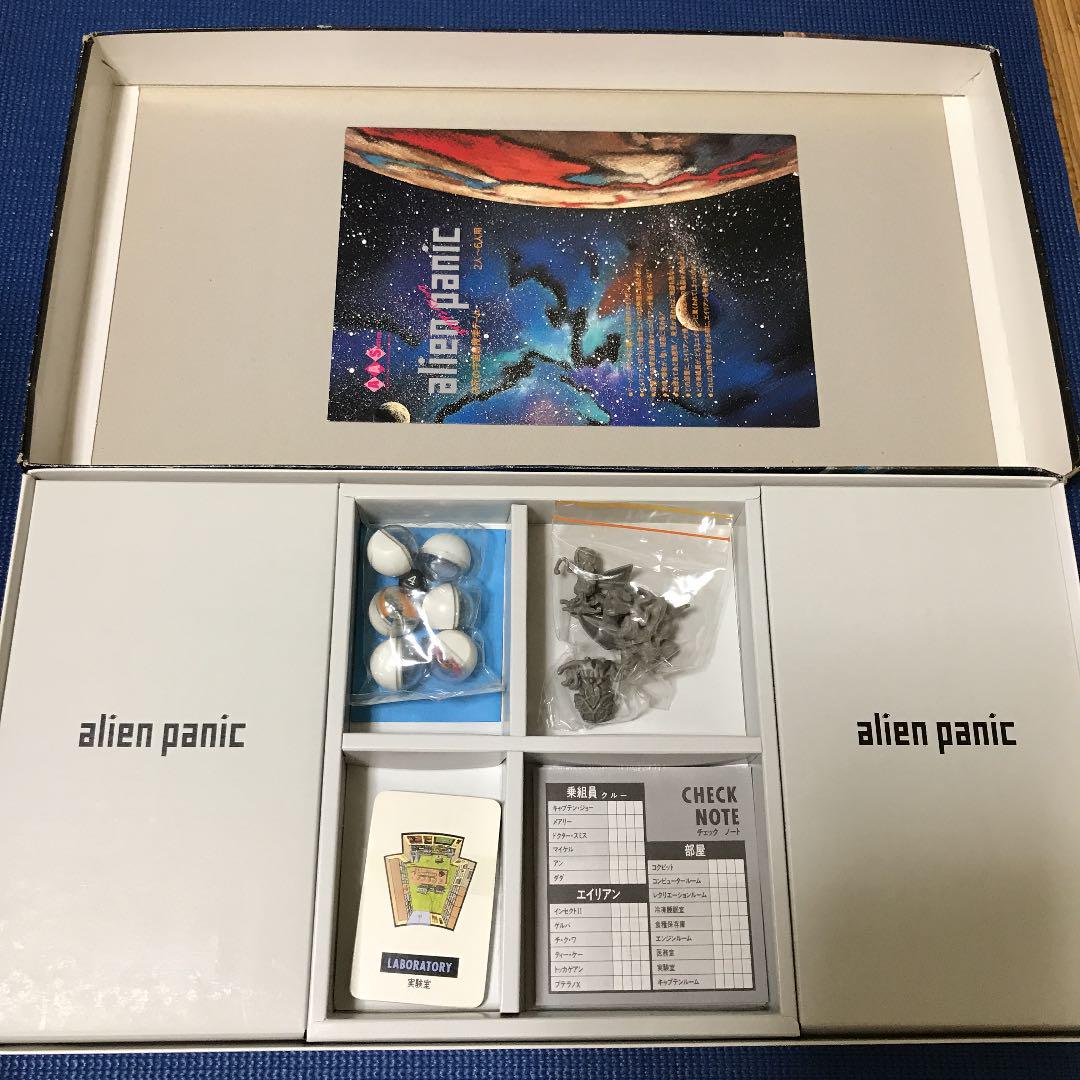
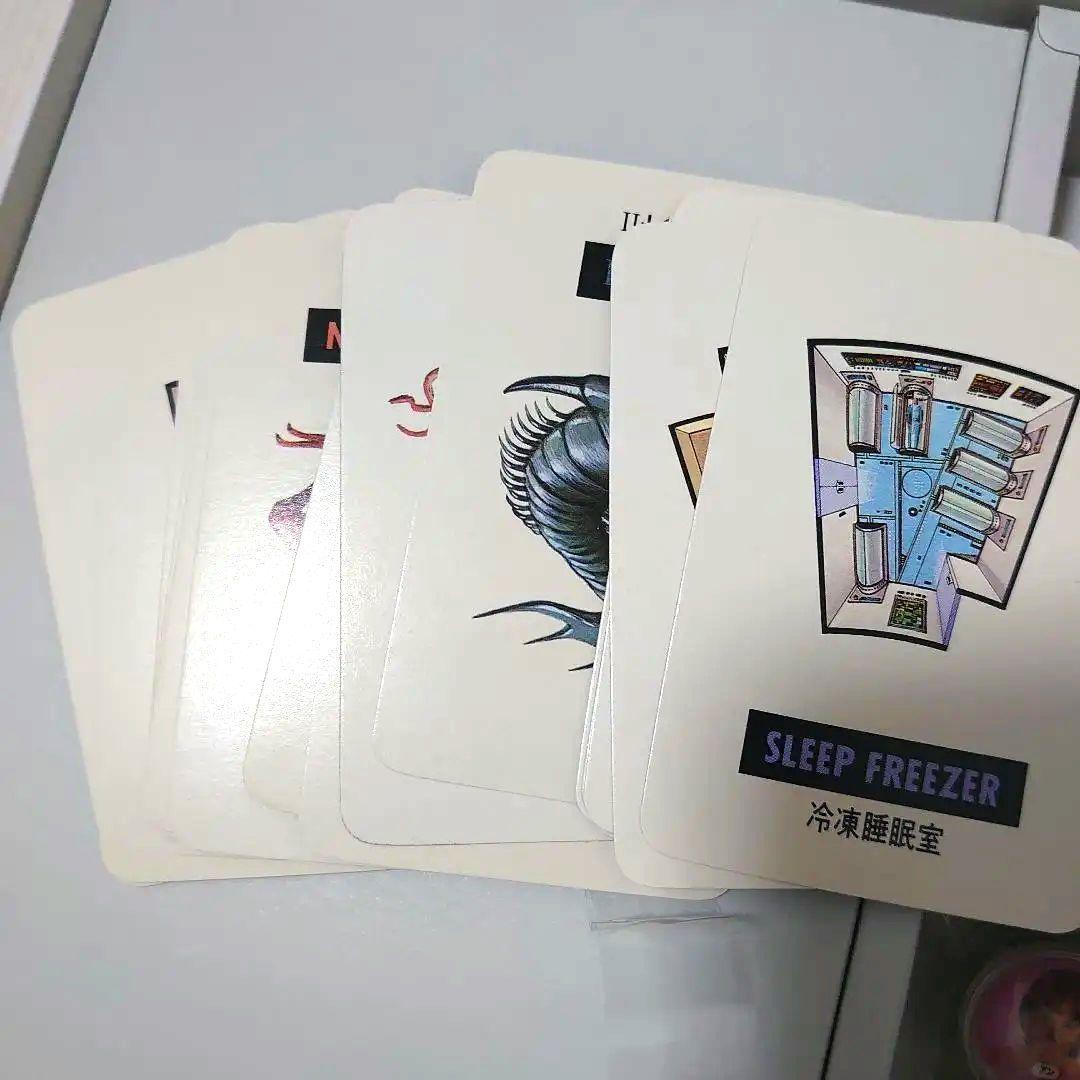
By A.A. Station, 1983, it is a Clue-like board game. I love the game board design and all the illustrations.

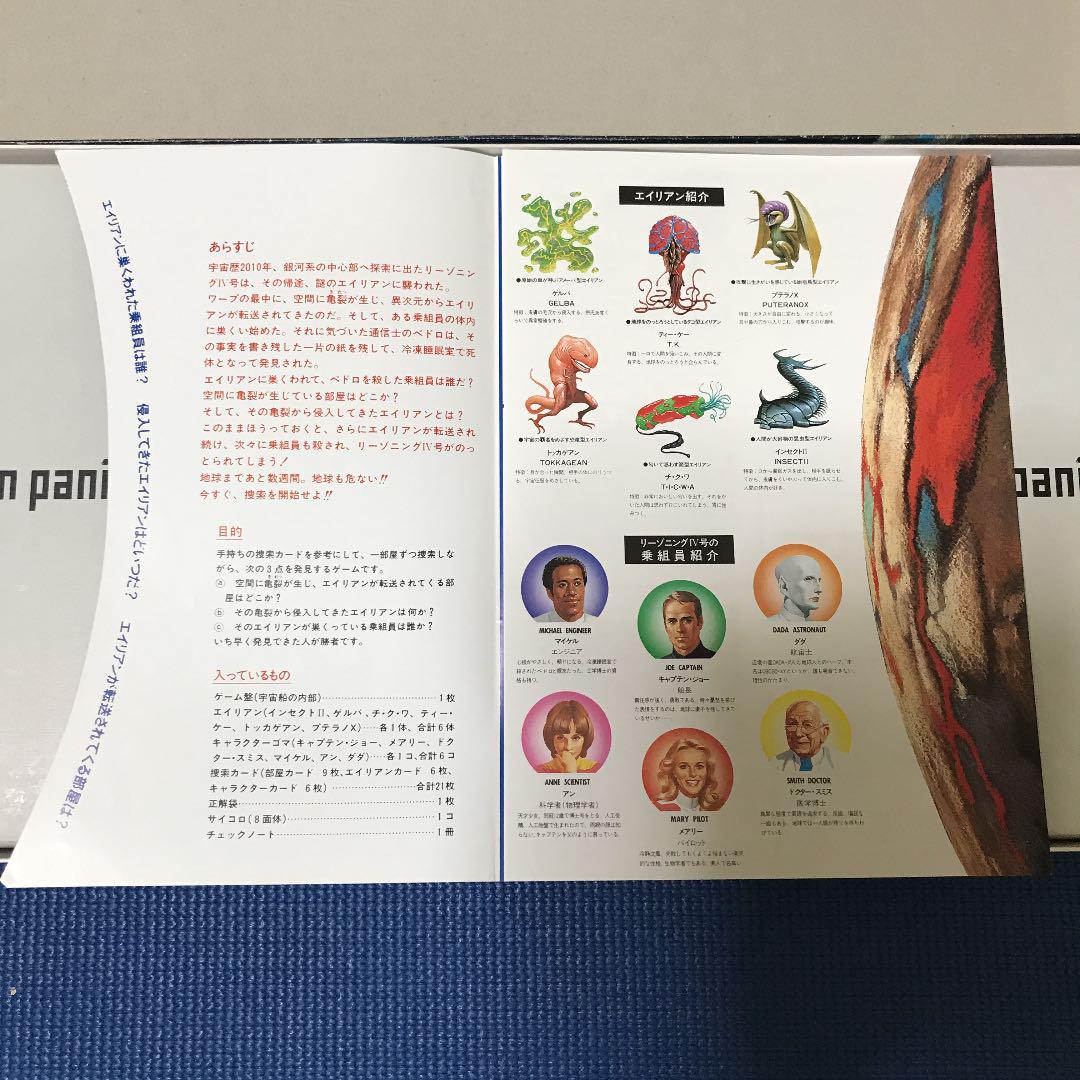
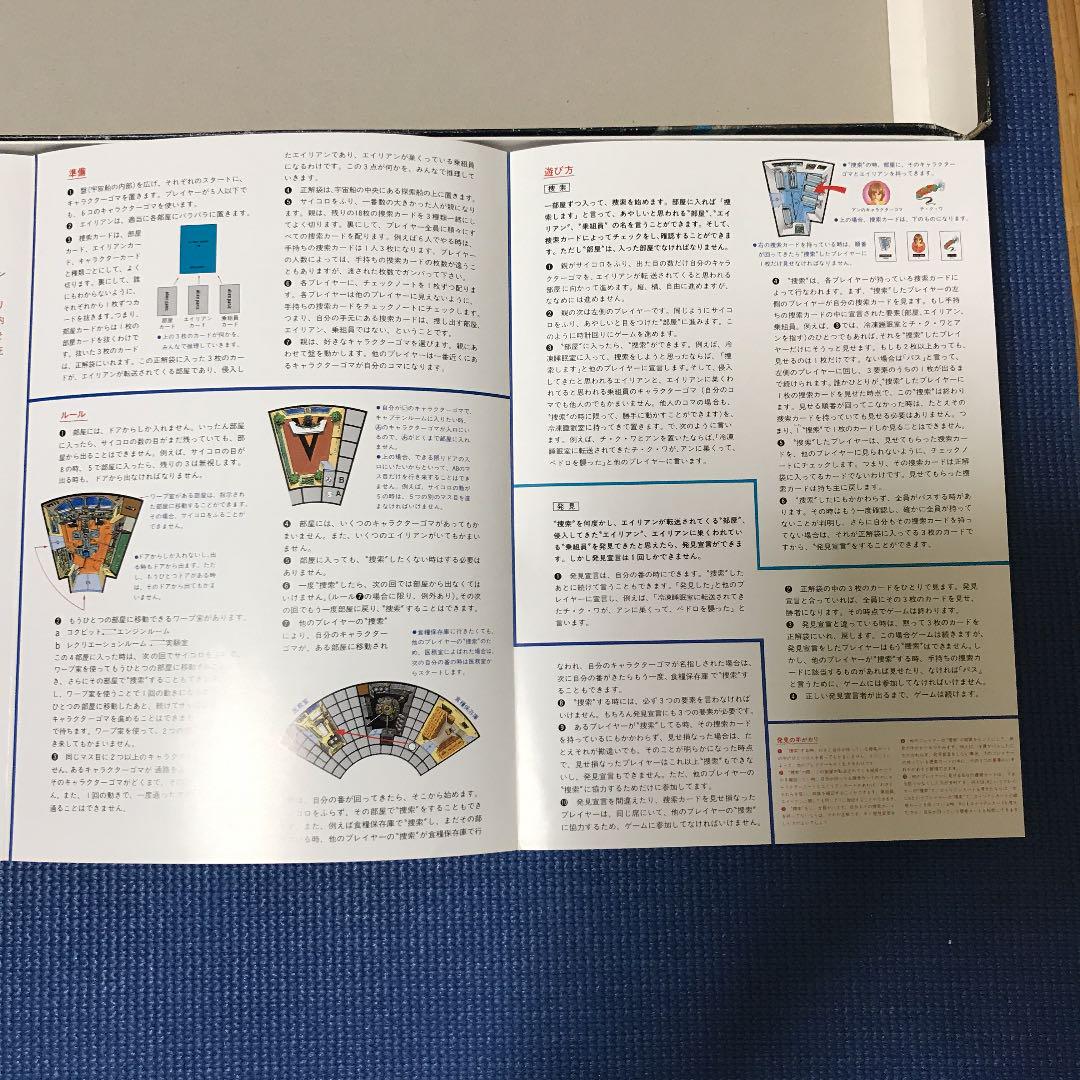
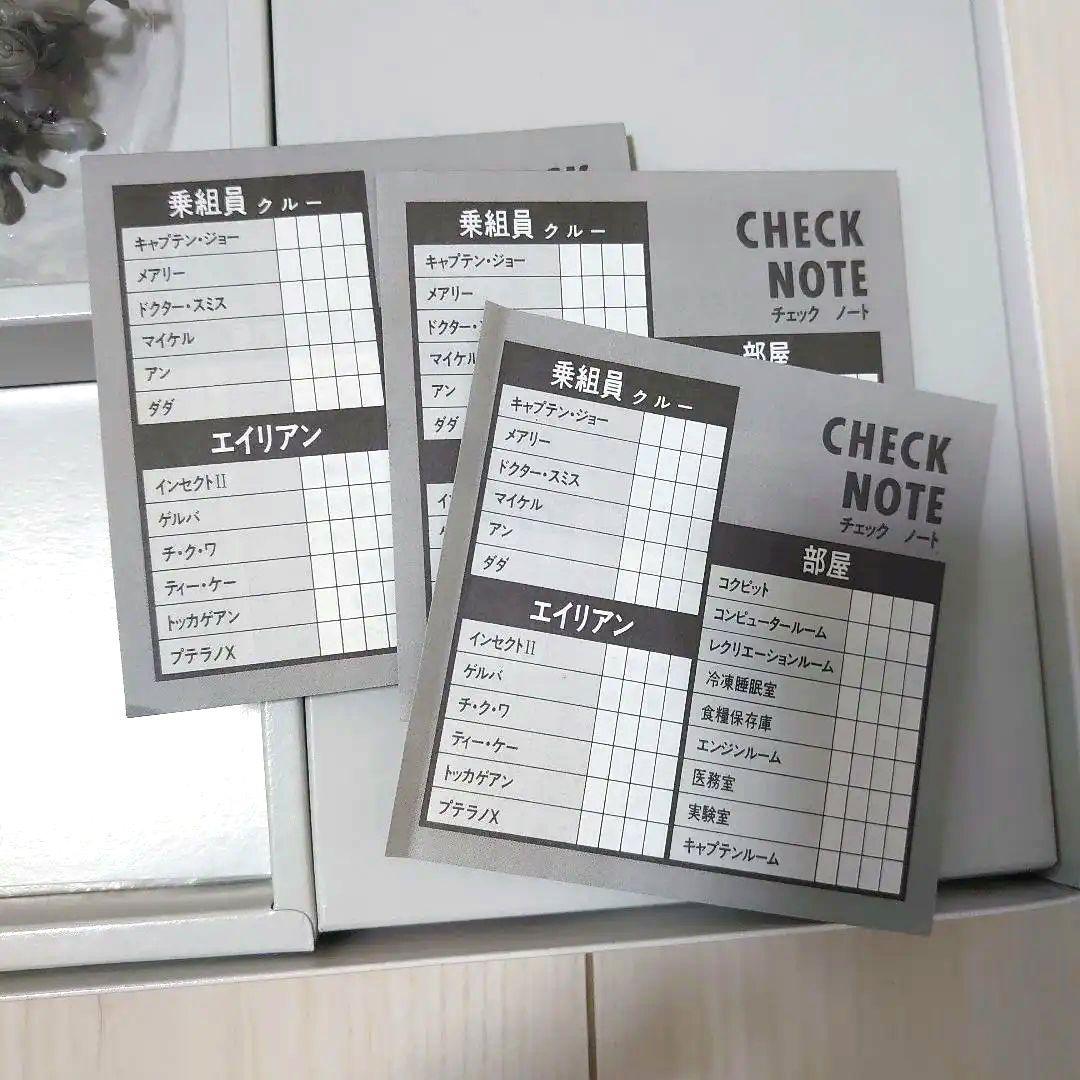
The goal of the game is to use your search cards to search each room and discover the following three things:

– Which room has a rift appeared for aliens to come through?
– What kind of alien invaded through the rift?
– Who is the crew member infested with aliens?

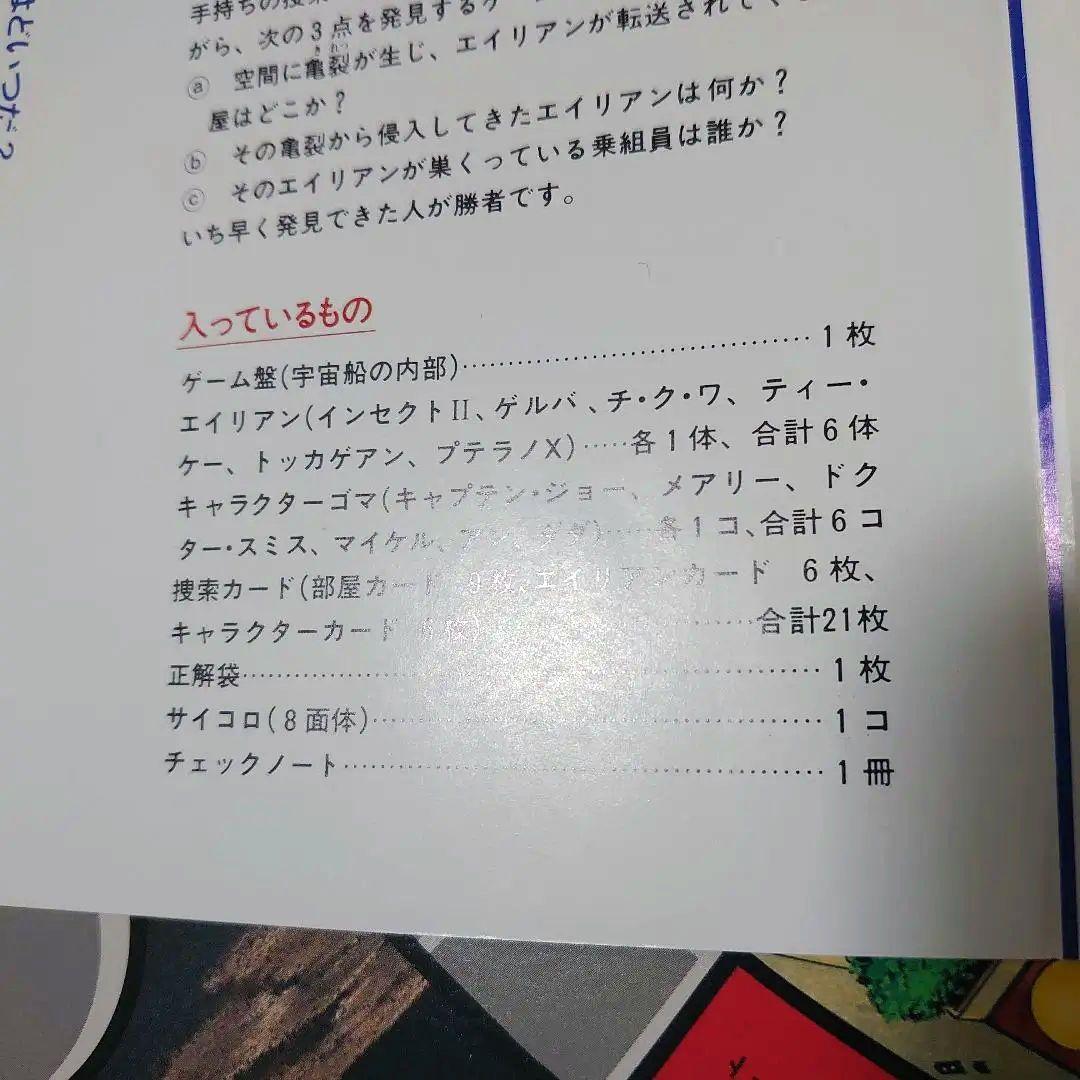
There are 21 search cards in total — 9 room cards, 6 alien cards, and 6 crew cards
The first person to find it is the winner.

I was very excited to find out about this Japanese version while researching other board games. BTW, the other space themed Clue that I love is Clue: Star Wars (2016).

Also, Akiko Takahashi, a.k.a. A.A. Station, is an interesting board game designer (source):

Yonezawa・ヨネザワ – Like many Japanese board and card game publishers in the Shōwa era, Yonezawa was best known as a toy manufacturer. They had dabbled in games since at least the 1970s but jumped headlong into game publishing with the パーティールーム21 (Party Room 21) series, which ranged from card and board games to Game Boy carts and console peripherals. Yonezawa kicked off Party Room 21 in 1986, targeting college-aged adults with a series of irreverent, rules-light party games. The series, which comprised more than 75 titles, continued at a steady clip until 1994, when Yonezawa was acquired by Sega. Party Room’s most prolific designer was 高橋章子 (Akiko Takahashi), former editor of Big House magazine. Using the pen name A.A. Station, she designed more than twenty games from 1986 to 1990. Many of her titles, like the popular Tanba board game, were subversive and satirical takes on traditional Japanese culture, customs, and games.

Board Games with a Vinyl Record

Posted on January 3, 2025January 3, 2025 by admin

Comes with a vinyl record and built-in record player:
Voice of the Mummy (1971)
Séance (1972)
Comes with a vinyl record only:
エポック社 モノポリー (Monopoly 1973)
エポック社 金田一耕助の推理ゲーム (Kindaichi Kosuke no Suiri Game 1980)

Board games with Clay or Play-Doh

Posted on January 3, 2025January 3, 2025 by admin

I am not particular interested in the sculpting nature of clay or Play-Doh so that rules out a lot of clay charade-ish board games like Clay-O-Rama (1987), Sculptivity (1987), Clay to Win (1988), Claymania (1993), Rapidough (1994), Barbarossa (1988), Cluzzle (2004), Smugglers (2016), Cranium Sculpt-It (2017), Sculptapalooza (2018) or any of the Cranium games.

I am more interested in the gameplays that involves molds such as Hawaiian Punch (1978), The Grape Escape (1992), Splat! (1990), The Incredible Hulk Smash (Godzilla Squish-it board game) (1998), and why I am looking into games with clay or Play-Doh, Necromolds: Monster Battles (2021).

Capsule (RFID) reader

Posted on November 8, 2024November 9, 2024 by admin

After many years, I am coming back to get 3 RFID readers to work together again. Completely forgot how I did it , I started with Software serial. I couldn’t get two software serial ports to work. After reading the notes I left for myself in this post (https://www.ivadream.com/kyle/red/?p=4344). I found out from myself that in order to get 3 RFID readers working on 1 Arduino, I had to use 1 hardware serial, 1 software serial, and 1 altsoftware serial. It worked like charm!

Posts navigation

Older posts

Recent Posts

  • 8bitworkshop Notes – Include binary files
  • 8bitworkshop Notes – Display an external Nametable V1
  • 8bitworkshop Notes – Player Running and Jumping
  • Native Web Speech API
  • AI: You are _____ correct.

Archives

Proudly powered by WordPress | Theme: MiniZen by Martin Stehle.