Skip to content

A PLAY EXPERIENCE MAKER'S WORK LOG FOR FUTURE SELF©2001 – 2023 Kyle Li 李肅綱 All Rights Reserved.

Author: Kyle Li

PLAYTECH SPRING 2013

Posted on April 13, 2013 by Kyle Li

Our awesome USB bracelet earn-away!

This semester we’ve stop the t-shirt tradition and embarked a brand new one with our awesome USB bracelet earn-away! All the registered presenters will be given a bracelet for their games well-made. Participants, on the other hand, will have to earn the bracelet by testing lots of fun games with us. We distributed these bracelet through MOUSE’s awesome metagame over the event, youth participants came up with some brilliant game ideas and feedback!

playtech

submit your application(s) here: goo.gl/3sTte


logo designed by Jessica Walker and Daniel Q2L


Touchcode is so simple it is awesome-ish

Posted on April 8, 2013January 27, 2025 by Kyle Li

I have been playing with Nukotoys’s Wildland and Monsterology recently, not for the app itself but for their touchcode embedded collectable cards. From the software point of view, reading printed touchcode is exactly the same as reading those iPad enabled action figures, it matches the rigid body formed by the touch points with a pre-designed data set. However, from the physical interface and user experience point of view, touchcode embedded cards are superior than those action figures. First of all, presentation wise, these cards don’t require bulky add-on bases to be read into the tablet. The conducted points are invisible to bare eyes but loud and clear to the touch screen. It is read into the app with touch points so it doesn’t require user to use the cameras nor flip their tablet. Touchcode embedded cards are perfect play pieces that bridge virtual world and reality, it is so magical!

Touchcode technology does have its weakness. Firstly, it is hard to apply pressure equally on every invisible conductive point so it works better for tapping (static) and it is not reliable at all for dragging (motion). Secondly, in order to read the conductive points in real time and because of only a few conductive points can be placed on a card without interfering each other, the rigid body is usually simple and made with a few points. This will cause one rigid body to be mistaken for another. It happens to me many times in both Animal Planet and Monsterology that the card was mistaken for a different one.

Reverse Engineering:
The first thing is to identify that this touchcode technology is truly made of touch points. I wrote a quick app that allows me to register multitouch points if there are any on the cards. It turns there are and they are forming different rigid body. I have shown these cards various friends and students, and as a collective effort, sadly few cards were hurt during the processing, we found out the card is multi-layered and one of them is the conductive layer.

20130412_154140
result
_4

Lytro, almost what I wanted.

Posted on April 4, 2013 by Kyle Li

lytro
Just got my Lytro today. Originally, I wanted to make surreal looking games with the focus-shifting mechanism that this awesome camera privides. After poking around more, I have mix feelings about this camera toy that I was so excited about. The biggest downer is they decide to go for the instagram model and ignore the fact that people who bought the camera are more interested in the technology  itself than purely taking square pictures with a file extension no one knows about. There is a potential opportunity to build a community of creative makers around this technology and, if intended, benefit from it.

Dorkshop 2013: Dynamic Level Management with Google Drive and Unity 3D!

Posted on March 15, 2013March 13, 2021 by Kyle Li

Resources & Requirements:

  • Internet connection
  • a Google drive account
  • Unity 4: I will be using this game creation tool for the dorkshop, but the backend will work with other web players such as FLASH. Yes, FLASH rules. (FLASH no more.)
  • jQuery javascript Backend: The code is partially based on Mike Mikay’s google-spreadsheet-javascript example. Only needed for the Unity 3D Web Player.
  • in-shop sample code: a Unity package.
  • notepad
  • some webspace.

Overview:

external spreadsheet

something, something level design
mini-game jam [live demo]

[Still compiling notes from the Dorkshop]

[ Part 1 ] Create and publish a Google spreadsheet
1. All we need is a Google spreadsheet, adding a form is just more fun and help us collecting data more easily.
2. Once the spreadsheet is up, publish it to the web.
3. The default output format is Web Page, change it to CSV (Comma-separated values)
4. Copy the link to the CSV file and save it for later.

[ Part 2 ] Unity 3D platformer in a flash:
I. Scene setup:
1. Go to Main Camera’s Inspector window. Change Projection to Orthographic, and Size to 4.0. (Main Camera and other newly created GameObjects can be found in the Hierarchy window.)
2. Create a Cube from Menu/GameObject/Create Other/, and rename it to “Player” in the Hierarchy window.
3. In the Inspector window, change Player’s Position to (-2, 2, 0) and Scale to (1, 1, 1).
4. In the same window, find the Box Collider component and remove it with the Remove Component option.
5. Create another Cube and named it “Platform”. In the Inspector window, change its Position to (0, -4, 0) and Scale to (8, 8, 3).

II. Import package files:
1. In the Project window, right-click on the Assets folder and go to Import Package/Character Control.
2. A pop-up window will show up, import PlatformInputController.js and CharacterMotor.js two files only.
3. Go back to the Player’s Inspector window. At the bottom of the window, click [Add Component]. In the drop-down menu, go to Character and add PlatformInputController.js and CharacterMotor.js to Player.
4. Now click the play button on the top. On the keyboard, press A to move left, D to move right, and space bar to jump. It should work like a magic!

You might not notice this due to the orthographic view, but the Player is still moving 3 dimensionally and will eventually roam off the platform on the Z-axis. To fix that, a few lines of code needed to be added to the CharacterMotor.js to eliminate the motion on the Z-axis.

5. Open CharacterMorot.js in MonoDevelop or other editors you prefer. Do a search (Command + f ) on “return velocity;” and replace both lines to:

return new Vector3(velocity.x, velocity.y, 0.0f);

[ Part 3 ] Data parsing
1. Import the Unity package file downloaded earlier. (Ok to all overwrites)
2. Create an empty GameObject and name it “lvlManager”
3. In the scripts folder under your Asset, add javaListener.js and javaParser.cs two scripts to the lvlManager.
4. Keep lvlManager opened in the Inspector window, go to the prefabs folder under your Asset, assign Platform and Marquee to javaParser’s Platform prefab and Text prefab.
5. The set-up we just did was designed to work with a web player, and you won’t be able to test it by the Unity itself.
6. Check the build type: go to file/Build Setting. Make sure the current build is on the Web Player. If not, select the Web Player and click on the build button.
7. Drag the filename.unity3d file from your build folder to our jQuery Javascript backend folder (download earlier and unzipped). Rename your file to dorkshop.unity3d for the purpose of testing (and awesome too.)

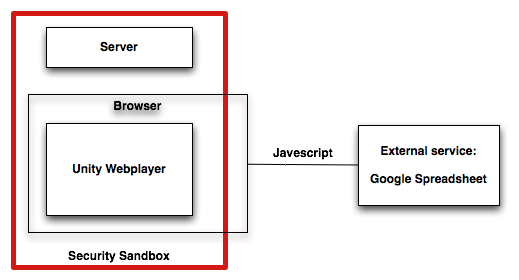
[ Part 4 ] Javascript
Find the following code block in the dorkshopEmbedded.html and replace the highlighted values with yours:

Replace Value 1 = link your Google CSV file
Replace Value 2 = The name of the GameObject in the Hierarchy window that has the javaListener script attached.

function myFunction()
{
     localStorage.clear();
     var sample_url = "Replace Value 1";
     var url_parameter = document.location.search.split(/\?url=/)[1]
     var url = url_parameter || sample_url;
     var googleSpreadsheet = new GoogleSpreadsheet();
     googleSpreadsheet.url(url);
     googleSpreadsheet.save();
     googleSpreadsheet.load(function(result) {u.getUnity().SendMessage("Replace Value 2", "GiveID", cdata);
                                              url = result.data; $('#results').html(JSON.stringify(result.data).replace(/,/g,",\n"));});
}

[ Part 5 ] test it All together
Now save the HTML file and open it in a browser. After the unity web player is fully loaded, click on the “Update level” button. (ノ◕ヮ◕)ノ*:・゚✧*:・゚✧ Magic moment! If not, make sure all the steps are done correctly, check for typos and casing. Good luck! ( ´ ▽ ` )ノ

[ Update ] 4/30/2014 The new Google drive, the option to publish .csv is no longer visible, however, the function is still there. Go to the share screen of your spreadsheet and copy the key and replace it in the following link and you are all set!

CSV file : https://docs.google.com/spreadsheets/d//export?format=csv

Gozilla Paper Holder ゴジラ ペーパーホルダー

Posted on March 8, 2013 by Kyle Li

IMG_5925

We finally bought this vintage Godzilla toilet paper holder (ゴジラ ペーパーホルダー) from the comic shop on 33th street today. I have seen this used bathroom accessory in the same shop long time ago, it was the center piece in a glass shelf right next to the cashier. However, it wasn’t the most desired toy in the shop because the label on the box claimed the sound was broken. A toilet paper holder that makes Godzilla sound? It got the physical-computing side of me all fired up.

After battling my impulsive buying spree for a brief moment, I decided to do some research first, mostly to make sure that I have a clear idea to repair the broken sound and bring it back to its full glory. Based on my research, the one I saw is the original Godzilla paper holder made in 1988. The electronics used to play the sound is in fact a motorized mini vinyl record player! There is a newer version came out few years later with IC chip instead of the record player. I was really impressed by this paper holder because it has some extraordinary guts inside but just like a million other toys and games that I follow, all the findings went into the “Wanted folder” and I forgot about it.

Today was our semi annual dental check-up and the hospital was just cross the street from the comic shop. We decided to give it a shot. It wasn’t in the glass  shelf. Somehow I had this gut feeling that she might be moved to the back shelf and that is where we found it! We asked to check the condition of the actual object.  The plastic and metal are in mint condition. We bought it right away and the project had started!

The first thing I did was to put the battery in and test it. The sound sure didn’t work but I did hear some motor sound. That is always a good sign because old motorized toys usually have rusty gears with enormous frictions, so cleaning and oiling will fix the problem. I shook gently and the sound started to come out but in broken pieces. That was an even better sign, especially when it is a motorized mechanism, somethings must be displaced inside.

IMG_5900

IMG_5897_cap

The sound module is made of two parts, one is the motorized player and the other is a speaker cap that covers up the playhead and the vinyl record. When speaker cap is closed, there is a rubber film underneath the speaker that presses against the playhead needle, and that is how the sound comes out.  When I opened the Godzilla, I realized that the speaker cap had fallen off. That was why the sound was inconsistent, because the rubber film barely touched the playhead. I put them back together carefully, and it works again! As a physical computer enthusiast, finding beautiful mechanism in the most unexpected places is exciting and rewarding. I read some Japanese blogs about the record player but there were no pictures to be found. Seeing it for the first time, it is really beautifully made, and really tiny.

I took everything apart and cleaned them dearly. There are traces of three thick sponge strip taped on the spindle but the original sponges are already detelerated over time. These sponges play an important role for this paper holder to work. The switch to trigger the sound is in the left arm and in order to pull the switch, the spindle has to roll. Those sponges create friction between the spindle and the paper roll so that when people pull the paper, the rotating spindle will pull the switch.

IMG_5885
IMG_5907

IMG_5917
IMG_5918

Mini Game Jam!

Posted on March 7, 2013February 16, 2021 by Kyle Li

Screen shot 2013-03-15 at 12.40.40 AM
The plan below is an overall view of the map in this demo game. As you can see it is empty between the lower-left platform and the upper-right platform. Use the Google Form below to create a platform for the game. When you are done submitting the form, launch the game below, once the web player is fully loaded, click the “Update level” button underneath the web player. To update again, just refresh the page and the button will show up again. CAUTIONS: The level creation here is a collaborative effort, everyone’s contribution will show up all in 1 game.

[CAUTION] Please don’t enter “,” in the text field.

== Launch the demo game v1.0! ==

lvelmap

Change Log:
[03-19-2013] Update Google form, change checkbox to multiple choice for Ramiro.

something, something level design

Posted on March 6, 2013February 16, 2021 by Kyle Li

basic guidelines:

1. Understand the genre
In our demo game, the main character “cube” can only move left or right and jump. The character doesn’t grow stronger over time, doesn’t level up, and doesn’t have any massive destructive weapons available in-game. There are tons of game characters like ours throughout the history of video games. In fact, the cube is not the weakest, Spelunker is – click the image to find out different ways the main character in Spelunker can die. However, from the point of view of play experience, the weaker it gets, the greater the satisfaction is after beating a difficult level.

Cabbage Patch Kids - Adventure in the Park
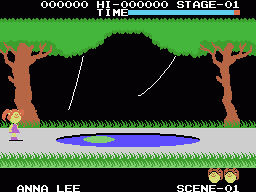
Cabbage patch kids MSX (83′)
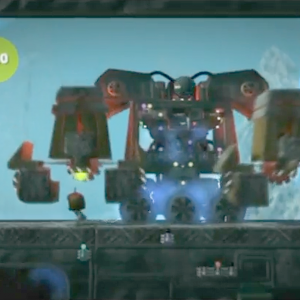
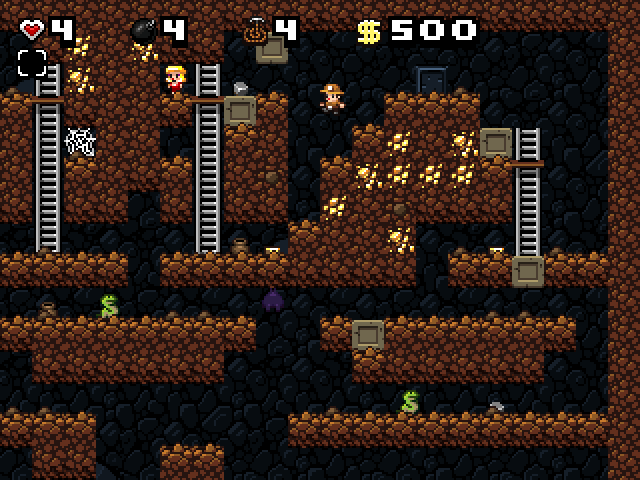
spel1Spelunker (83′)
lbp1
Little Big Planet 1 (08′)
spelunky-pc-screenSpelunky (08′)
Week2.009
Week2.011

2. Be Experimental
Understand every one of your game elements and different ways they can work together to create new gameplays, build game levels for those elements and combos to thrive. Check out this link on the 4 step level design in Super Mario 3D world that covers onboarding, habit-building, and mastery in building a fun and challenging player journey.

3. Offering options and keeping secrets
Get players involved in making choices. Even tho only 1 door leads to the next level, let’s give them 5 doors to choose from.

megaman


4. Keep them focus
Mix and match your game elements to create different Immediate Goal (combo gameplay) e.g. Exploration = traversal + stomping + exterior. Doing so will give limited game mechanics a fresh spin.

  1. Immediate Goal: Exploration, Defending, Puzzle Solving, …
  2. Mechanics: Traversal, Stomping, Brawling, Flying kicking, …
  3. Environment: interior/exterior, weather condition, urban/rural, …

5. Alternation:

LEVEL
levelDesign

6. Break your rules in case of fun!
“Rational game design repeats rational gameplay.” and “Irrational game design lead to new experiences.” – If Sol LeWitt designs games.

Animated GIF can teach!

Posted on February 28, 2013 by Kyle Li

Animated GIFs have created a cultural common ground for people to share certain emotional moments. If we boil our memories down to relics, those might just be a bunch of animated GIFs. The knowledge created by learning experiences works the same way, some are more impressive than others. If we turn these learning moments also to animated GIFs, by watching them casually, the referral bonding between pieces of knowledge will be reinforced and new motivations and needs to know will be stimulated.

protein synthesis: translation with tRNA, mRNA, and ribosome
tumblr_lsbffysO561qhuyx7o1_400
DNA Replication
183_0.022372001356727375_tumblr_mfnn33snpz1qbh26io1_r1_400Proving the Pythagorean theorem with liquidRlxlZProving the Pythagorean theorem through rearrangementimagesLockstitchHow a Sewing Machine work
tumblr_m8rii7oEPS1r4zr2vo1_r1_500
Caterpillar’s wiggly squishy legs
LocxlUnrolling a Circle’s CircumferenceMloOY
Hypotrochoid by Sam Derbyshire
EpitrochoidIn2
Epitrochoid by Sam Derbyshire
NegativePedalNegativePedal by Sam Derbyshire
prism animated
light and prism
Geneva_mechanism_6spoke_animation
Geneva mechanism
Vnf72
Steam engine Principle
Zipper_animated
How zipper works
tusi_gears_animation
Circle inside of a circle (2:1)
tumblr_m94g4wzIJX1qasthro1_400
hydrogen peroxide

Lego: Mechanical Bull

Posted on February 18, 2013 by Kyle Li


IMG_5791 mbull8891
My Mechanical Bull iteration with LEGO Powerfunction system 8891 Mechanical Bull (1991) with 9V motors system


My very own Lego Mechanical Bull, inspired by the old Lego Technic idea book(8891), is made entirely with Technic beams and Lego Power Function parts. There were 4 Lego Technic idea books (8888, 8889, 8890, and 8891) ever published between 1980 and 1991. These books contain many fun Lego instructions on simple machines, motor systems, pneumatic systems, and Lego Control Center. The Mechanical Bull is one of the Lego Control Center examples in the idea book 8891. During the iteration, I am fascinated by some of the profound design decisions made in the original instructions around the use of gears. Even with the modern Power Functions parts and tons of new gears, there are very little options on combinations in order to keep the structure small and robust. My next step will be finding ways to speed up the rotation.

Mechanical Bull (base) LDD instruction

CAREN Lab

Posted on January 22, 2013 by Kyle Li

CAREN Lab, a hidden gem of embodied play in the city! Too bad this panorama projection + motion tracking + interactive hydraulic floor installation is only used for physical rehab. Through an unexpected connection, I was invited to visit the hidden CAREN Lab in mid-town. This medical grade arcade center is packed with technologies. SMALLab and CAREN Lab use the same marker-based motion tracking system but CAREN Lab has better cameras. A researcher there pointed out that a marker based tracking system is necessary to the installation because marker-less sensors such as KINECT can’t provide accurate information on patient’s joints. CAREN Lab has its own custom game editor and the interface works like one in MAX/MSP.


734775_10151443940233745_2047078727_n

Posts navigation

Older posts
Newer posts

Recent Posts

  • BMP – Rearrange Colormap
  • Reset Allow USB Debugging? Notification
  • 8-bit Notes
  • AT29C256 90PI
  • Super-Toys Last All Summer Long

Archives

Proudly powered by WordPress | Theme: MiniZen by Martin Stehle.