Skip to content

A PLAY EXPERIENCE MAKER'S WORK LOG FOR FUTURE SELF©2001 – 2023 Kyle Li 李肅綱 All Rights Reserved.

Category: games

RFID Multi Reader

Posted on January 1, 2020December 29, 2020 by admin

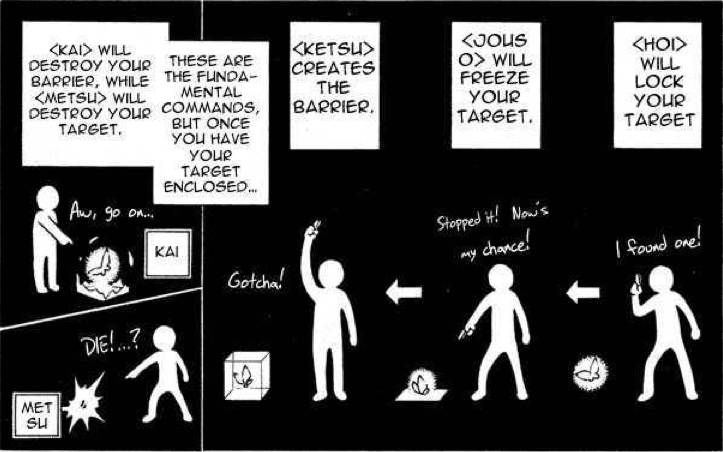
Anti-collision is a general term used to cover methods of preventing radio waves of a tag from interfering with radio waves from another. Anti-collision algorithms are used to read more than one tag in the same reader’s field. Scientifically speaking, an RFID reader can only interrogate 1 tag at a time. However, with the help of anti-collision algorithms, the reader is able to single out radio waves of a tag from the rest and read it. If this is done with an HF or UHF RFID reader, it will feel like it was read all at once.

https://www.iotrfidreader.com/sale-9376781-icode-ilt-embedded-rfid-reader-usb-rs232-interface-for-casino-management.html

Interestingly, based on search results on google, this technology (RFID multi-reader) is often associated with casino management.

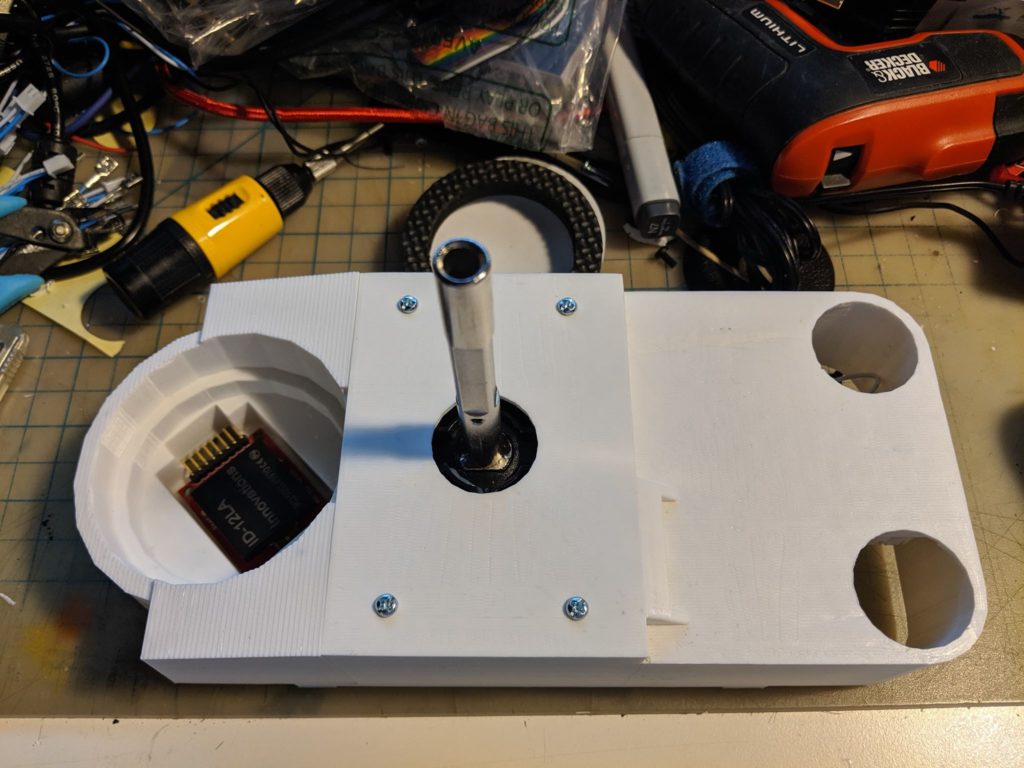
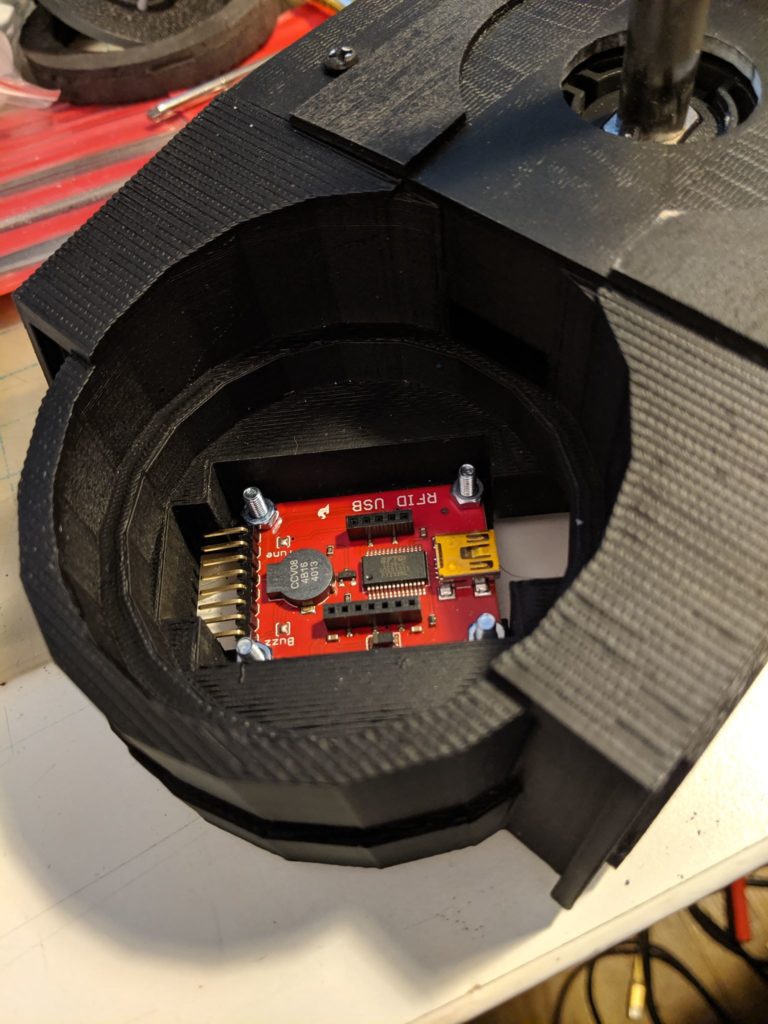
All my online searches seem to point to the development board below. The size of it leaves plenty of rooms for playful imaginations! The title of this page reads “HF13.56 Mhz multi protocols ISO15693 ISO18000-3M3 ISO14443A RFID smart card reader writer all in one access control rfid reader.” The protocols are different international standards designed for specific use scenarios. According to the RFID 4U:

ISO 14443A This standard defines identification cards operating at the 13.56 MHz frequency using near-field inductive coupling. The cards are usually called proximity cards. Typical applications include identity, security, payment, mass-transit, and access control. ISO 14443 systems are designed for a range of about 10 centimeters (3.94 inches), so they are a good fit for applications such as vending machines.

ISO 15693 is an ISO standard for vicinity cards, which can be read from a greater distance compared to proximity cards defined by ISO 14443. ISO 15693 systems operate at the 13.56 MHz frequency, use near-field inductive coupling, and offer maximum read distance of 3 to 5 feet. This range makes them a good fit for applications such as physical access or controlling entry to a parking garage, also serves as the foundation for a variety of applications outside of contactless smart cards, such as airline baggage tracking and supply chain management.

https://rfid4u.com/rfid-basics-resources/how-to-select-a-correct-rfid-tag-standards-mandates/

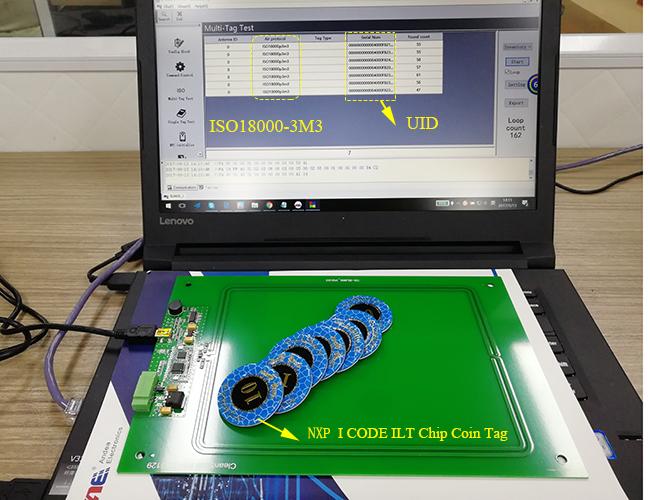
ISO 18000-3M3 is a newer and more powerful tag standard when it comes to the anticollision speed. The ISO 15693 standard has a speed of 60 tags per sec which is already perfect for a lot of situations. Most of the collectable card arcade games have a limit of 50 cards per deck. The ISO 18000-3M3 standard can read up to 700 tags per sec!!

https://www.alibaba.com/product-detail/HF13-56-Mhz-multi-protocols-ISO15693_60478486249.html

More on how do anti-collision algorithms work:
https://www.rfidjournal.com/blogs/experts/entry?9271

The interrogator basically asks tags to respond depending on their serial number or some other number. If two tags respond, the reader asks again in a slightly different way, and then continues to do this until only a single tag responds.

Imagine that the reader is a teacher, and the tags are a room full of pupils. The teacher might say, “If your last name begins with A, stand up.” If more than one pupil stands, the teacher might then state, “If your last name begins with A and your first name also starts with A, stand up.” If no one stands, the teacher could say, “If your last name begins with A and your first name starts with B, stand up.” And so forth.

A reader can ask all tags with a serial number beginning with 0 to respond. If more than one tag responds, the device might ask all tags that have serial numbers starting with 00 to respond. And so on, until it isolates one tag.

One problem with this tree-walking algorithm based on serial numbers is it means that if two tags were to have the same serial number (which could happen either accidentally, or on purpose), the tags and reader would never be able to communicate since there would be no way to isolate a single tag.

To avoid this problem, the EPC Gen 2 air-interface protocol standard employs a unique anti-collision protocol based on a tag’s ability to generate random numbers. The anti-collision technique used, known as the “Q Algorithm,”

—Mark Roberti, Founder and Editor, RFID Journal
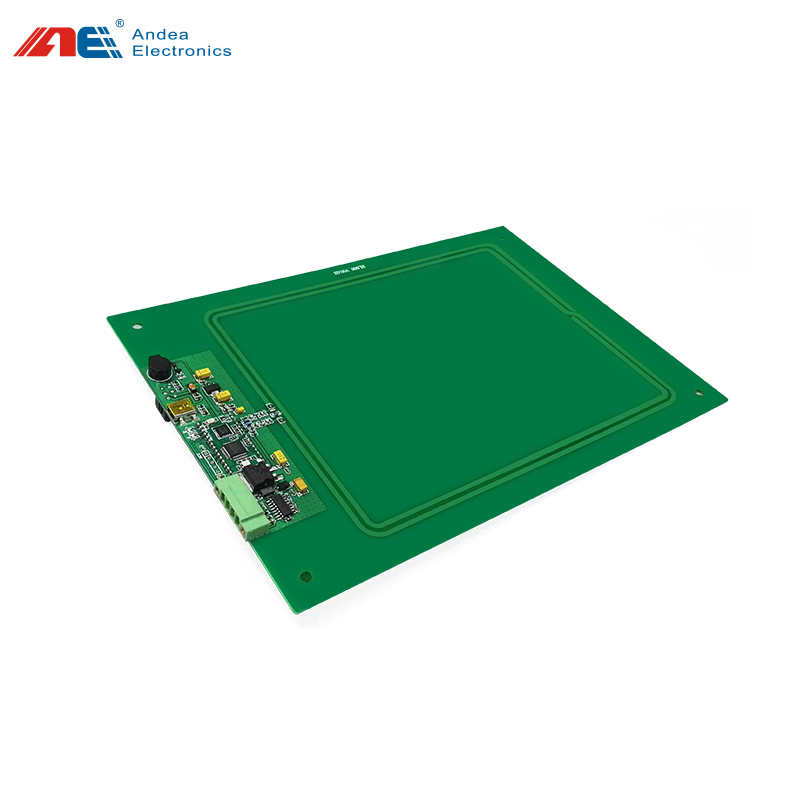
ModelRL866
Operating Frequency13.56 MHz
Compatible ProtocolsISO 15693, ISO 14443A/B, ISO 18000-3M3
Compatible Tags– NFC Forum Type 1: Innovision Topaz512
– NFC Forum Type 2: Mifare Ultralight, Mifare Ultralight C, Mifare Ultralight EV1, NTAG21x.
– NFC Forum Type 3: Sony Felica [only support Polling]
– NFC Forum Type 4: Mifare DESFire EV1
– NFC Forum Type 5: ICODE SLI ,ICODE SLIX ,ICODE SLIX2 ,Tag-it HF- I plus
– Mifare Classic Type: Mifare S50, Mifare S70 ,Mifare Mini
– ISO18000-3M3 Type: ICODE ILT
– ST ISO14443B Type: SRIX4K, SRI512, ST25TB512-AC
Communication InterfaceUSB & RS232
Reading Range– ISO 15693 = 28cm
– ISO 14443A = 15cm
– ISO 18000-3M3 = 20cm
Plug & PlaySupport
Keyboard EmulationSupport
Anti-collision AlgorithmSupport
Working VoltageDC 5V (USB Power Supply)
Max Power Consumption1.7W
MaterialPCB
Dimension250*170mm
Weight130g

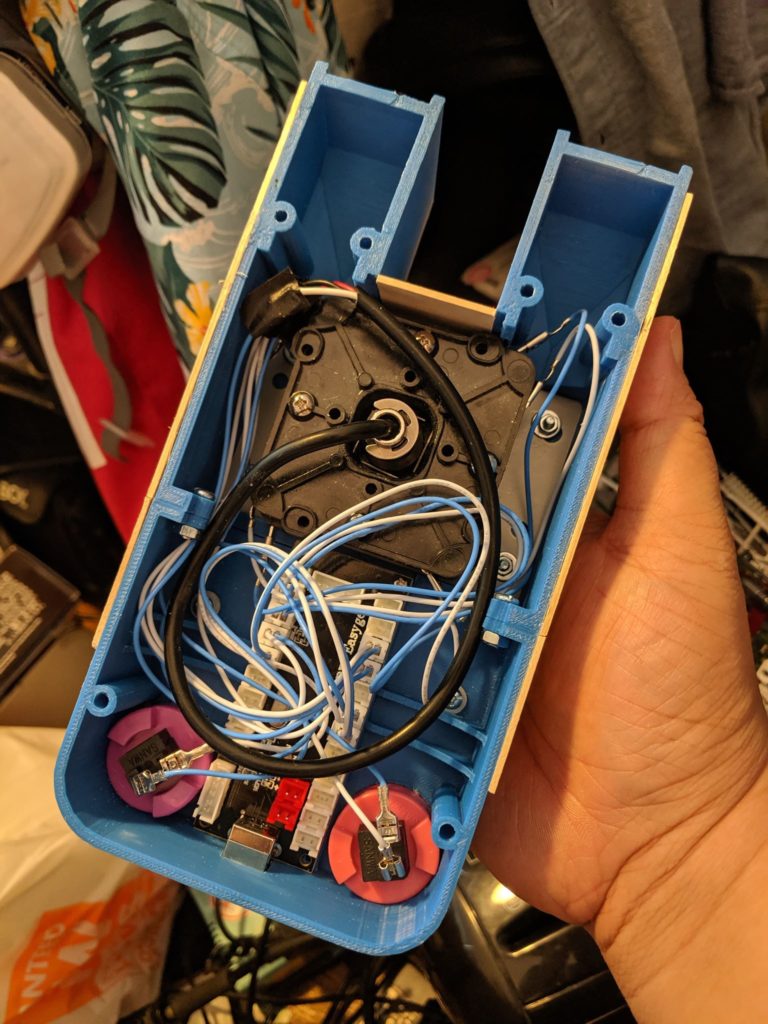
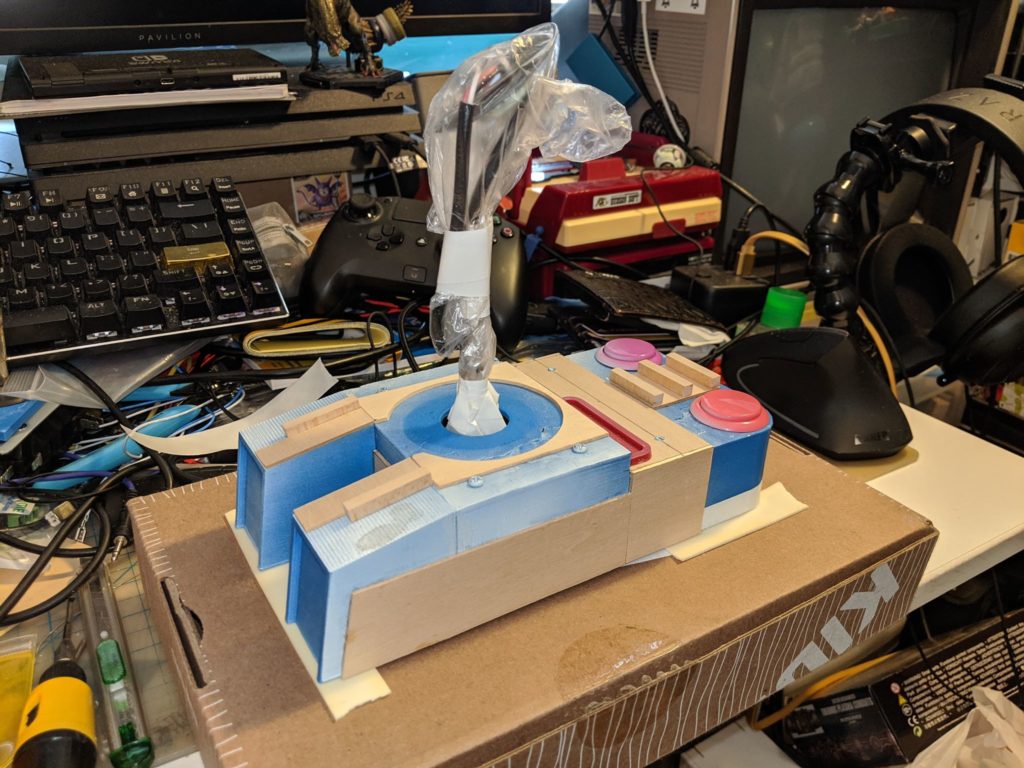
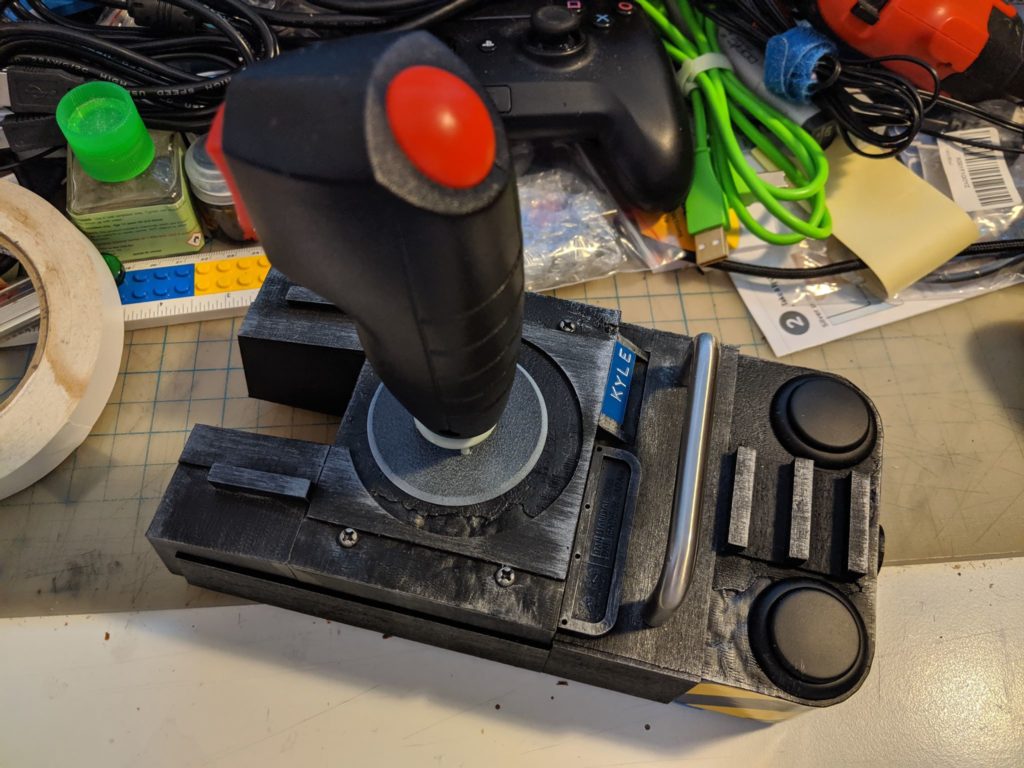
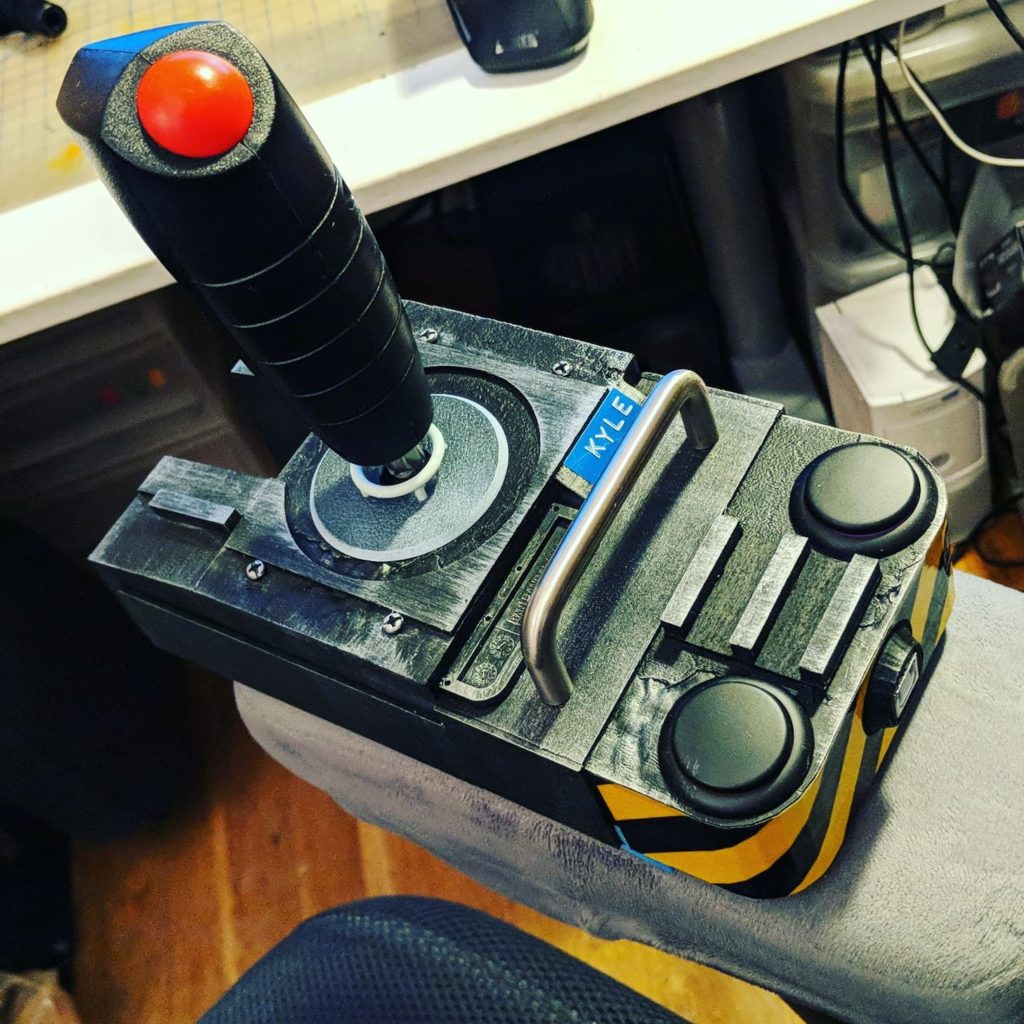
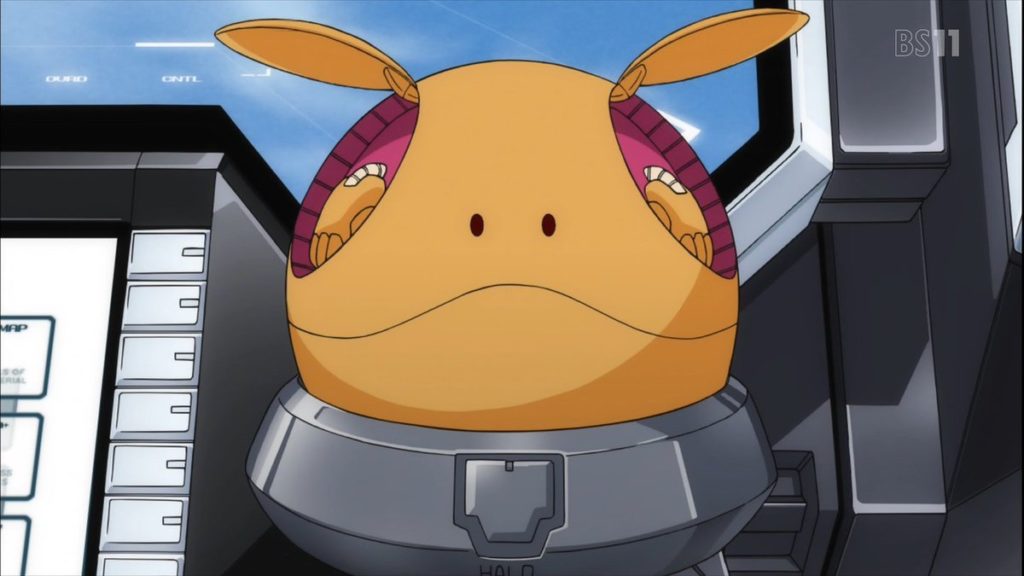
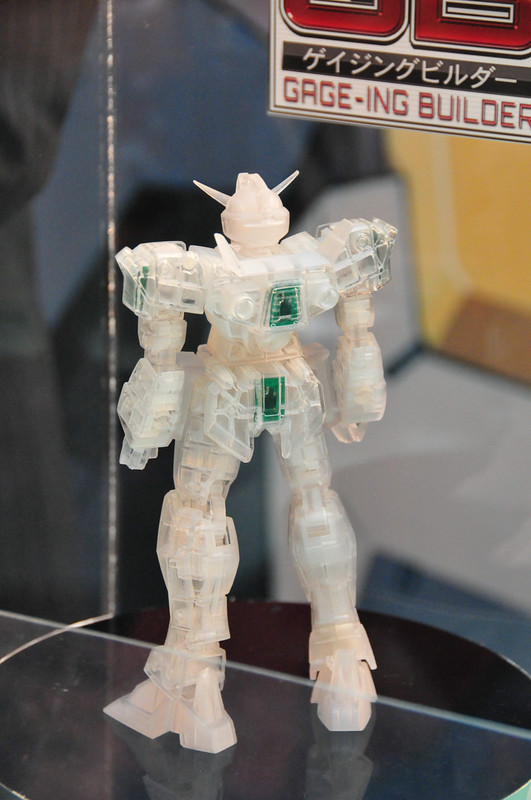
This technology brought me back to Mobile Suits Gundam AGE (機動戦士ガンダムAGE) for their RFID embedded toyline: 1/100 GB grade (Gage-ing Builder – http://gage-ing.com/gb/) and 1/144 AG (Advanced Grade アドバンスドグレード). In the animation, the main character, Flit, also invented a life-size all-in-one Gundam part fabricator called the AGE Builder system which was so relevant and cool to me when it came out in 2011.

Mobile Suits Gundam AGE Episode 3
http://gage-ing.com/gage-ing_haro/

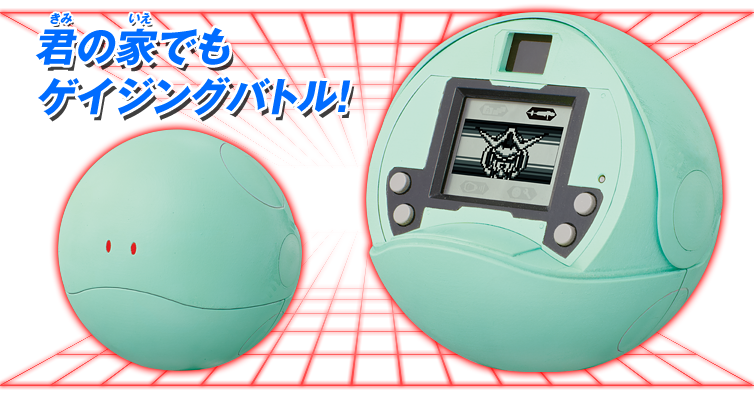
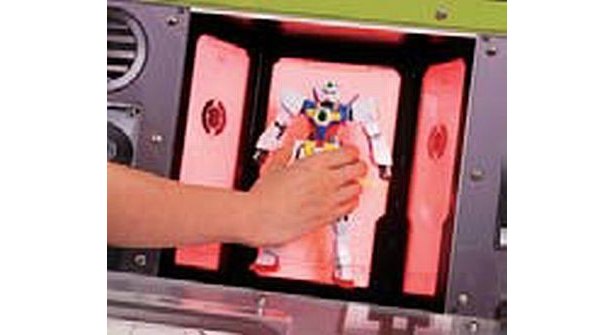
The GB grade Gundam toys or model kits have 4 modular and detachable parts: the left arm, the right arm, the torso, and the lower body. Each part has an RFID tag embedded to it. Players can customize their GB grade Gundam with parts from different kits and play a Tamagotchi-like game with the Gage-ing Haro (sold separately). When registering a new configuration, players scan all the GB parts one by one with the RFID reader in the back of Haro.

https://gigazine.net/news/20110613_gundam_age_toy_game/

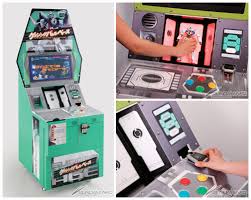
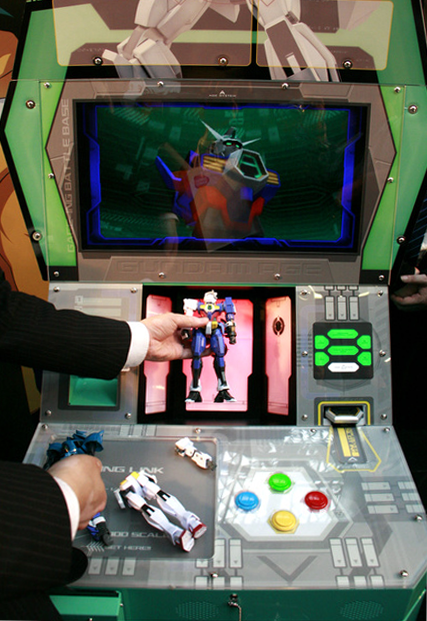
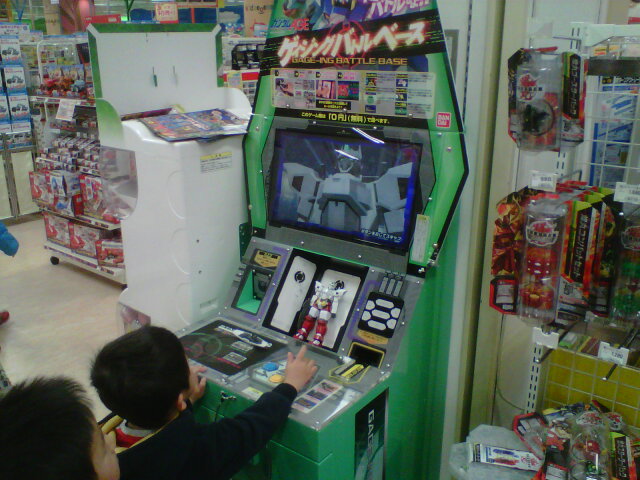
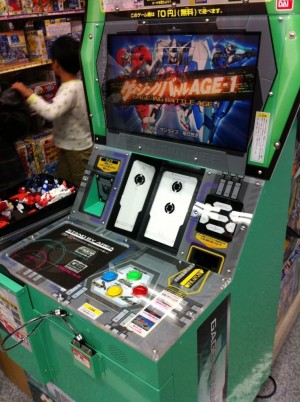
There is also an arcade version of the game (ゲイジングバトルベース) with full-model scan available in selected stores across Japan. However, I don’t think the scanner was made with the anti-collision algorithms reader. Most likely it is just 4 RFID readers placed away from each other and read the 4 tags separately.

Mobile Suits Gundam AGE toyline has to be one of the most ambitious and technology savvy in the Gundam universe. However, I felt the storyline failed to capture the mature audience. It was an uphill battle for them coming after the dramatic Mobile Suits Gundam 00 series. On the other hand, the younger audience didn’t appreciate as much the efforts went into the technology side of the model kits.

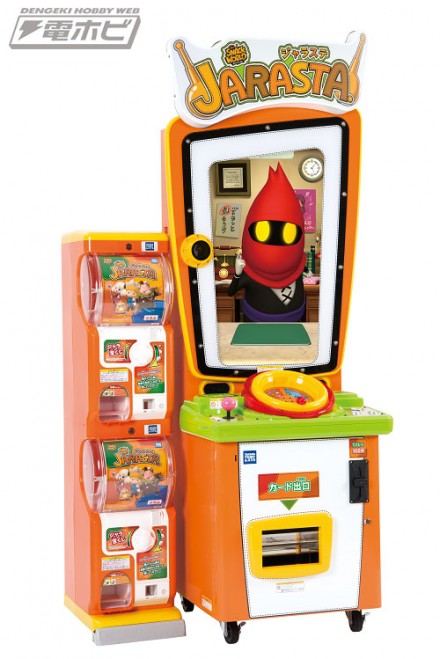
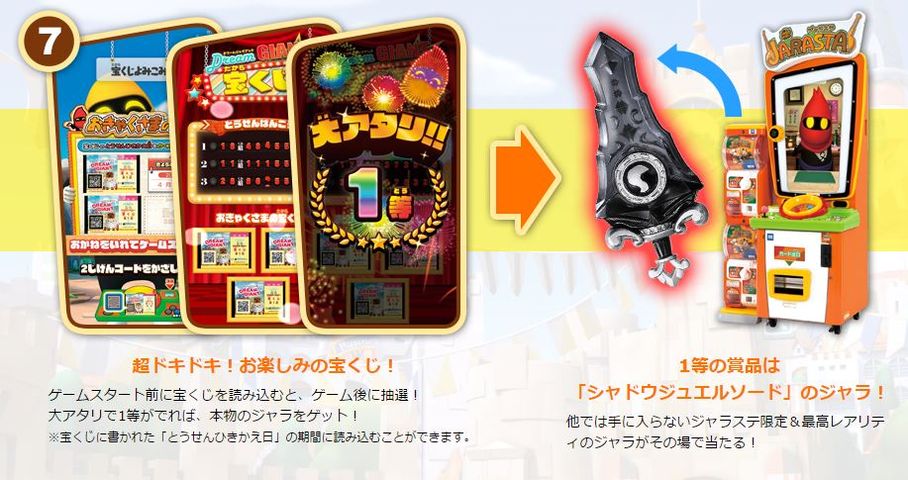
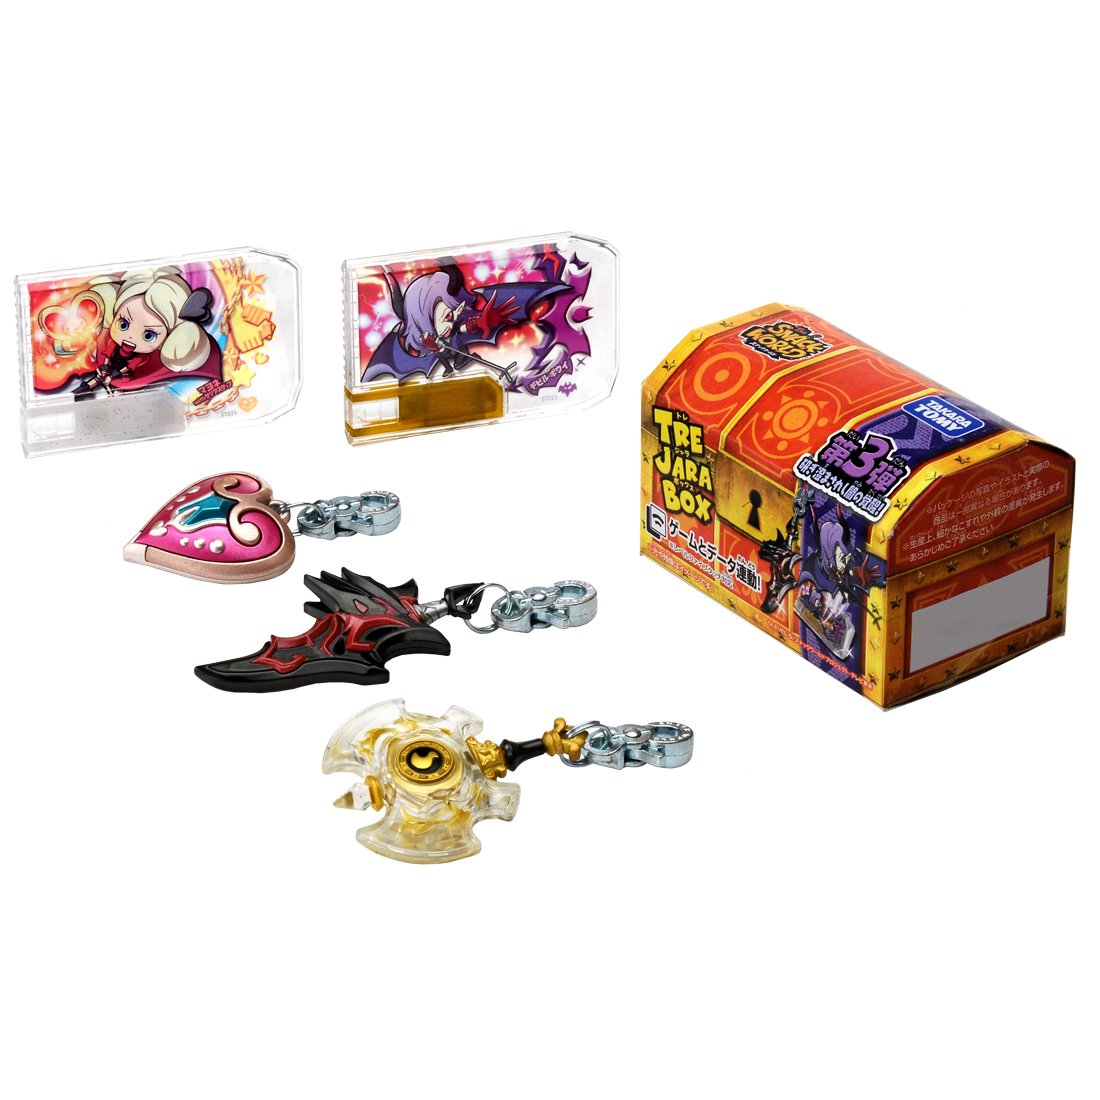
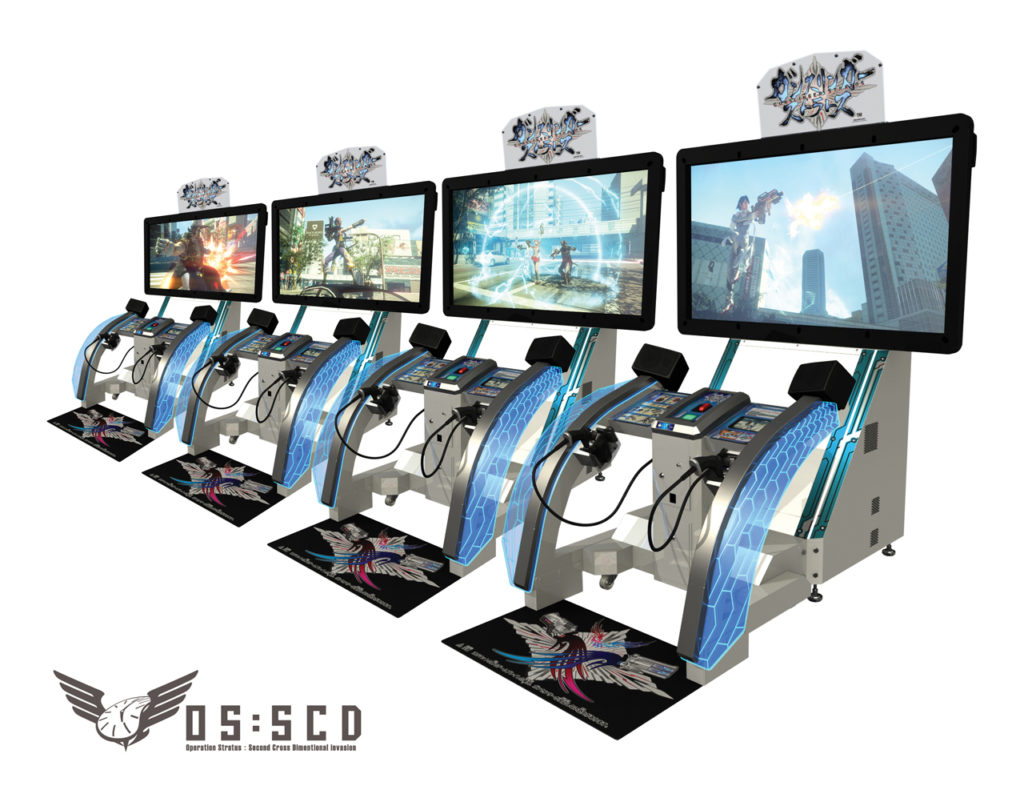
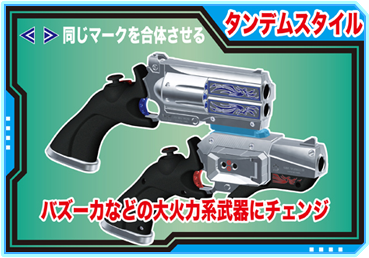
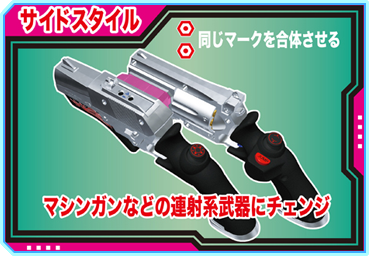
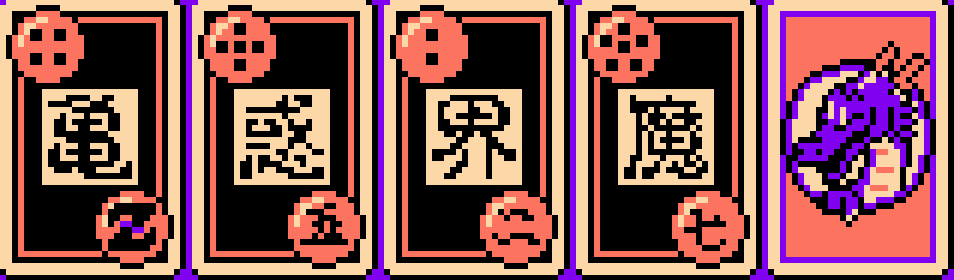
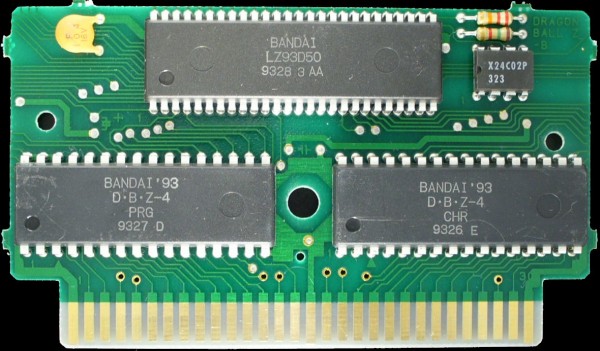
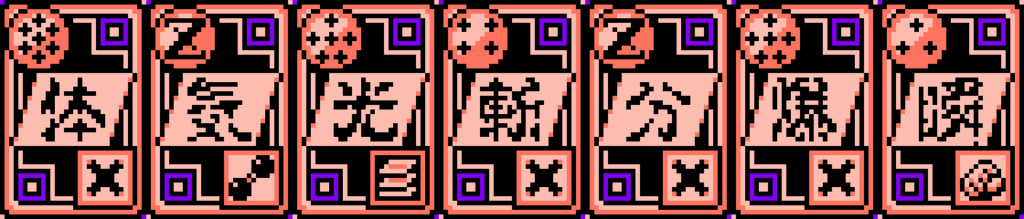
An arcade game that definitely uses an RFID reader with anti-algorithms is SNACK WORLD (スナックワールド ジャラステ, 2017). It is an RPG game that players can either gain collectable weapons and supporting characters in dungeons or find them in boost boxes from toy stores. The arcade machine came out with 2 to 4 capsule vending machines attached to the side of the cabinet that are controlled by the game. There is a huge rotating bowl in the middle of the arcade machine where players can drop in up to 6 collectables for power-up.

Bubblemancer

Posted on September 24, 2019February 9, 2020 by admin

Bubblemancer is a 1st person VR ready post-apocalypse zombie V.S. warlock survival game. The player blows air to the magic artefact to bubble up monsters and snap the string to burst them to one hell of pain!! This is made possible with a custom game controller.

I have been wanted to make a play experience inspired by the KETSU and METSU combo in Kekkaishi (結界師), one of my all-time favorite animes. I had this idea since Microsoft Kinect came out, the gesture of pointing at a monster and create a barrier seems like a perfect fit for sensors like Kinect. However, I never got around to make it. Now I might be able to achieve that dream with this new controller that I am building.

I use the MDA theory when it comes to designing playful experience. It is a very straight forward and friendly framework no matter if you are a player, a developer, or a game designer. It helps you systematically break down a playful moment to tiny little things you need in order to (re)create the moment.

Aesthetics:
Create an embodied play experience that is similar to the KETSU and METSU moment in Kekkaishi with a speciality controller.

Dynamics:
1. Look at the target
2. Blow bubble at it (Particle Effect)
3. Enclose it in a bubble or attach to it (Sound)
4. Snap the string to send out a shockwave (Visual ring ripples out on the ground)
5. Shockwave bursts bubbles (Particle Effect and Sound)
6. Burst bubbles damage the target

Mechanics:
1. animated target walking towards camera
2. animation of crunching in a bubble
3. collision and placement of bubbles
4. shockwave collision (distant, speed & time)
5. damaging calculation

This is what I got:

a bubblemancer, art by me

Fire Ball Jutsu

Posted on September 22, 2019October 22, 2025 by admin

This is a game controller that enables the player to blow fire into the virtual world. It started out as a study of an electronic sensor and the findings were satisfying. The response time between the player action and sensing speed is quick enough for me to turn it into a meaningful and embodied play experience.

I purchased two wind sensors from ModernDevice.com many years ago, finally inspired to do something with them.

Wind Sensor Rev. C:
https://moderndevice.com/product/wind-sensor/

The first thing that came to me is Sasuke’s Great Fire Ball Jutsu (
Gougakyu No Jyutsu 豪火球の術).

The setup is pretty straight forward with Arduino, all I needed to do to read the RV pin with the analogRead. The sensor is capable of picking up very subtle changes in air movement around it. It works really well with detecting breath as well. I hooked it up to a flamethrower in Unity3D. I linked the serial data to the startSize and startSpeed properties of the particleSystem. Fireball is coming!

I made a stand for it on Tinkercad, so I can mount it on to my Arduino box. I also made a tube-like windshield to go around the sensor. By doing so, I was able to eliminate air coming from other directions and boost the strength of the reading by up to 20.

/*

 Hardware Setup: 
 Wind Sensor Signals    Arduino
 GND                    GND
 +V                     5V
 RV                     A1

 Vibration
 Signal                 A3

 LED
 PIN                    6

*/

#define analogPinForRV 1  // change to pins you the analog pins are using
#define analogPinForPR 3
#define LEDPIN 6

const float zeroWindAdjustment = .2;  // negative numbers yield smaller wind speeds and vice versa.

int ANALOG1, ANALOG2; 

void setup() {
  // put your setup code here, to run once:
  // initialize serial communication at 9600 bits per second:
  Serial.begin(115200);
  Serial.println("start");

  pinMode(LEDPIN, OUTPUT);
  digitalWrite(LEDPIN, HIGH);
}

// the loop routine runs over and over again forever:
void loop() {

  ANALOG1 = analogRead(analogPinForRV);
  ANALOG2 = analogRead(analogPinForPR);

  // print out the value you read:
  Serial.print(ANALOG1);
  Serial.print('|');
  Serial.println(ANALOG2);
  delay(10);  // delay in between reads for stability
}

Fishing Cake

Posted on September 14, 2019February 9, 2020 by admin

Bumped into a strawberry cake shaped candy box at a Japanese deli nearby school today. I want to turn it into a game controller. The plastic strawberry on top is detachable so I decided to make a strawberry fishing game with this cake box. Imagining a candy box desperately want to become a fruit cake – oh wow.

With some Lego Technic parts and a lever switch, with some super glue, I made a simple fishing mechanism that allows the player to “fish” the top fruit piece.

Core mechanism:
1 Limit (Lever) Switch Roller
1 Lego Axle 4 with End Stop (87083)
1 Lego Technic, Liftarm 1 x 7 Bent (4 – 4) Thick
1 Lego Technic Gear 24 Tooth

  • Limit (Lever) Switch Roller
  • Lego Axle 4 with End Stop (87083)
  • Lego Technic, Liftarm 1 x 7 Bent (4 – 4) Thick
  • Lego Technic Gear 24 Tooth

I removed half of the teeth on the gear to make enough space for the lever switch to click and bounce back. I experimented with different locations for the lever switch in relation to the gear and found the most smooth one and glued it down. The extra technic arm (grey) to the right is glued to the black one for support also provides a bigger contact area for the switch.

Handle:
1 Lego Axle Connector with Axle Hole (32039)
1 Lego Axle 2 (3704)
1 Lego Technic, Axle and Pin Connector (32013)
1 Lego Connector Peg
1 Lego Pin Connector Round 2L
1 Lego Technic 1/2 Bush

  • Lego Axle Connector with Axle Hole (32039)
  • Lego Axle 2 (3704)
  • Lego Technic, Axle and Pin Connector (32013)
  • Lego Connector Peg
  • Lego Pin Connector Round 2L
  • Lego Technic 1/2 Bush

Infinity Mitten

Posted on September 3, 2019September 22, 2019 by admin
Infinity Mitten

Infinity Mitten is a solitary digital world destruction simulator. When a digital planet is located on the screen, the mitten wearer reads the name of the planet out loud followed with a reason to destroy it. Unlike Thanos and his Infinity Gauntlet, we wipe one planet at a time. (and we tell them why!)

After watching Avengers: End Game, I had been looking for an Infinity Gauntlet mitten. Without knowing the Infinity Mitten was actually a thing in the comic, a mitten is the closest thing to an infinity gauntlet I have in real life. When I put it on, I am the most powerful person in the kitchen universe.

What The–?! #24 – The Infinity Mitten released by Marvel on December 1, 1992.

Last week at our first New Arcade class, I drew a diagram on the board to show how our first basic pipeline worked. For the physical interface, I spontaneously drew an Infinity Gauntlet with buttons (jewels), LEDs, and haptics. In one of the slides that Henry, my co-teacher, was showing there was a picture of a toaster. For demo sake, I decided to make the infinity mitten idea a reality, and the kitchen universe where a toaster can be found becomes the inspiration.

introduction to the initial pipeline

Creating that vaporizing effect on digital planets in Processing:

I built a planet name generator based on this website, very good names.

INCENDIO

Posted on June 21, 2019June 25, 2019 by admin

I am going to lead a design and technology workshop at the Shanghai Art and Design Academy (SADA) this summer. I eventually decided to build the workshop on Project Mapping, because of the diverse design backgrounds of the participants and short turnaround time. After I decided on the direction of the design content and main learning outcomes, I went through all the examples I made in the past and updated them to work with the current tools and technology.

I kept most of the interaction and creative control based examples that were built with OSC, midi I/O, and Leapmotion, and retired all the Internet of Things ones that were built with Littlebits, Beedotte, IFTTT, and ESP8266 due to the scope of this workshop. There are no major changes in VPT 8, so most of the update works were on the Processing side.

Updating old examples or coming up with new ones is in itself a creative process. Discovering new affordance makes me fall in love with an old technology that I had worked with before all over again. I am excited to teach Projection Mapping in 2019 now! Among the new examples I created for this workshop, my current favorite is the INCENDIO example inspired by the wizardry world of Harry Potter. In this example, the user can set the projected surface on fire (animated fire!) with a magic wand. This is made possible with a commercial TV remote wand, an IR TV remote encoder, Processing, and VPT8.

concept sketch

Trying to design a stand that can hold the white cardboard cube I used for the workshop and an extension USB cable for the TV remote sensor dongle. On the stand side, the goal is to cover the least amount of the surface at the front. It turned into a dragon fish at the end, it was magic.

the remote controller sensor base version 1
fire.gif

USB Dragle (Dragon + Dongle)

MR Mechanic Study: Gunslinger Stratos Arcade

Posted on June 17, 2019June 26, 2019 by admin

Gunslinger Stratos (ガンスリンガー ストラトス) is a 4 v.s. 4 third-person shooter arcade game came out in 2012. Every character in this game is equipped with some type of dual weapons. During the gameplay, players can transform their dual weapons into speciality ones based on situations such as a machine gun for rapid fire or a rocket launcher for more power. My favourite part is that these weapon transformations are initiated by combining the physical lightgun pieces in different ways.

  • Combine for more power
  • Combine for rapid fire

MR Mechanic Study: Twin Stick

Posted on June 16, 2019May 26, 2022 by admin
Twin Stick

In 2010, I had the opportunity to lead a group of students and work with General Engine (GE) on re-imagining the cockpit of a new commercial airliner. During the research, I also looked into robot animations and live-action films for inspirations. I couldn’t help to notice how much thinking has gone into the design of fictional mecha cockpits.

From a single fighter jet joystick to a PS2 game controller to twin stick setup to motion capture to mind-control, all is possible when it comes to piloting a giant Mecha. While motion capture seems to make the most direct sense, my personal favorite is the twin stick (ツインスティック). The concept of a twin stick interface is more of a metaphor than direct control.

RX-78 GP01 Cockpit by Sky Moo

I played Cyber Troopers: Virtual On in an arcade center in Tokyo when it first came out in 1995, it was love at first sign. Because the controls were intuitive thus easy to pick up, I was unstoppable that night (and that night only). The idea behind the twin stick is brilliant. The player only has to send out a combination of binary commands, and the robot (AI!?) will interpret the commands and put them into actual actions. It is very similar to how our body works. When we think of walking forward, our body turns it into action by moving all the related muscles.

Cyber Troopers: Virtual On (電脳戦機バーチャロン )

It is inevitable for me to become a veteran of this arcade game – Gundam: Senjou no Kizuna (機動戦士ガンダム 戦場の絆). I spent most of my free time on this game whenever I am in Japan. It is a full-size Gundam cockpit with a panoramic view. Besides tiny legroom, this is the most authentic experience of robot piloting. The controllers I am interested in building for VR are inspired by the twin controllers in this cockpit.

Gundam: Senjou no Kizuna ( 機動戦士ガンダム 戦場の絆 ) Arcade Cockpit

Okay, the elephant in the room – the Steel Battalion controller. I love everything about this controller excepting the game. Just by looking at the hardware, there are endless possibilities in terms of what the play experience could be. I would completely detach it from the dreadful, demanding, and unforgiving Steel Battalion gameplay and re-imagine it in a Virtual On setup and add a SEGA Saturn in the back. I am very confident that I can come up with a fun mechanic or two for the WASHING button.

http://www.flyingbell.co.jp/works/promotion/%E9%89%84%E9%A8%8E-2/

星と翼のパラドクス

My first impression of this arcade machine was beyond joy, I thought it was the overdue Cyber Troopers resurgence. However, after a few games, I was very disappointed about almost everything about this poorly put together experience. It didn’t come anywhere close to the hype I had when I played Cyber Troopers for the first time, especially the control of the mecha, it doesn’t make the slightest sense and everything after that go south quickly. Maybe the game is trying really hard to differentiate itself from Cyber Troopers and Gundam Pod. The twin joystick of the game reminds me of the twin-stick for ACE COMBAT™ 7: SKIES UNKNOWN. Whoever designed the control scheme forgot two fundamental principles of interfacing a fast pace game – intuition and simplicity. The fewer turns and associations when making a piloting decision the better.

ACE COMBAT™ 7: SKIES UNKNOWN Controller

Honorary mentions:
[PS1] Remote Control Dandy (リモートコントロールダンディ)
[PS2] Tetsujin 28 go ( 鉄人28号)
[DS] Super Control Mecha MG (超操縦メカMG)

In Remote Control Dandy, the player has to press left foot forward (L1) and then right foot forward (R1) in order to move a step forward. It was weird and difficult at first, but it somehow resonates with my imagination of how a 1st generation giant robot would work. After becoming better at it, I felt achieved as a player. ROCKET PUNCH!

sketch of the right stick

These cheap Zero Delay Joystick encoders appear on PC as generic gamepads. In the Device Manager, they are found under the Human Interface Devices. It can also be found in Setting/Devices/Devices and Printers/ as a USB Joystick. Right-click the icon and select Game Controller Setting and then Properties to bring up the USB Joystick properties window for testing the joystick and buttons.

I decided not to worry about making the handle look like the one in sketch and tried to re-imagine the left stick because I didn’t want it to be just a mirrored version of the right stick. Sliders, flip-switches, emergency exit switch, the weapon of mass destruction switch, key switches, a small touchscreen, more buttons, no buttons, …etc. Ideas went through my head like I was in a Mecha hanger going over different customization options.

DUAL GEAR

Then it came to me (like a wrecking ball), what I needed is an RFID reader. This RFID reader will be built into the front of the left stick and served as a docking station for a Haro-like robot.

HARO ( ハロ ) docked in cockpit (Gundam 00)

Goes really well with my keyboard:

goes really well with my keyboard

SWITCH HOMEBREW NOTES

Posted on April 25, 2019October 18, 2019 by admin

I want to mod Monster Hunter Generation Ultimate (MHGU) so I can get my fashion on and maybe bypass all those delivery quests. I have done it on PS2, PS3, PS4, PSP, and 3DS and it gets harder and harder each time. Over time, the quest to mod the console or the game saves has become a game itself. My knowledge of low-level hardware and software can only get me so far. I remember back in the days when the modding was simpler, I was able to figure out the cheat codes for the English version of the game by offsetting the Japanese ones through trials and errors. I am glad that there is a strong community online that supports this liberation – to enjoy the gameplay our way.

The only way to mod MHGU on Nintendo Switch right now is through Switch homebrew launchers because the 3DS version of MHGU doesn’t exist. MHXX is the Japanese version of MHGU and it was also released on the Japanese 3DS. That is a much easier quest because I can just mod the 3DS save and then update it to Switch. For MHGU, I get 1 chance which is when I upload the MHG 3DS save to MHGU on Switch, but that only gets me all the pre-G contents.

  • ゲームラボ 2017年 5月号 [雑誌]

  • ゲームラボ 2017年 5月号 [雑誌]

  • ゲームラボ 2017年 5月号 [雑誌]

  • ゲームラボ 2017年 5月号 [雑誌]

I purchased an R4S dongle which is the latest payload dongle in the market. However, since I didn’t follow the Switch homebrew before this dongle, the installation didn’t go smoothly. I decided to stop being a Google zombie and put some thoughts into it. Here are some notes:

Payload: Payload senders (or payload injectors, or code loaders), are programs or devices used to transfer a small binary file (the payload) to the Nintendo Switch while being in Recovery mode (RCM), which allows early custom program’s execution at console boot before the Switch official Operating System (Horizon OS) is loaded.

Recovery Mode (RCM): The Recovery Mode (also known as Maintenance Mode in firmware version 1.0.0) can be accessed when turning on the Nintendo Switch while performing a button combo.

Jig: A jig is a type of custom-made tool used to control the location and/or motion of parts or other tools. In this case, a jig is used to short the Switch so we can get into the RCM and inject custom payloads.

a jig

hekate: Custom Nintendo Switch bootloader, firmware patcher, and more.
https://github.com/CTCaer/hekate

Atmosphère:

Atmosphère is a work-in-progress customized firmware (launcher) for the Nintendo Switch. I need Atmosphère to run the homebrew tool, Checkpoint, on Nintendo Switch. There are other firmware/launchers out there, but this one is my favorite, and Checkpoint is included in the release.
https://github.com/Atmosphere-NX/Atmosphere

The R4S website was a bit confusing to read. After looking at it in both English and simplified Chinese, I finally got it to work. My goal is to be able to use Checkpoint. It helps me back up the save file from MHGU.

http://www.r4i-sdhc.com/R4SDongles.asp
https://github.com/FlagBrew/Checkpoint/releases

1 semi-useful video for beginners: There is no all-in-one tutorial online that aiming at modding MHGU. Most of the posts require some sort of hacking knowledge. For someone who just wanted to mod 1 file, it is really difficult to get the right help online. Many videos cover a portion of what I needed e.g. this video has some basic information on how to inject the payload with R4S dongle but there are some outdated pieces of information here and there.

I eventually stomp on the tables above. These two tables were separated by a horizontal line and a heading that reads, “Previous Version”. However, it turns out I need files from both tables to make it work. I tried R4S’s official Dongle Firmware V2.5 and ArgonNX SD-files V0.3 and the combo didn’t work on my console with firmware 7.0.1. The above combo, Atmosphere For NS 7.0.1 and Atmosphere_UF2_7.0.1, was the only one that worked for me.

It was a success. I was able to back up the save file and edit it on my PC with the MHXXSaveEditor. The editor works well but crashes from time to time, especially when I try to save for the second time. The editing was a lot of back and forth between my MHXX save and my MHGU one. The ネセト set in MHXX becomes the Neset set in MHGU. The name of each Neset weapon, instead of having a unique name for each weapon type in the MHXX editor, are all simplified to “Jewelled” + weapon type, i.e., Jewelled Greatsword and Jewelled Hammer.

Atmosphere 8.10 came out last week and it supports Version 8.0.1. , finally! The links to SD content and the UF2 file were also updated on the R4S website to version 8.0.1.

Fortunately, this time the dongle doesn’t need an update. I was able to keep my version 7.0.1 console as it is just in case something horrible happens to the new Atmosphere 8.10. The install was super smooth, but it took me a while to figure out how to launch the homebrew menu. It changes almost every update. For 8.10, simply click on the player account icon. Finally caught up to the current version. Before Nintendo strikes back with a newer update, gonna take advantage of the save editor and go to town with MHGU, thanks to all parties who made this possible. PLAY LIBERATION!!

7/23/2019

I wiped my SD card and did a fresh install of the firmware (Atmosphere 0.9.1). I had tried to overwrite the existing files without formatting, it gave me an error. I had to back up the 120G SD card and re-install everything, I must miss a memo somewhere.

20190923-atmosphere0.9.4 .rar:
https://mega.nz/#!fnoiwSQR!QleFKzzZOo-F0dFAu3BOI8J5HxvVoWTp-iMwu9xolJ8

MR Mechanic Study: FC ドラゴンボール Card Game Mechanic

Posted on March 26, 2019June 26, 2019 by admin

I played ドラゴンボール 大魔王復活 when I was a kid and I was impressed by the card battle mechanic in the game. It was a brilliant idea to bring some strategic thinkings into dice rolling which is usually just pure randomness. I didn’t fully understand how it works because it felt like there were more than just comparing numbers on cards. The mechanic evolved over 6 Dragonball games on Famicom and then was carried over to Super Famicom. I missed old animes that were made into RPG games back in the days such as Saint Seiya, Jo Jo’s Bizzard Journey, and Dragonball. All of them had become fighting games in their recent video game adaptations. Looking back to those old RPG games, I really appreciated all the efforts went into telling a complex story with so few pixels.

ドラゴンボール 大魔王復活
wikipedia

128KB PRG + 128KB CHR
Card Design

カード

普段プレイヤーは5枚カードを持っており、このカードを使ってゲームを進めることとなる。各カードの上にはドラゴンボールをモチーフにした星、中央には戦闘時の攻撃手段、下には漢数字が書かれている。

  • 星(1〜7)- フィールド上では移動力で、この星の数だけ悟空が移動できる。バトル時は攻撃権兼攻撃力を意味する。詳しくは後述のバトルを参照。
  • 攻撃手段 – 後述のバトルを参照。
  • 漢数字(一〜九)- 防御力。もし敵に攻撃されても、この数値が高ければ回避できたり傷が少なくてすむ。

ドラゴンボール3 悟空伝
wikipedia

128KB PRG + 256KB CHR
Card Design

戦闘(カードバトル)

戦闘はカードで行われる。星の数(1〜7)で攻撃力、漢数字(一〜七)で防御力が決まる。星の数が高い方が攻撃権を取るが、こちらが1で相手が7の場合はこちらが攻撃権を取る。中心の漢字「拳」「蹴」「体」「武」「連」「必」によって攻撃パターンが決まる。「必」と書かれたカードを使うと必殺技ポイントを消費し必殺技を繰り出せる。敵に勝利すると修行値が貰え、一定の値になるとレベルアップし体力や必殺技ポイントが増えたりスピード、パワー、テクニック、タフネスを高めるレベルポイントが得られたり、新たな必殺技が覚えられる。レベルの上限はストーリーの進行具合によって決められている。敵を倒すと、その敵が持っていたアイテムを獲得できるときがある。

ドラゴンボールZ 強襲サイヤ人
wikipedia

256KB PRG + 256KB CHR
Card Design

戦闘(カードバトル)

戦闘はカードを使って行われる。星の数で(1 – Z)が攻撃力、漢数字(一 – Z)で防御力が決まる。またカードに書かれている流派と各キャラクターに設定された流派が一致すると攻撃力がアップする。「必」と書かれたカードを使うと、BEを消費して必殺技を繰り出せる。2体以上の敵キャラクターへの攻撃はキャラクターごとに設定するが、複数のキャラクターが1体の敵キャラクターを倒してしまうと。他のキャラクターはそのターンの間行動しない。敵に勝利すると経験値としてBPが貰え、一定の値になるとレベルアップ。キャラクターはHPが4分の1になると苦痛の顔に変わり、0になると死亡する(名前の横に十字架のようなマークがつく)。死亡した仲間を復活させるチャンスは、ゲーム内の特定のイベント一回きりである(ガーリックJr.編終了時の悟空復活イベント時に合わせて復活するため、終盤のベジータ・ナッパ編では復活不可能)。

ドラゴンボールZII 激神フリーザ!!
wikipedia

256KB PRG + 256KB CHR
Card Design

戦闘(カードバトル)

戦闘はカードで行われる星の数で(1 – Z)が攻撃力、漢数字(一 – Z)で防御力が決まり、攻撃は漢数字の多い順に行われる。カードの流派と各キャラクターの流派が一致すると、強力な「複合攻撃」や敵全員を攻撃する「複数攻撃」ができる。「必」と書かれたカードを使うと、BE(バトルエネルギー)を消費して必殺技を繰り出せる。必殺技には敵全体を攻撃するものもある。キャラクターはHPが29[3]以下になると、顔の上に「ピンチ!」の文字が点滅し[4]、0になると回復効果のあるおたすけカードを使って全快しない限り戦闘に参加できなくなる。前作とは違い死亡扱いではなく一時離脱扱いとなるため、回復さえできればいつでも復活可能。敵に勝利すると経験値としてBP(バトルポイント=戦闘力)が貰え、一定の値になるとレベルアップ。サイヤ人である悟空、悟飯、ベジータは、瀕死の状態から一気に全快するとレベルアップする。前作にあった「神」流派カードは本作には登場しない。

ドラゴンボールZIII 烈戦人造人間
wikipedia

256KB PRG + 256KB CHR
Card Design

戦闘(カードバトル)

今作では3Dと2Dバトルの2種類に別れる。基本的に戦闘はカードで行われる星の数で(1 – Z)が攻撃力が決まる。敵に勝利すると経験値が貰え、一定の値になるとレベルアップ。またサイヤ人(悟空、悟飯、ベジータ、トランクス)は、戦闘中HPが1桁や戦闘不能になったときに仙豆などで一気に全回復すると、レベルアップする特性を持つ。

3Dバトル戦闘に参加するメンバー3人と、控えているメンバーとで、敵との戦闘が展開される。引いたカードの右下のマークにより様々な効果が起こる。戦闘中に敵が放つ必殺技は、画面上のキャラクターに「!」マークが出ると同時に十字キーの上を押すことによって2分の1の確率で回避できるというテクニックがある(技の命中が確定のときは、双方のキャラクターのカットインが入る)が、ボス戦ではこれが不可。ランダムではね返したりはね返されることはある。またオートバトル時やサブメンバーは、ステータス画面でのオート設定によって「わざをつかうな」「よわいテキから」「とにかくオート」「おおわざでいけ」の4つの戦い方を選択できる。マップでの移動画面でスタートボタンとセレクトボタンを同時に押すと、常に2D戦闘にするか、あるいは3D戦闘にするか、といった選択も可能(ボスキャラクターとの戦闘は必ず3D戦闘になる)。

必殺技カードに書かれている流派と、そのキャラクターの流派が一致したカードを選ぶと、KI(気)を消費して必殺技を出すことができる。KIを練ることで1ターン無防備状態となるが、次のターンでより強力な技を出すことができるようになる。

2Dバトル戦闘に参加するメンバーのみで戦う簡略化されるバトル。主に(CPUが)弱いと判断した敵に対して展開される。※フィールド移動中にスタートとセレクトボタンを押すことによって設定が可能。

ドラゴンボールZ外伝 サイヤ人絶滅計画
wikipedia

256KB PRG + 256KB CHR
Card Design

戦闘

カードを数枚選んで行う。使用可能な枚数はストーリーの進行に従い増加する。前作までの流派ではなく、「拳」「蹴」など。「Z」は好きなものに変化させることが可能。 星の数と文字により、攻撃力および攻撃方法が決まる。アレンジメントを完成させることで必殺技が発動し、初めて使った技には各キャラクターのコメントが入る。敵の必殺技は、当たる寸前にAボタンまたはBボタンを押すことで、弾くまたはかわすことができる(巨大な光線技はかわすのみ)。ただし味方の必殺技も同様に敵に無効化されることがあり、ザコ敵は一部の技を吸収することも可能。前作では裏技的扱いだった光弾を弾くコマンドを説明書に載せたのはプレイヤーに戦闘を見せるだけでなく、参加させるためである[。

[SFC]ドラゴンボールZ 超サイヤ伝説
wikipedia

バトルカード

キャラクターが戦闘を行うときに使用するカードで、「星(1 – Z)」「漢数字(一 – Z)」「流派」の3つの要素から構成される。「星」は攻撃力、「漢数字」は防御力に対応しており、数が多いほど効果が高くなる。本作における「流派」は「神」「魔」「界」「惑」「特戦隊」「超」と、特別な効果を持つ「気」「必」と全7種があり、カードに書かれた流派とキャラクターの流派が一致するとそのターンの攻撃が強化される(敵が複数いる場合は全体攻撃、1体しかいない場合は攻撃力を上昇させる)。また、流派「必」のカードを選ぶとKI(気)を消費して各種の必殺技を繰り出せる(KIが不足している場合は必殺技を選ぶことができず、打撃攻撃を行う。なお必殺技のほとんどは「エネルギー波」など、気功波系による通常打撃攻撃よりも威力が高い強化攻撃であるが、例外もあり「太陽拳」のように対象相手の行動を1ターン封じる(お助けカード「じいちゃん」と同等)補助技もある。

ドラゴンボール 大魔王復活
ドラゴンボール3 悟空伝
ドラゴンボールZ・強襲サイヤ人
ドラゴンボールZII 激神フリーザ!!
ドラゴンボールZIII 烈戦人造人間
ドラゴンボールZ外伝 サイヤ人絶滅計画

ドラゴンボールのファミコンゲーム 7本
DBゲーム攻略本
Bootgod

Posts navigation

Older posts
Newer posts

Recent Posts

  • BMP – Rearrange Colormap
  • Reset Allow USB Debugging? Notification
  • 8-bit Notes
  • AT29C256 90PI
  • Super-Toys Last All Summer Long

Archives

Proudly powered by WordPress | Theme: MiniZen by Martin Stehle.